
Finishing work in the arrangement of any room includes several stages. One of the most important is a putty, which helps create the most smooth and smooth surface, as well as close minor flaws of the previous repair or the resulting destruction of the material. The finish spacing of the walls is applied immediately after the starting. It will perfectly prepare your walls for finishing work in the most varying complexity. About how to do it right, you will learn in this article.
Content
Why make the finish putty?
Finishing putty is designed for wall decoration.

This type of work makes it possible to make the surface perfectly smooth and smooth for subsequent decorative processing. In addition, we note some more important nuances of the result of a qualitatively conducted finish putty of walls with their own hands:
- increase adhesion;
- strengthening walls;
- cleaning surfaces, which allows you to use any decorative material for subsequent finishes.

Important! With the subsequent painting of the surface or sticking wallpaper, in no case neglect the fulfillment of the finish putty of the walls, the price of which is significantly lower than the subsequent repair when creating poor-quality decorative finishes due to poorly prepared base.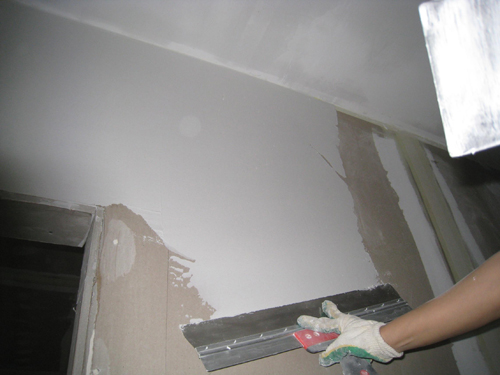


Advantages of finishing spacure
This type of finishing work brings many advantages not only in the form of repair quality, but also in relation to increasing some technical specifications. With the help of the finish putty of the walls - the photo will clearly help understand how to do it right, you can easily achieve a high-class result. 
We note a few advantages of applying finishing putty:
- high-quality masking of the smallest defects and irregularities of the walls;
- white color of a solution that allows you to increase the attractiveness of the surface when using any shade of decorative material;
- at the finish putty, the small size of the fractions, due to which it is possible to achieve a fairly smooth surface;
- ideal for subsequent painting of walls.

Important! Do not ignore the procedure for the finish putty of the walls, the cost of which largely depends on the selected manufacturer of the material, if you perform the trim of plasterboard or foam concrete surface. These materials are sufficiently porous and actively absorb moisture. So that the decorative finish does not fall off over time, determine the wall with a layer of finishing putty.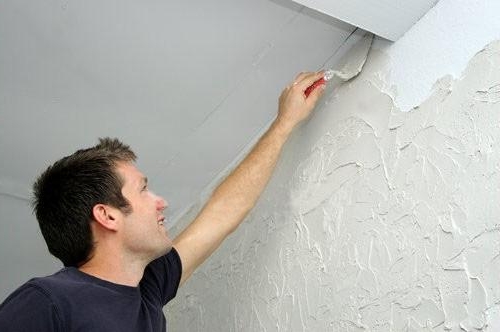


Types of finishing putty
The selection of the mixture is carried out, after reading what kinds of finish putty are.
Important! Please note that the finish putty is a relative name, it is worth talking about it if the size of the fraction of the filler is not more than 0.5 mm. 
There are three types of finishing putty depending on the material taken beyond the basics of the mixture:
- cement;
- plaster;
- polymer.
Important! To properly decide which finish putty fits suitable in your case for obtaining the highest quality result, read the above-mentioned advantages and disadvantages of each type of solution.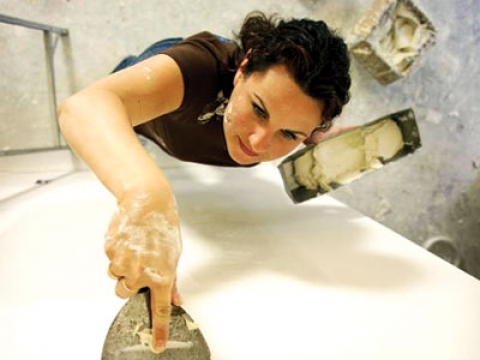

Advantages of cement formulations
- good waterproofing;
- democratic price.


Disadvantages of cement finish putty
- minor shrinkage of the applied mixture;
- the pivag of cracks over time.
Important! Cement finishing putty is relevant for finishing rooms with high humidity, such as bathroom, bathroom, kitchen or building facade.

Advantages of gypsum wipelovka
- the surface is smooth, without shrinkage;
- quickly collapsing;
- the possibility of applying a thick layer.

Lackages based on plaster
- not waterproof;
- short time of the finished mixture.
Important! Gypsum putty give preference in case of room decoration with low humidity - Rooms, corridors and hallways.

Advantages of polymer putty
- a long life of the solution;
- quickly collapsing;
- smoothly to go from the first time;
- it has the ability to apply a layer from 0.2 mm.


Disadvantages of polymeric compositions
- high price.
Important! Despite the high cost of such a solution, it is easy to work with it and pleasant. It is best suited for rooms with a normal level of humidity.

Wall Puttail Tools
To perform finishing finishing putty, you will need a number of tools:
- respirator;
- wide spatula 35-60 cm;
- narrow spatula 10-18 cm;
- putty;
- rectangular tank for putty;
- rag or sponge;
- water pulverizer;
- wide brush;
- high-quality light source, for example, searchlight;
- pumice, grinding bar or sandpaper;
- drill or screwdriver with a nozzle mixer.

Important! So that all the tools needed for putty work are at hand, fold them into one big tray. When performing work at a height, it is convenient to put on a stepladder or a table for repair. This approach will save time and strength on constant distraction from work to go down to the instrument.


Also for working with corners and discovery you will need:
- rule or leveling ruler;
- corner spatula.

Important! Before starting work, install the light source so that you can be clearly visible all irregularities and chips on the surface. Without enough lighting, the quality of work will be distant even from low standards.

Preparation of solution
The finish putty is on sale in several options:
- finished solution;
- dry mix.
Important! If you decide to buy a solution in the form of a finished mixture in banks, keep in mind that it is 20% higher than that of dry material. If your budget allows, such an approach is more beneficial in terms of time and strength costs.

Technology preparation of finishing putty
For the purpose of saving, give preference to self-preparation of the solution:
- Pour cold water into a plastic bucket.
- Pour the required amount of dry mixture, observing the proportion.
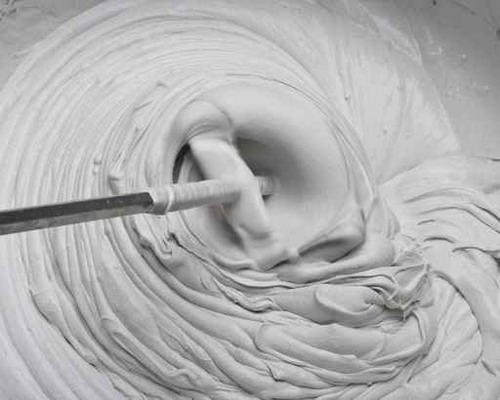
- Mix manually or a mixer to homogeneous mass without lumps.
- Re-stir the solution after 5 minutes.
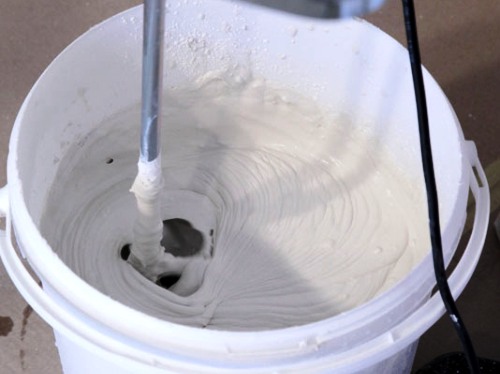
Important! For the preparation of the solution, do not use the metal tank. When mixing with a mixer, it is possible to damage the surface, it can enjoy and rust particles will fall into the solution.

How to check the availability of the mixture?
The putty includes many different components, and the speed of their dissolution in water is different, so mix the solution more than once. 
Putty is considered ready if:
- its consistency turned out to be thick as sour cream;
- on the surface of the mixer remains a trail.

Important! If you have to apply a thinner layer of putty - to spread a solution with water so that it becomes fat. Conversely, add a bit of dry part, if you need a layer thicker. Manufacturers are not recommended to do this, but practice shows that it does not affect the quality of the mixture.

Finishing Shoulder Application Technology
In order for the work performed, pleased with the qualitative result obtained, while performing the finish putty, follow the following recommendations:
- Spray with water with water and wipe the sponge.
Important! Such a watcher solves several tasks at the same time:- removes dust and dirt;
- improves adhesion;
- slows down the decay of the solution.

If you work with a thin layer of putty, this action is not only desirable, but is a mandatory requirement, otherwise the layer will not be smooth and smooth. The putty will quickly grab on a dry surface, so it will not work in high quality.
- Drive the wall with 10% aqueous plow glue solution.

Important! Many manufacturers of mixtures for putty are recommended to grind the surface of the wall with their special solutions. Which option to give preference - determine yourself, based on your financial capabilities. Both options will give the necessary quality result. - Tap a slight spatula from the tray a little putty.

Important! Make sure that the putty is held on the spitel in any position, it means that its consistency in the desired form. - Put the wall in the vertical direction, performing the movement of the cross-cross.

- Cover the selected wall zone.
- With a wide spatula with a slight pressure and under the minimum angle, stretch the putty on the surface.

Important! Ensure that the thickness of the putty layer does not exceed 1-1.5 mm, otherwise the putty will crack and cauded soon. - Wipe a wide spatula with a damp cloth.
Important! The spatula must be perfectly clean, without the slightest residues of the solution before each subsequent application. - Continue work until you cover the whole wall with a solution.

Important! In places where the corners of the spatula passed, strips will remain, do not attempt to re-move them. After hardening the solution, simply read them using sandpaper or abrasive grid.
- Hold the technical break until the solution snacks.
Important! The solution should dry out, that is, to grab, and not dry completely. - Circular movements remove the irregularities using sandpaper.

Important! Emery paper should be special abrasiveness - very small grain. The optimal option will be the numbers within 220-240. - Start your subsequent finishing work.


Video
It will help more clearly understand the entire upcoming volume of work and the sequence of performing the finish putty of the walls of the video walls - read it carefully in the preparation process.
Conclusion
After completion of the finish putty, the walls will become perfectly smooth and ready for decoration. Follow the proposed instructions and sequences of actions, and this part of the repairs in your home will be as efficiently as possible and quickly. Having perfect walls, you can embody the most unusual design interior solutions to life.


