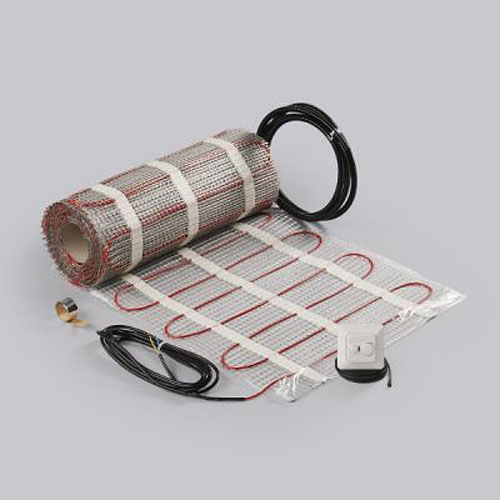
underfloor system is considered an effective method of heating surrounding space, such a surface gives a sense of comfort. There are several ways arrangement in which various materials are used. The simplest system is considered to be using the heating mats when the cable is pre-attached to the substrate.
It only remains to calculate the need for material and to determine the necessary power. Buy heating mats can be in DIY stores, they are sold in rolls. Their standard width is 0.5 m, length 25 m.
system device
Warm floors are composed of three elements:
- heating surface. Matt looks flexible grid to which is attached the cable. Before acquisition costs in advance to schedule a future situation, because it is not used in the arrangement of furniture and parts of other items. According to the safety requirements, the edge of the heating cable must be located no closer than 25-30 cm from the elements of the situation. Already knowing the coated area, in-store consultants are selected mat required capacity and length;
- a temperature sensor, whose task consists in fixing temperature parameters and transferring them to the control system;
- the thermostat that controls the entire system. Thanks to the operation of the thermostat, compliance with various modes is possible, there is a concept as hourly, daily and variable control. All manipulations are carried out directly from the central control panel. There are various models of thermostators, expensive representatives allow you to save up to 60% of energy thanks to the correctly displayed mode.
A feature of a system consisting of mats is the location of the temperature sensor, which is stacked under cables. Therefore, the adjustment of the extra gutter in the wall and the floor is required.
Preparation of the basis
Ideally, the floor surface should be as smooth as possible, so it is desirable to pre-make a new screed. However, in practice it is not always rational, for example, the heating mats can well be placed on the old tile. In the case of a small amount of irregularities, they are corrected by mixtures.
Taking into account the temperature extensions around the perimeter of the room, in places of fitting the heating elements, damping bands are fixed. It is necessary to make the markup of the shield under the sensor wire, the opening will go through the wall and the floor. A cable will be laid on the interface, then climb the control unit. It is a plastic box in which switches and sockets are installed. It should be borne in mind that the entire system is connected to the electrical tailor, so you have to ensure the approach and to it. The depth of the pulp should be about 3 cm, and the radius is at least 5 cm. Such dimensions are necessary for the free movement of the sensor when problems occur. In order to make the shrobe, the Bulgarian and the perforator will need, with this tool, the entire process will not take much time. After the strokes, the installation of conversion is carried out, it is fixed with alabastra - the power supply wires are already supplied to it.
Mounting work
The arrangement of a warm floor consists of three stages:
- distribution of mats;
- laying wires of the system and installation of the sensor;
- mounting thermostat and system connection.
Preceded the process of installing heating mats. Pre-cleansing of the surface and its priming. This is necessary for the quality attachment of the mat, because it has an adhesive basis. Next begin to exhaust the heating surface on the floor. Because of the small width of the roll, you will have to roll out the mat first from one side to the other, then cut the grid and stretch the roll in the opposite direction. Important moment: it is impossible to touch the wire, it should remain as much. Between individual strips you need to withstand a distance of about 5 cm.
On the prepared stroke, the cable is paved to the location of the thermostat. It is important to withstand their parallel passage, the wires in no way should be superimposed on each other. After moving the ends of the cable into the thermostat box, you need to fix all the alabaster.
Completes the laying of heating mats by connecting the thermostat, which is performed according to the instructions. In it, the manufacturer indicates a scheme where all components have their own location. In addition, almost all devices depicted terminals with graphic symbols, it can also be understood in the intake subtleties. For high-quality operation of the system, it is important to ensure a reliable connection of wires, which is achieved by soldering.
Even before all the work, it is important to test the operation of the acquired system, at the heating mats for the floor, the resistance is considered to be the resistance. After its measurement, the indicator is compared with the passport data. At the end of the installation process, the system is launched into operation, only then you can think about the finish coating.
Tips of professionals
- To reliably fasten the heating mats of the warm floor, experts are recommended to additionally use a glue thermopystole. After all, the self-adhesive base does not always provide the necessary adhesion strength.
- There are two-housing and unwitting mats, as a rule, try to use the first option. This is explained by the need to install one cold cable, and in the second case, it will have to pull the wire in the opposite direction from the end of the heating wire. At the same time, single-core systems are distinguished by great radiation, therefore are not intended for residential premises.
- During operation, problems may occur, the malfunction will help the detailed laying of the mat with the location of the sensor, the coupling and cable. Therefore, it is worth keeping the embodied scheme, then it will be easier to find the desired area of \u200b\u200bthe system.


