Almost every repairs in an apartment or house includes a replacement or restoration of interroom doors. At the same time, all owners certainly concerns the issue of reducing cost estimates. It is worth saying that it is almost impossible to save on the purchase of high-quality materials. But if you perform work on dismantling and installing doors, without attracting additional help of specialists, you can significantly reduce your financial costs for repairs. Next, consider how to install the interior door with your own hands with a good one.
Content
The main stages of the installation of interroom doors
The technology of installation of interroom doors with bad peers consists of the following main stages:
- Dismantling the old door. Remove the old door should be carefully so as not to damage the integrity of the doorway. All defects and potholes formed during the dismantling of the box should be aligned using starting and finishing building mixtures.
- Next, you should collect a new door frame. Usually, on the ends of each element of the box, there is a connecting element that provides a reliable clutch using the "Schip" technology - "groove". All parts of the collected box should form the letter "P". They are bonded between themselves with plastic elements or nails. The door package should still include an additional bar for temporary fixation of the box. It is placed at the bottom of the door.
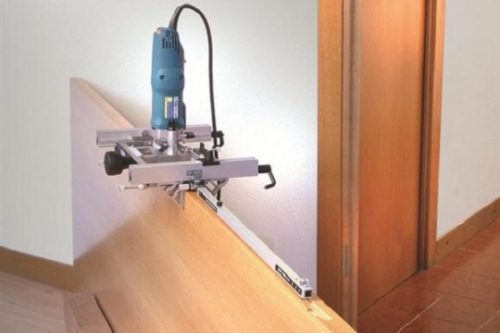
- To perform mounting works, we will need the following tools - drill, screwdriver, spindle (milling) head. The parameters of the doorway in the room should be measured (length and width). According to the measurements made, cutting off the part of the door frame with a saw. From the bottom the box is fixed by the bar in order for it does not lose its shape.
- Next, fasten the box on the screws in the opening. Screw in this case will serve as a temporary fastening until the door is fully assembled.
- In the doorway, holes under the loop, handles and castle are made.
- At the last stage, the door canvas is installed. The correctness of the work is controlled by the construction level. The resulting gaps are bleed by mounting foam.
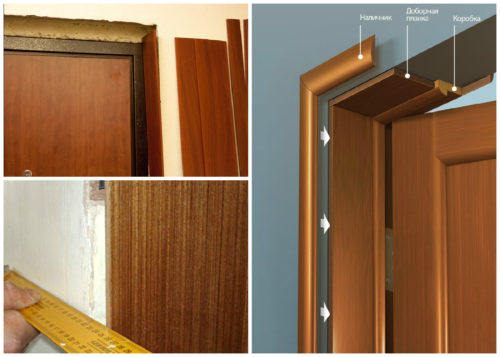
Sometimes too large slots are formed in non-standard doorways. They can be eliminated by means of good boards. Next, we will consider in more detail the varieties of this building element and how dashing to interior doors are put.
What are the dodgers of interroom doors?
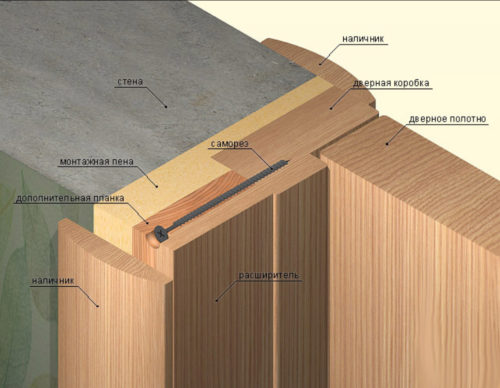
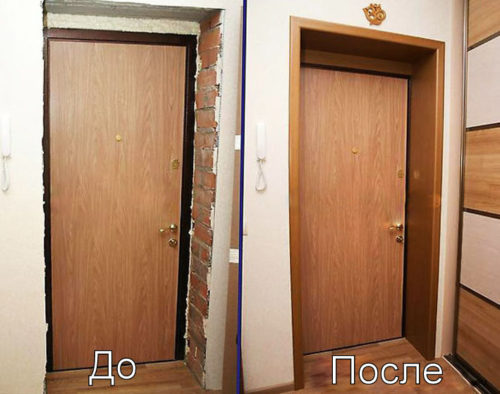
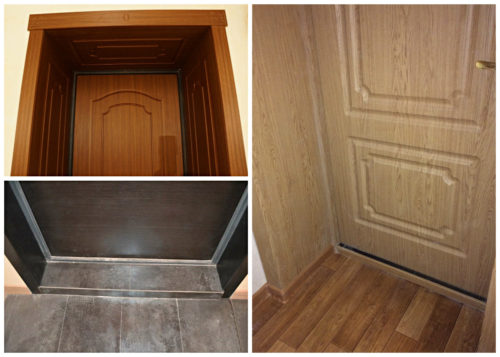
Double boards are designed to close the bare or cracks in the doorway. Most often, this building element is made from the MDF Board. Today there are dobors of various configurations and color gamuts. Thanks to this, this element can be selected under the doors of any design. And if earlier the difference between the thickness of the wall in the room and the dimensions of the door frame could be aligned only by applying a large number of building mixtures, now with this problem you can easily cope with the installation of a good door to do it yourself. When installing a challenge, instead of using putty solutions, it is possible to significantly reduce the cost of performing repair work.
Installation of good facilities for interior doors with their own hands has many advantages:
- Cash savings for the purchase of expensive building mixtures.
- Door block with bad peers has a neat appearance. Dobly boards are firmly adjacent to the surface, due to which a beautiful one-piece unit is formed.
- The door with goodness becomes more dense, its service life increases.
- On the door with good it is easier to set the slopes.
Dobors can be used in the finished form and make them independently from MDF. At the same time, interior doors are manufactured at the modern building market, in which the grooves are initially provided for the installation of a good, as well as the design without a groove.
Types of kind for interroom doors
Before installing good, you should deal with what kind of types there are:
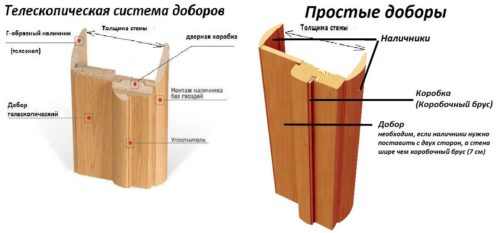
- Ordinary good. They have a standard shape and length, but the width of such products may vary from 10 to 20 cm. In addition, ordinary dobors may vary in color and design.
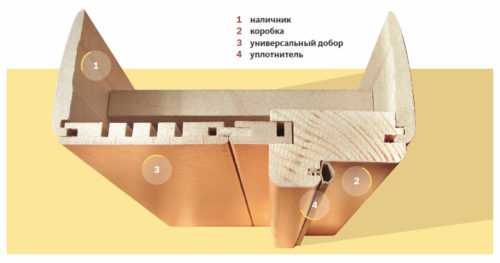
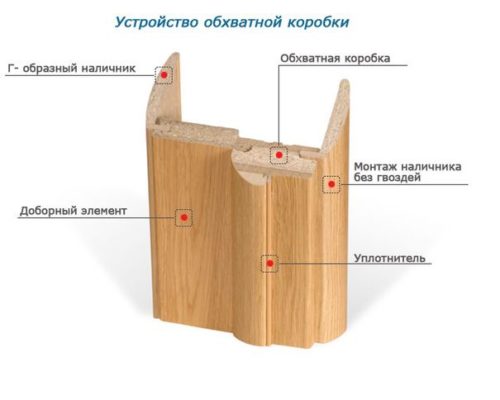
- Telescopic good (universal). It can cover the boom in the doorway of any thickness. Such good boards have a structure similar to the design of the railway railway. They are connected to the surface of the box using the "Schip" technology - "groove".
- Combined Dobra. Such boards fulfill the role of both kind and platband.
How to put goodness to the interroom door
Highlights of installing goodness to the interroom door
Installing the door of the door is allowed both before installing the door canvase and after that. It does not affect the quality of this work. The installation of good slats is carried out on the reverse side of the door opening, that is, opposite the loops. If you do this on the contrary, except for not quite a beautiful appearance will significantly reduce the angle of opening the web. In addition, the loop when moving will touch the chains.
Dogs are installed in several ways:
- Installation to a box with a groove.
- Installation to the box without a groove.
- Installation to the intermediate bruus.
Installing Sobor to the Box of the Interior Door with a groove
Boxes with grooves are manufactured by a specially manufactured manufacturer. Make the right and accurate groove at home will be problematic. True, in this case, you should make sure that there are a necessary groove on the purchased volunteers.
To run the installation of the problem, you will need:
- Roulette, ruler, level, pencil, square.
- Fantasy and ordinary saw, electrolybiz.
- Edge ribbon, greasy tape, mounting foam.
Procedure for installation:
- After installing the door frame, measurements are measured from its end to the end of the doorway. It is necessary to do this at least 4 points in order to most accurately cut off the extension width of the good.
- Further on the involving side of the Dobly Plank with the help of the coolee, points are noted according to the results of measurements. All of them with the help of the rule are connected direct line. Side is cut without a groove. It is very important. You can cut the line with an electroll bitch or a permeaker saw. It is necessary to do it carefully so that there is no marbles. If such appeared, you can correct them with the help of the edge tape.
- Conventional saws Dobly elements are cut down at a certain length. After that, the bar is installed in place. Fastening of good tops begin. Only when the top plank is attached, you can install lateral. Be sure to believe that there is a straight corner between the side values \u200b\u200band the upper bar.
- For good items stood straight and "not played", they are fixed with the help of a painting tape or crushed into small wedges.
- Next, with the help of the level, the position of all slats is checked, and if necessary, it is adjusted.
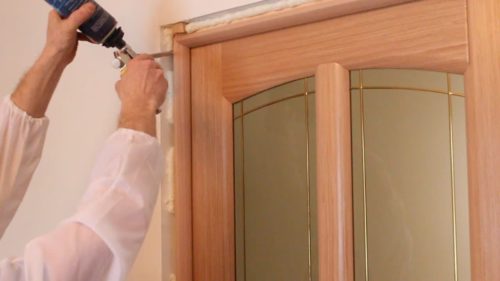
- The next step is the gap between the dogs and the doorway is filled with the mounting foam. Foam during drying increases in volume, so there is a better spacer between the side baders. After the foam is driving, its surplus is neatly cut into a knife. The last step towards probes are attached.
Installation of a bad product to a box of interior door without a groove
Unfortunately, not all door boxes have special end grooves for installing challenges. In this case, the mount is performed using nails and glue. To carry out this operation, you will need:
- Fantasy and ordinary saw, electrolybiz, hammer.
- Roulette, ruler, level, pencil, square.
- Edge tape, greasy tape, mounting foam, copper nails.
In this case, the work is performed in the following order:
- First of all, it is necessary to determine the width of the volunteers. To do this, with the help of a roulette or a square, the distance from the end of the door frame to the doorway angle is measured. After that, there is a markup on the challenges with a pencil, rules and squares. Excess width is cut off with an electrolybiz.
- Then, with the help of a drill and a thin drill (1 mm diameter), holes are made in the end of the problem that will be attached to the door frame. Holes are drilled in increasing no more than 200 mm. Copper nails are inserted into them for fastening platbands. You can drive the nails to the end and without the drilling holes. However, in this case, there is a possibility that the plank can split. As soon as the nails are clogged into the bar, it is necessary to cut off with nippers with their hats. It is necessary to do this at an angle to leave a sharp end.
- Next, the Doblyar Planca nails leans towards the door frame and neatly nailed to it. It is impossible to beat the hammer in a hammer. In this case, removal can be formed on the end. It is necessary to use a wooden copper. Some experts recommend to apply carpentry glue on the surface. In this case, the connection will be stronger.
- After completing the installation of sketches, the slot is fought. As soon as the foam is dry, it is cut off with a knife and installed platbands.
Installation of nonsense to the intermediate bruus
This method is the easiest and requires less time and strength. Its essence lies in the fact that in the unclosed door frame part of the opening the bar (board) is installed. In order to secure a good to the intermediate veneer, the following materials and tools are needed:
- Fantasy and ordinary saw, electrolybiz, hammer, perforator (drill).
- Roulette, ruler, level, pencil, square.
- Edge ribbon, greasy tape, dowel, wood screws, furniture plugs.
Procedure for work:
- After the box is installed, a board is installed on the unclosed part of the opening around the perimeter. Its thickness must match the gap between the box and the doorway. The board before installing must be overtaken and covered with oil.
- The mounting of the bar to the walls of the doorway is performed using a dowel. To do this, the through hole of the corresponding diameter is drilled, a dowel is installed through it into the wall, which is clogged with a nail. The bars are installed throughout the perimeter.
- After that, the good is unscrewed by the required size. Installing the good faults to Brusa is very simple. A hole equal to the diameter of the self-pressing is drilled in good. The hole of the hole must be no more than 600 mm. After that, they are syncing with a drill with a diameter with a diameter of the screw of the self-press. This is done in order for the tapping screw to be recessed inside a challenge.
- Then the good applied to the intermediate bruus and is attached to the self-tapping screw. Holes in good fit are closed with decorative furniture plugs. So that the latter did not fall inside the hole you can apply some glue or sealant. The advantage of this method is that foam consumption will be much lower than with other installation methods.

