Often, in the process of repair, walls or ceiling is carried out using plasterboard sheets. It is one of the most popular materials for finishing. From it you can make the surface of any form, while painting it into one or more colors. Also, plasterboard designs are easily mounted and quite strong enough. Since this material is a layer of plaster located between two sheets of paper, it is easy to cut with the help of a stationery knife, which allows you to create various forms.
Content
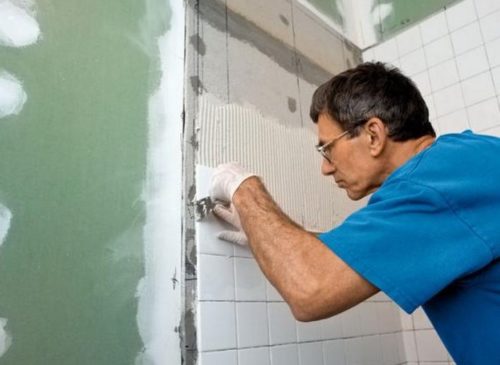
Considering the popularity and demand of this material, the question is increasingly raised, whether the installation of ceramic tile is possible on its basis. The answer is positive. Laying ceramic tiles on plasterboard is not a difficult task that can be under power to any master, even to someone who has no experience in doing such work. Next, we will describe how the installation of tiles on plasterboard is carried out, we will present a phased instruction manual for these works.
We put the tile on plasterboard. Selection of material
Before performing installation work, the material should be properly picking up. For this there are several types of plasterboard sheets:
- GKL, GVL - the most budget version of plasterboard sheets. Such material is suitable for facing walls of rooms, hallway. This type of material is not moisture-resistant, therefore it is not suitable for decoration of rooms with elevated moisture level.
- G CLEV and GVLV - such marking are plasterboard sheets resistant to change in humidity level. They are processed by a special impregnation, thanks to which they can be used for lining of bathrooms and kitchen premises.
- Glevo - the material is so labeled, which is resistant to the effects of elevated temperature.
- Glv EP - such plasterboard is distinguished by high quality and combines all positive performance. The material of this brand has a fairly high price.
If you are planning to carry out the walls of the walls with ceramic tiles, then the water-resistant plasterboard brand G CLEB and GVLV is recommended as the basis.
Preparation of the surface of plasterboard under the tile
Frame for plasterboard under the tile
Consider how to properly prepare the working surface for a further blowing tile. Initially, the wall is removed the entire previous facing material. If before this wall was finished with an old tile, then the question should be wondering how to dismantle tiles from drywall. In any case, the dismantling of the previous cladding material must be taken carefully so as not to damage the working surface.
Next, it should be determined what way to secure the sheets of plasterboard on the wall. There are 2 options:
- Dome of a tree.
- Dome of metal products.
It is worth remembering that the tile has a sufficiently large weight, therefore the basis for which it stacked should be securely fixed. In this case, it is best to mount a crate of metal products. This material is strong enough to withstand the weight of the plasterboard sheet, and is also easily processed, which allows the surface of various designs and shapes. Moreover, the installation process is quite simple and will not require special skills and skills.
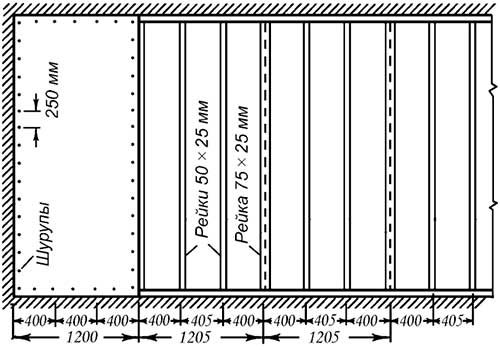
If you still prefer to install a wooden frame, then we note that the wood should be predetermined by protective compositions that increase the resistance to moisture and ignition. The frame barcas should be fixed at a distance of 40-cm from each other to ensure reliable fixation of sheets of plasterboard. Due to this, the glued tile will be well held on the surface.
Securely consolidating sheet carcarter sheets on the frame, the working surface should be placed by polypropylene material. The grid is glued in two ways:
- On the entire surface of the plasterboard sheet. In this case, the working surface does not need to be applied to putty, it can only be covered with primer and then immediately begin to stick the tiles.
- On the joints between sheets of plasterboard. In this case, the plasterboard surface is stretched in the future, and then covered with a layer of primer.
Surface primer
The primer provides an increase in the level of clutch of the tile with a plasterboard surface. For applying a primer mixture use a roller or a wide brush.
When choosing a primer, you should clarify whether the mixture is responsible for the following requirements:
- The ability to dry in a short time.
- The absence of toxic substances in the composition of the mixture.
- Ability to bind dust.
- High-quality adhesion.
- Resistance to temperature regimens and humidity indicators.
- Resistance to the development of mold and harmful fungi.
After applying the primer, she should give time to dry carefully. This will take about 6-10 hours.
Putty jigs
The putty of the joints is necessary in order for the drywall base to acquire the necessary strength to further glove the ceramic tiles. At this stage it is important to choose the proper spike mix. They are a few species:
- Start. It can hide coarse defects of the plasterboard surface.
- Finish. Allows you to make plasterboard sheets as smooth and smooth.
- Special. Designed for sealing seams and cracks.
The basis for putty mixtures can be:
- Gypsum. Apply quite often during repair work. However, they are not suitable for facing the premises in which an increased level of humidity is present.
- Cement. Suitable for premises with high levels of humidity. But the service life of such coatings is not durable, since with time, small cracks can be formed on this coating.
- Polymers. The optimal option for sealing the junctions between plasterboard sheets. However, such mixtures have a high cost.
Installation tiles on plasterboard
Selection of tools and materials
Before performing installation work, you must prepare the following tools and materials:
- Ceramic tile.
- Glue for tile under plasterboard.
- Grout for seams.
- Level to control the correctness of the work.
- Crossings and corners for tiles.
- Slab.
- Mixer for mixing the solution.
- A set of spatulas for applying a solution.
Important! Tile thickness for plasterboard should be minimal. This is necessary in order to reduce the load on the plasterboard surface.
Preparatory stage
At this stage, the preparation of tiles to laying:
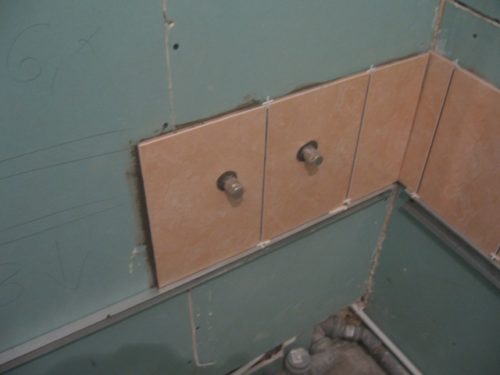
- So, it is necessary to see the appearance of ceramics and postpone the material that has on its surface of the crack and chip. Such a tile will be needed for laying on the edges and corners of the wall (or in those places where it is necessary to glue the sliced \u200b\u200btile).
- Next, the tile is examined for compliance of ornaments. To do this, the material is folded on a flat surface where it is noticeable, as properly to lay out the drawing.
- The available amount of tiles should be calculated, and it is necessary to arrange it so that the cropped pieces of the material are located at the bottom of the wall.
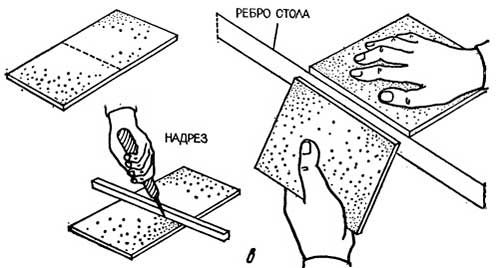
- Next, cutting tiles according to previously made calculations are performed. Make sure that the edges and corners of the material are symmetrical.
Scheme laying tiles on plasterboard
The order of laying tiles on plasterboard is as follows:
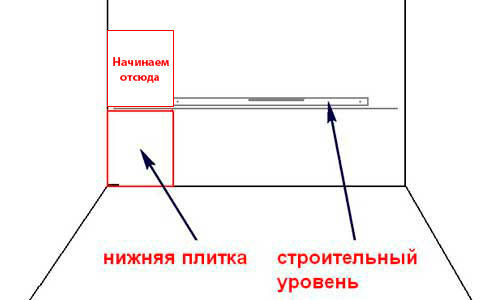
- You should draw markup on the working surface. At the same time, a level line is drawn with a level (at the level of the second row of tiles). This mark will be starting with further cutting of ceramics on plasterboard.
- At the level of the applied mark, a metal profile is installed. It fixes the glued tile in the desired position, because it can "slide" down the fresh glue.
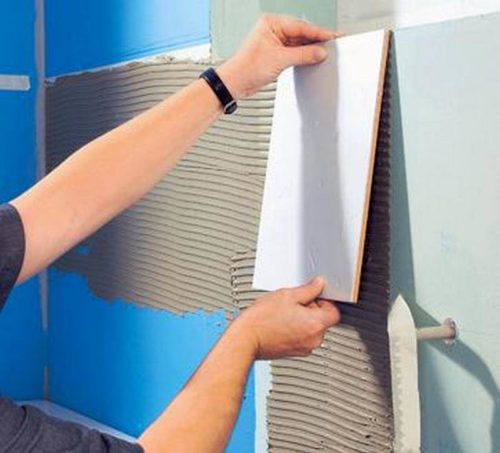
- Next prepare glue for tiles. The contents of the package are stirred from 1/3 of the part of the water bucket and then mixed well with a construction mixer. In order to properly prepare the adhesive solution, you should carefully read the instruction attached to the dry mixture. It is important that the grade glue by consistency reminds the sour cream. A spatula is used to apply adhesive composition. For reliability, the solution is applied to the wall, and to the surface of the tile.
- Stacking tiles from the previously made mark on the wall. Despite the fact that the surface of sheet cabarton sheets is quite smooth, it is still necessary to control the correctness of the laying using a construction level.
- To properly and smoothly glue the tile, it is necessary to refer to the indentation of one piece of material from the other. For this use plastic crosses. They are located between the tiles. Most often, crosses are used, the thickness of which does not exceed 3 mm. Then the seams are small, so that the surface in the finished form will have a beautiful appearance.
- As mentioned above, the rows of tiles should be positioned so that the cropped parts of the material are located at the bottom of the wall. For cutting material it is best to use home stoves. But if you do not have the opportunity to purchase or rent this tool, you can use the usual glass cutter. If you need to trim the figure of the figure shape, use the grinder. It is necessary to adjust the cut line.
Shutdown of seams
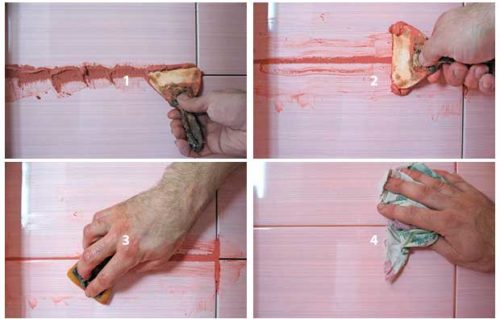
Next, consider how to rub the stitches on the tile, because the appearance of the finished surface is dependent:
- We stir the mixture for grouting in a separate container. In the finished form, it must have a gravel consistency. In order to break the lumps of lumps when stirring the mixture, you can use a screwdriver or a drill. Do not stir at once a large number of rubbing, because it is capable of thickly thick. It is best to stir her portions of 350-400 gr.
- A small rubber spatula is used to apply the mixture. Grouting with neat smears is applied to the joints between the tiles, then pressed and "pressed" into the plasterboard base.
- Next, the spatula is removed excessive solutions. After that, the grout is given time so that it thickens and "grab". Usually it is enough for 10 minutes.
- Owing construction textile gloves, light movements walk through the fingers on the nesting rubbing. This is necessary in order to deepen it a little. The seam level should be slightly lower than the level of the tile itself.
- Wipe the tile with a dry cloth. Remove the residues of the solution.


