Plinth is an integral part of the interior of any room. First, it allows you to disguise unsightly joints and gaps between the fine flooring and the wall. Secondly, under the plinth you can hide the wires, thereby freeing the floor and protecting them from the encroachment of children and animals. Thirdly, with the help of beautiful plinths of natural wood, you can emphasize the features of the interior, play in contrasts and give a "highlight" room. In general, solid advantages. Correctly choose the plinth is very important, but even more importantly, it is easy to install it. In this article we will tell how to mount a wooden plinth to the floor.
Content
Choosing a plinth
Most people do not think about the appointment of plinths until they are confronted with the need to replace them or installation. When choosing a product should be repelled from two factors: appearance and practicality.
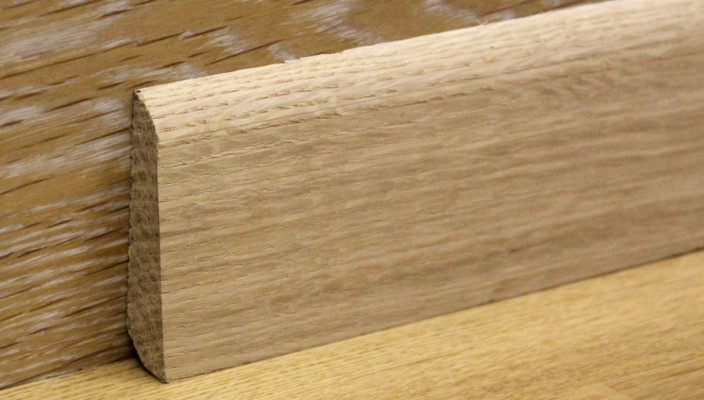
In the first case, the plinth must fully correspond to the interior of the room. Since its installation should be engaged after ready walls, gender and ceiling, choose the product of the appropriate color and the texture will not be difficult. The main advantage of a wooden plinth consists of its natural and natural appearance. If there is a wooden parquet or laminate on the floor, you can choose to "framing" to the tone. So you can visually make the room slightly spacious. If you want to focus on the beautiful floor covering and wall decoration, pick up the plinth of a contrasting shade.

The width and height of the plinth can also affect the perception of the interior, but it is mainly intersecting with the functional load. So, if you want to set a wide strip, that is, it makes sense to pay attention to the plinths with cable channels. They can hide a lot of wires and communications in them so that they are not confused under their feet. Narrow plinths are also capable of closing the wires, but too much will fit in them. Therefore, consider the purpose of the room - if it is a bedroom with a minimum number of equipment, you can buy a narrow plinth, and if the cabinet with a multitude of devices, it is better to choose a wide one. On the market you can find high wooden plinth for the floor, which look very original, but carry a purely decorative load.

The product size depends on how much useful fields of the floor will remain at your disposal. Having installed a wide wooden plinth, you will not be able to make the furniture close to the walls, so you have to leave the gaps. This, perhaps, is the only drawback of such plinths.
IMPORTANT: Since wooden fighters for the floor are very tough and are not able to fake, both plastic, before installing them it is necessary to check the evenness of the walls. Unfortunately, not every owners of apartments can boast of perfectly smooth walls, so it often has to be corrected by putty or plasterboard plates.
Calculation of plinth
Before going to the construction store behind the plinth, it is necessary to determine its number in meters. To do this, measure the entire room around the perimeter in the joints of the walls and the floor without taking into account door openings. Since the plinth is sold not in the sweat, but a fixed length with products, it is necessary to find out the length of the appropriate model in advance. Divide the resulting perimeter without doorways for the length of the selected product and get the number of plinths needed for this room. With any construction or repair, buy materials with a small margin, so round the resulting result is in the biggest.

When calculating, all sorts of adapters and docking parts should also be taken into account. So, a special decorative strap is attached to the angle of a wooden plinth, curved at an angle of 90 ° so that the surface looks more aesthetically.
Depending on the length of the product, calculate the number of connecting elements for them. For example, if there is a long wall in 6 m in the room, and the plinth has a length of 2 m, then two intermediate parts will be required for connecting planks and two angular. Calculate the number of internal and external corners.
We offer to make the calculation of the necessary plinth length on the example of a room with a common perimeter (taking into account niches and protrusions), equal to 23 m. In the store we picked up the product with a length of 2.5 m.
23 / 2.5 \u003d 9.2 m
We round the result obtained in the most side and we get 10 m plinth.
After you bring shopping home, you should not immediately start the installation. Wood is a special and rather whimsical material. Unpack the plinth and give them to lie down in the room where the repair passes, at least a day. After such acclimatization, you can be sure that the tree is not deformed after installation.
When the plinth "will come to yourself", they must be cut in accordance with the length of the room walls. How to do it correctly, look in the video below:
Installation of wooden plinth
When you prepared all the tools, fasten and saw the rails on the segments of the desired length, you can start the installation of a wooden plinth. Do not rush to immediately fasten it to the wall - so that everything happens exactly and beautifully, you need to make marking.
Where to attach - to the floor or wall?
Since the outdoor plinth is adjacent to the adjacent wall, many are born a completely reasonable question: "What kind of surface need to be attached?". Naturally, preference should be given to a lighter and rapid way and repel from specific conditions. The main rule of the surface selection for fastening is to install the plinth there, much easier and fastest fasteners.

For example, if we are talking about a house from a bar, whose floor covers a concrete screed, then the plinth is easier to attach to the wall. Conversely - if you work in an apartment with reinforced concrete or brick walls and a floor, eliminated wooden parquet, it is better to adjust the plinth to the floor. But in this simple rule there are exceptions. So, if the wall is made of a durable hard-riveted material, but the floor covering is worth a lot of money, it is wiserfully to spend a little more time and strength to insert fasteners into the wall than to spoil the dear floor.
To install wooden plinths on a concrete tie or surface of foam concrete, you need to make a hole with a perforator where to drive plastic dowels. The distance between the attachments depends on the geometric characteristics of the plinth and the type of base. Usually, dowels are inserted in a step of 30 to 40 cm.

Important: If you had to level the wall curves with plasterboard plates, plywood, chipboard, plaster, if they are decorated with flexible decorative stone or other soft material, the plinth is better attached to the floor. Otherwise, it will be fragile and fall off at a random strike.
If you still do not want to spoil the costly flooring, in the walls are made of chipboard or drywall, purchase special screws for these materials or galvanized finish nails.
Installation instructions
As we have already said earlier, you must first make markup. Start marking a simple pencil with the corner of the longest wall in the room. Put on the rail corner and attach it to the corner of the room. Mark the fixation point of the first fastener of approximately 5-6 cm from the corner. If you are confident in the perfect flatness of the walls and the floor, then to make the following marks, just arise the roulette and put the points every 35-40 cm. If there are gaps, the fasteners step is better reduced.

How to mount a wooden plinth to the floor:
- When you put the labels throughout the perimeter of the room, attach to the wall of the plinth segment, which should be located on this site and drill the hole perforator, slightly smaller than the dubel diameter. So you can make identical openings and attach the plinth without offset.
- Remove dust from the holes in the wall with the help of a vacuum cleaner and score dowels.
- Attach the plinth to the wall and screw the fasteners into the dowels.
- The locations of the attachments can be closed with decorative plugs selected in tone to the color of the plinth or shut from the wood plaster.
- If you did a wooden plinth with your own hands, and did not buy a finished product, do not quarrel and do not paint it before installation. After fixing, lick the places of fasteners with putty, stick the surface so that it is as homogeneous as possible and only after that make the finishing product processing.
Useful advice: To simulate valuable wood varieties, use the veil - the more layers you will apply, the darker and most saturated the surface. Each subsequent layer apply only after complete drying of the previous one. Then you can cover the plinth varnish. Since we are talking about the interior decoration with a normal level of humidity, use the usual furniture varnish or nitro varnish. The latter has a rather sharp toxic smell, but dries in just 2-3 hours.
There are other methods for fastening outdoor plinths, but they are not so reliable as the one that is described above. For example, the easiest, easy and fast option is to just glue the rails to the wall. However, this method is very impractical, because in the case of repairing the plinth, you will have to handitton quite rudely, and they will probably break. By the way, in many houses of the Soviet buildings, they were attached to adhesive compositions, reinforcing everything for reliability long nails. This repair "on the century" is unlikely to enjoy modern owners, but in some cases, the adhesive way will help save time and money. For example, if you are preparing an apartment for renting, or wall coverage and sex so strong that their replacement can be postponed for the next 10-15 years.
You will need "liquid nails" and a special construction gun.

Progress:
- Stay styling from the corner, as in the previous case, making a spice of the extreme part of the plinth at an angle of 45 ° for a more beautiful docking.
- On the back of the panel, put "liquid nails" and press the wall with the effort.
- Press the plinth of the cargo (here you can improvise in your pleasure) and leave 30-40 minutes to reliable fixation.
- At the same scenario, attach the rest of the fragments.
And the last method of attaching wooden plinths involves the use of special parquet studs. The caps of these products are very small, and if you drive them directly into the surface of the floor plinth, it is almost impossible to distinguish the places of fasteners from the height of the middle human growth. And if you further draw the surface of the primer on the tree of the appropriate color, the texture will be perfectly smooth. To drown studs in a wooden plinth, use a thin dober.

And what if there are rounded columns in the room? It is not aesthetic to leave them without plinths, but to cut down and cut the many short segments to make the semblance of a circle very troublesome and impractical. Especially for such cases flexible wooden plinths were invented. They are sold in hermetic packaging to maintain the desired level of humidity and elasticity.

To get them from there before installation, to quickly attach to the right place and give the desired radius before they solidify and take the final form. Install such plinths in the same way as the usual.
Wooden plinth: photo
As always, according to tradition at the end of the article, we suggest you look at a small selection of photos. Here you will see various types of wooden floor plinths that fit perfectly and complement the interior.


