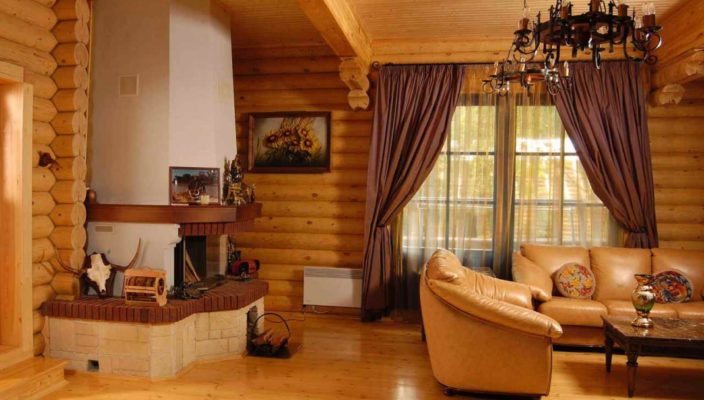
Often in the process of repair are wondering what kind of ceiling coatings choose for the room. One of the best options for many years remain wooden ceilings - this is a classic, tested and endowed with time. Many owners of apartments and houses prefer such ceiling coatings for their aesthetic beauty, environmental friendliness, availability. After all, as you know, in many regions of our country, wood is quite simple. Moreover, the tree is a fatty material, so you can create beautiful and original designs from it. Next, we will talk about the peculiarities of wooden ceilings, as well as how to mount the ceiling coatings of wood with their own hands.
Content
Advantages of wooden ceilings

Wooden ceiling structures have many advantages:
- Long service life. If you properly care for wood, to process it with appropriate protective compositions, comply with some rules of operation, it can serve for quite a long time.
- The tree refers to natural and environmentally friendly materials, so the installation of wooden lining on the ceiling is possible even in rooms where there are small children. In addition, modern impregnations intended for wooden ceilings do not contain harmful substances.
- As you know, wood is a good heat and soundproofer.
- The sphere of use of the ceilings from the tree is quite extensive, they can be mounted both in apartments and houses and in office space.
- Designs made of wood have a very beautiful and noble view. Such ceilings perfectly fit into any room design, such as classic, art deco, ampir, modern, etc.
- Mount the ceilings from the tree is not difficult, just adhere to the basic rules and recommendations.
- In wooden ceilings, any lighting devices can be easily elevated.
Disadvantages of wooden ceilings

Among numerous advantages, wooden ceilings have some drawbacks:
- If the wood does not treat the wood with special protective compositions, then its structure can be destroyed as a result of the action of various parasites - fungi, bug-and-tree bugs, etc.
- As you know, wood has good flammability and easily flashes. Therefore, wooden ceilings can be attributed to fire-hazardous designs. In order to reduce the tendency of wood to fire, it is treated with special flame retardant mixtures.
- The ceilings made of natural wood array have a very high cost, so they can afford not every homeowner.
Wooden ceilings for home

By type of installation distinguish the following wooden ceiling structures:
- Brew ceilings. In this case, the coating of the tree is attached ("fastened") directly to the beams of overlapping or wooden bars attached to the dowels to concrete overlap. It is stitched in this way the ceiling of the clap, rails and plywood.

- Dropped ceilings. The most common type of structures. It consists of a frame (crates) and attached to it on the suspension of a wooden binder. Such designs are not recommended to be mounted in small rooms, as they "take" about 30 cm ceiling height in the room. However, the suspended ceilings have many advantages, thanks to which homeowners most often resort to their installation. For example, in the carcass niche, you can successfully hide all communications. In addition, the suspension design allows you to hide even the largest defects and potholes of the ceiling surface.
- Cable ceilings. Such structures consist of cells (caissons), which are fixed on the beams of overlapping. This is a rather old way to finish the ceiling, which in modern times most often applies only to decorative purposes.

Depending on the materials used, wooden ceilings are classified into the following types:
- Constructions from plywood. Such ceilings are lined with moisture-resistant plywood sheets. They are tightly bonded between themselves, due to which the homogeneous and solid ceiling canvas are obtained. In the future, plywood needs finishing. To do this, it is toned, lacked, covered with protective compositions.
- Panels from veneer. This version of the ceiling cladding belongs to the "budget". In this case, the framework is trimmed with veneered MDF and chipboard sheets.
- Ceiling beams. When creating such a design, natural wood beams are attached to overlapping slabs, and then covered with protective compositions and decorated.

- Ceiling of lining. The lining is made of wood of various breeds. Depending on the value and quality of the wood massif, the price of the finished lining is changed. The ceilings lined in this way have a beautiful view and have good heat and noise insulating properties.
- Ceilings made of wooden plates. Thus, you can create a stylish and embossed design. Wooden rails belong to the most popular options for finishing the ceiling.
Next, consider how to independently install a wooden ceiling in your home or apartment.
Wooden ceilings do it yourself
Materials and Tools for Mounting Wooden Ceiling

Installation of a wooden ceiling in its technology is similar to the installation of a ceiling of plastic panels. With its structure, lining something similar to the plastic panel. It also has a groove and spike, so when it is mounted on the ceiling, it does not form a slot. Installation of a wooden ceiling begins with the mounting of the crate. Unlike plastic, which is mounted on a galvanized profile clamp, a more powerful design is needed to install heavy lining.
To cover the ceiling with the help of the wallpaper, a wooden rail with a spike-groove system is used with a thickness of 1.25 to 2.5 mm, wide up to 150 mm and up to 3000 mm long. The most preferable for such works is a rail made from an oak or cedar tree, and for gourmets there is a lattice from a red tree. The class of the trim material depends on its quality. The class A and B Reika should not have visible defects, and the class C tree can have small holes or traces of bitch. Also for mounting the crates need a timber. Its quantity depends on the size of the room.

From the tool for such work it will be necessary:
- Electric drill.
- Electrolovka.
- Screwdriver.
- Level (laser or hydraulic).
- Painting thread.
- Roulette, Galnik, pencil, rule.
- Chisel, planer.
For unlocking processing, you need to purchase a varnish and brush to apply it. Before starting work, all wood is necessarily processed with the help of antiseptic, including the crate.
Installation of wood ceiling crates

Procedure for work:
- Installation of ceiling crates start with fastening of the coding rail around the ceiling perimeter. To do this, it is necessary in one of the corners at the right height from the draft ceiling to put a label. From her begin to mark the markup under the circuit rack. To do this, use a laser or hydraulic level.
- The line for fastening the bypass bar is carried out throughout the ceiling perimeter.
- After that, the roach rail is mounted to the walls. For this, it is drilled by a hole with a diameter of 5.5 mm in a step of no more than 300 mm.
- Then the plate is applied to the wall and with the help of a drill (for brick walls) or perforator (for concrete) holes under the fast installation dowel. Thus, the bar is fed throughout the perimeter of the room.
- Now it is necessary to consolidate the transverse slats of the crate. They are put in increasing no more than 600 mm.
- In addition to attaching to the walls, they must be attached to the ceiling on special suspensions using self-tapping screws. Fastenings should be quite powerful to withstand not only weight planks, but also lamps and other designs that will be attached to the ceiling.
Installation of lamps and wiring on a wooden ceiling

Work on the installation of lighting is carried out prior to the start of the sewing ceiling by trampling:
- At the level of the switch axis between the draft ceiling and the crate, the distribution box is mounted, from which the layout will be separated.
- Often, lamps are used to mount the lamps on the wooden ceiling, 12 V. lamps are used, given the fire hazard of the wooden coating. If such a scheme is used, it is necessary to provide a place to install the transformer.
- All connections above the final ceiling are performed only with the help of terminals, the twist is not allowed. When using voltage 220, the power wires are placed in a protective sleeve. After graduation, all lamps are connected, and their performance is checked.
- For fastening point lamps in the lining, holes are made. This uses a special crown of the corresponding diameter. Before starting the molding, the voltage is turned off.
Installation of lining on a wooden ceiling

If the work is carried out in a private house or in the apartment on the top floor, you need to take care of the ceiling warming. An excellent insulation for such a case is mineral wool. It fills the gap between the rough ceiling and the wooden frame.
Installation of the lining performed in the next sequence:
- Before starting work, you should prepare the boards. Morilka is better not to use, as it looks too beautiful on the ceiling. To begin with, the board is better to handle the antiseptic, to brand, and then paint using a sprayer.
- If there is a desire to preserve the natural texture of the tree, the board can be proligified and coat with one layer of varnish.
- Installation of lining is not difficult. The first plank is attached from the wall with the help of self-tapping screws. Their heads will hide under the ceiling plinth.
- Then, on the other hand, in the groove neatly at an angle spin sores. It is necessary to do it in such a way that the spike of the next board is fluent in the groove.
- The board is attached to all laminations of the crate. Thus, the whole ceiling is going. If at the end of the ceiling remains unbroken, it can be closed with ceiling plinth, otherwise the board will have to be cut into half.
- After the end of the installation, the ceiling is mandatory with several layers of varnish.


