Alignment of walls by plasterboard (GLC) is a practical method that allows you to quickly achieve the desired result. Thus, you will create not only the perfect plane and a decorative surface, but also organize aesthetic laying of all kinds of engineering communications.
Content
Advantages of work with plasterboard

- Installation of GLC is quite simple and convenient.
- Building material is distinguished by environmentality, versatility.
- Plasterboard is lightweight, "breathable", fire-resistant, can be used in rooms with high humidity.
- With this material, you can create curvilinear structures, partitions, and the like.
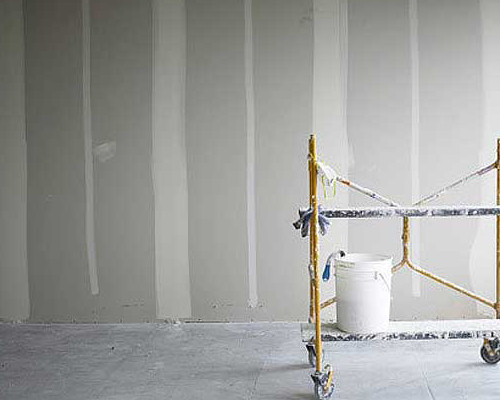
Alignment of walls of plasterboard
This method of alignment of the walls is resorted to the presence of large drops when the ideal smoothness of the surface is required, and in the event that the use of plaster compositions is impractical.
Wall alignment methods (photo)
1. Frame.

GLCs are mounted on a frame made of wooden bars, metal profiles.
The main drawback of the method is the thickness of the profiles, which reduces the useful area of \u200b\u200bthe room.
2. Frameless.

Installation of GLK is carried out on special glue.
3. Combined method.
Used for normal dusting of plastered and drywall walls.
Features of the alignment of the walls of GLC

1. Before installing plasterboard plates and gaskets, you should consider the placement of hatches, which will make it easier to access the latter.
2. It is not recommended to level the walls of GLC, if they are planned to hang heavy designs.
3. It should not be used by plasterboard in those rooms where the probability of mechanical and dynamic loads is present.
4. Plasterboard plates must be mounted on a durable, dry, not having sprinkling areas surface.
5. Walls height from 3 m It is not recommended to align the frameless method.
6. Installation of GLCs must be made with special care, reliability.
7. If it is planned to hang something heavy on the wall of plasterboard, take care of strengthening it with plywood and other building materials.
8. Covering the surface of the GLC in a wet room, use special moisture resistant plates treated with waterproofing mastic.
Alignment of walls of plasterboard do-it-yourself
Alignment of walls with plasterboard without frame

Notes:
- before installing plasterboard plates, complete the laying of electrical wiring, pipeline;
- the working base should not be exposed to moisture, frost, etc.;
- GLC is not recommended to fix on lime plaster;
- in the presence of walls with a normal ability to absorb, the fastening of sheets is carried out with the help of putty, the fugenfuller glue, Pearlfix, etc.;
- the hygroscopic surface is processed by primer "Tifengrund", "RicomBigrunch";
- non-absorbent moisture, smooth walls are processed by the primer "Betokontakt", creating high-quality adhesion;
- for sinks, on door and window jumpers, GLCs are fixed over the entire surface (not point).
Rules for fastening GLK.

1. If the base has a drop of 4-20 mm, the mounting of plasterboard plates must be carried out by glue "Perlfix", which is applied with piles around the perimeter and in the middle with a step of 30 cm.
2. If the surface of the walls of the walls exceeds 4 mm, the GLC is fixed using a plaster powder, which is applied by longitudinal seams with a thin layer around the perimeter and the center of the material.
3. If the differential is 2-4 cm, 10 cm wide, cut from drywall, and then the GLCs are fixed to the walls.
4. The plasterboard installation must be carried out to the flooring of the floor covering.
5. In wet rooms, a special moisture resistant plasterboard is used.
6. After purchasing and before installation, the sheets must be cooled in this room up to 3 days.
7. In the process of installing plates, the temperature in the room must be from + 10 ° C.
8. By installing plates, they should be cut off with equal height of the room.
Preparatory work
- we determine the deviation from the vertical, the presence of irregularities (with a level, plumb);
- we choose the installation method;
- carry marking on the wall and ceiling;
- eliminate oil stains, irregularities, are diverting the surface;
- we apply a primer on the wall, let it dry;
- decitation GLK, cut into them holes under the socket, switches.
Recommendations:
- dispatching plates, leave a gap of 8-12 mm (subsequently this slit is treated with a sealant);
- since the gypsum does not like water, the open edge in no case should be in contact with the surface. To do this, it is necessary to put the GLC on the lining and give time to grab glue;
- fix the GLC to the wall using self-uses is prohibited.
Installation of plates on the surface with deviations from vertical up to 4 mm
- with the help of a calibrating gear, we apply to the center and on the perimeter of the sheet a gypsum putty;
- if it is planned to place the furniture here, put the entire sheet;
- then along the walls on the floor are mounted lining from cropping drywall;
- the sheet is lifted and installed on them, pressed against the wall;
- next, the level and rubber image is put on the level of vertical surface.
Recommendations:
- start fixing the plates from any angle of the room;
- the second sheet is attached close to the first;
- if there is a cladding of wooden walls, you can use nails with wide hats. They must be dried into the material, and then sharpen.


