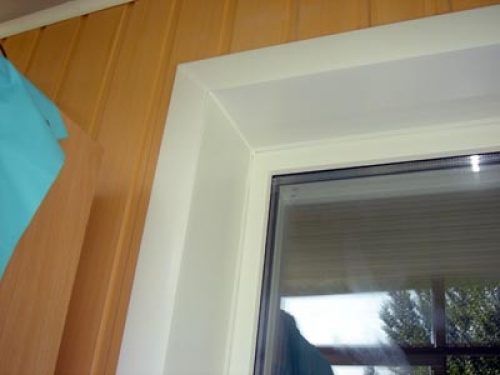
Replacing the old, which served the last period of wooden window frames to metal-plastic window blocks requires a special approach. To install plastic windows, it will be necessary to help professionals. Installation, as a rule, is included in the price, but in the course of work, the slopes are violated. And each owner has a desire to put them in order. Works are not complicated, so you can cope on your own, but first you need to study all the nuances, prepare materials and stock tool. And when everything is at hand, you can cope with the task in a few days.
Content
- Options for internal slopes on windows with their own hands
- What tools will need to install internal slopes on the windows with their own hands
- Preparatory work or dismantling of old slopes
- Stucco and painting of slopes with their own hands
- Installation of plasterboard slopes
- The main advantages of plastic internal slopes with their own hands
Options for internal slopes on windows with their own hands
After dismantling the old windows and installing new plastic, you need to update the internal slopes.
Varieties of window internal slopes:
- plaster;
- from plasterboard;
- from plastic.
Consider the advantages and disadvantages of each type:
- sunsaw plaster - classic option, inexpensive, but labor-intensive. It will take to work in several goals, because first is prepared the surface and processed by primer, then plaster is applied to several layers and each layer needs to give time to grab. The method is time-consuming, but not costly. If compared with other options, ineffective, because there is no protection from the cold and the probability of fogging windows and supercooling is not excluded;
- domestic slips from drywall - pluses more and the first is the practicality of the design. If, after a while, the slopes will have to be refreed, then it will be much easier to do so to update the slopes from the plaster. Everyone will cope with the installation, but you have to work hard. Mounting consists of phased performance: First, you need to prepare the surface, create a framework to which the material will be attached, perform a competent insulation, from which the microclimate in the room will depend on the premises and then apply a thin layer of putty, and after drying - prepare the surface to apply paints. Pros: material relatively inexpensive, it is easy to work with it, an excellent appearance and durability. But there are disadvantages: plasterboard absorbs moisture, so you need to purchase a sheet of moisture-resistant drywall;
- out of plastic is the easiest, universal and affordable option. Easy and simplicity, reliability and noise insulation, plus high aesthetic indicators are the advantages of the material. Plastic suitable for installation of internal slopes and outdoor. Recently, instead of ordinary plastic sheets, another material is used to mount the slopes - this is a sandwich panel. This is the same plastic, only with insulation (on both sides of plastic, inside - a layer of polystyrene foam). The material is practical, identical in structure with plastic windows, so with aesthetic side, such slopes are considered the best. Maintaining the installation technique is not difficult, subject to the purchase of panels in the finished form.
The slopes from the foam or from wood are set, in the first case, competent installation of the installation will be required so that the windows do not sweat further, and in the second case, it is pleasant to work with a tree, but this material is expensive and as a rule, if we installed metal-plastic windows, then wooden slopes Will look no harmonious.
What tools will need to install internal slopes on the windows with their own hands
Depending on which material is selected, the list of instruments will depend. For example, to make slopes from plaster, you need to prepare:
- rule;
- spatulas of different sizes and shapes;
- plaster cells;
- grater;
- angular equalizer;
- half-sash;
- topor;
- level;
- trowel, shovel;
- rag;
- electric drill for making a solution with a nozzle;
- a bucket or a bowl to knead the solution;
- metal profile (Wooden rail).
To mount the slips from drywall, you will need such a tool:
- metal ruler;
- rule;
- roulette construction;
- knife for cutting plasterboard (cansaler, only with new blades);
- screwdriver;
- spatula for applying adhesive mixture;
- capacity for mixing the solution;
- brush, rollers;
- rag;
- marker or pencil;
- drill with a nozzle for kneading a solution;
- grater and sixrock.
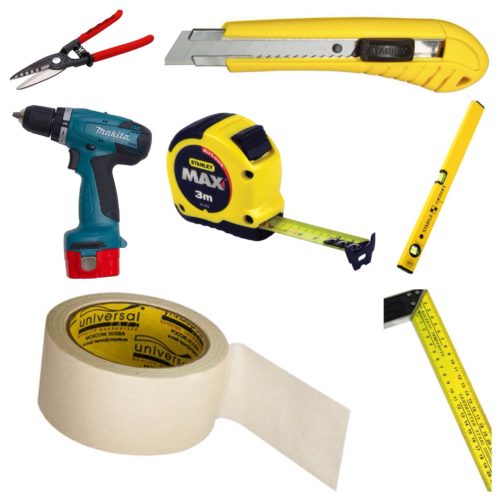
To mount plastic panels you need to cook:
- spatula (several species);
- roulette;
- acute building knife;
- scissors for metal;
- level;
- stapler;
- rag;
- pencil or marker;
- brush or roller for primer.
Preparatory work or dismantling of old slopes
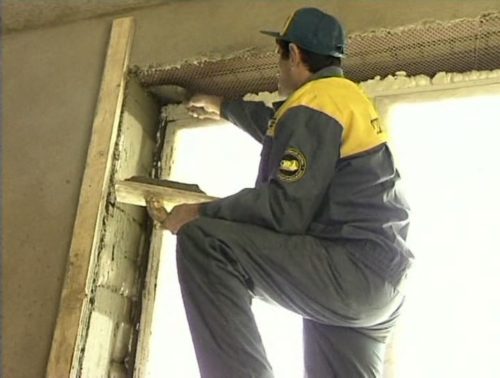
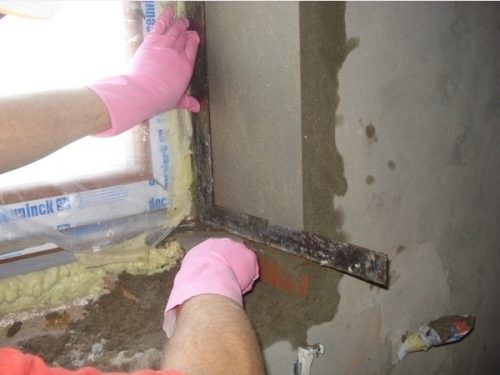
Often, when replacing windows or updating internal slopes, it becomes necessary to remove the top layer of plaster to competently perform the installation of slopes with the selected material. But first you need to close the formed slits after installing metal-plastic windows, to revoke irregularities. At this stage, many are faced with the first difficulties, because plastic windows in size are slightly less than wooden (old wooden are dismantled together with the frame), so you need to close the resulting furrow on the perimeter. A simple way is to fill the space of foam, but it is best to launch.
If large, then it is necessary to apply a solution to the reinforcing grid.
Then you need to get rid of the top layer of plaster or paint. After performing these works, it is necessary to process the entire surface with a primer with an antiseptic, to avoid the appearance of mold and greasy spots on new slopes. The primer must be applied in several layers with the gap, so that the first layer may have dried.
Stucco and painting of slopes with their own hands
Before you begin work, prepare all the materials:
- cement with sand or finished mixture for plaster;
- perforated corner;
- serpenta;
- primer;
- paint is water-emulsion.
Sequence of work:
- We put lighthouses to choose from: made of metal or from wood. In the event that you have to build up a bit, then you can make tags, but if you are new, use ready-made beacons for plaster. We put the first lighthouse at a distance of 5 cm from the window so that the first layer of plaster lay on the frame with a minimal approach. The second beacon is placed at the corners of each slope. The distance between the beacons around the perimeter of the window opening should be the same.
- The sealing of the gaps and errors on the internal slopes with their own hands is performed using fast drying mixtures (gypsum plaster). This solution is mixed faster and easier if you use a special nozzle on a drill. A fresh solution is applied with a spatula with a layer thicker than cement solution to fill all the slots and emptiness, as well as deeply potholes. If you work with cement and fill the slots more than 3 cm, then you need to add to 2 parts of the cement 1 part of the sizzy sand. This solution is grabbed faster.
So that the windows do not stove in the cold season, it is more expedient to put a layer of insulation even before let's start shuttering the slopes. This may be a layer of mineral wool or other insulation. If you installed single-chamber metal-plastic windows, the fogging is not avoided, so you will definitely insulate the slopes so that there is no condensate, and the mold did not appear in the future. - After the first layer grabbies and dry well, you need to handle the surface of the primer before applying the next layer (in 1 or 2 layers) before applying the next layer.
- Then the minimum layer of finishing putty is superimposed. After it gets dry, the slopes must be pasted. For these purposes, the grinding machine is perfect, but you can manually cope with the works if you need to make the internal slope of one window.
- Do not avoid the appearance of small gaps between the window block and the layer of putty. Therefore, these places need to fill with a sealant. In order to smooth the joint place, you need to cut it on 3 mm sharp construction knife. Angle - 45 degrees. This recess must be primed first, and then fill the resulting groove with a sealant. In order for the work to be neat, take advantage of painting scotch, and the sealant do not directly apply from the pistol, but with the help of a rubber spatula, treating stages to small sections and gradually moving around the perimeter. After completing the work, the painting ribbon must be removed.
- The primer of the entire surface of the slope is a roller or a wide brush. It is impossible to skip this stage, since the paint can lie unevenly, and in the future the slopes can crack.
- What paint is better to use? You can, even enamel, but recently enjoys acrylic paint. She better falls, dry faster. The final stage of the plaster of slopes: In order to paint evenly slopes, it is necessary to apply the paint into 2 layers. After the first dry, apply the second.
At least 7 days are allocated to perform internal plaster slips.
Features and progress of work you can visually see, reviewing this video:
Installation of plasterboard slopes
What features of the slopes from drywall do it yourself:
- the finishing material does not allocate toxins, it is an environmentally friendly material, does not harm the health of people and animals;
- speed mounting, compared to other materials;
- the finish will last for many years if you choose all the materials and stick to the installation technology;
- you can align the irregularities with sheet carcart sheets, adjust the thickness of the window opening and walls, lay a layer of insulation and communication if such a need arises.
A brief list of all necessary: \u200b\u200bthe list of tools was described above, it will be necessary from the materials:
From materials need to be prepared:
- moisture-resistant plasterboard;
- profiles;
- screws, dowels;
- glue for drywall (depending on the selected method of installation);
- self-tapping screws and metal;
- insulation (for example, minvat);
- perforated corner;
- sickle;
- putty finish;
- primer;
- paint water-emulsion.
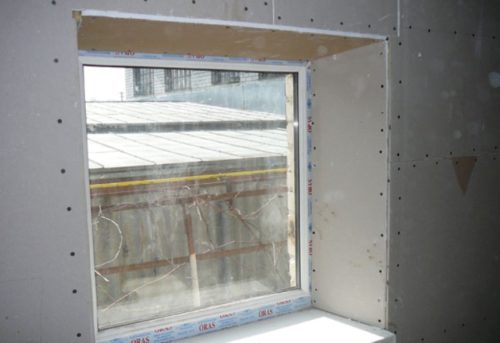
Installing drywall slopes with your own hands without a window block:
- The surface is pre-prepared, you need to make marking and transfer it to a sheet of drywall.
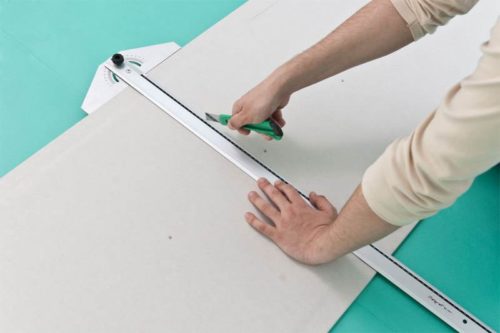
- A sharp construction knife needs to cut blanks. How to make it right and fast? Newbies do not always turn out to cut off the sheet smoothly, so you first need to draw a pencil line, attach a rule and tightly, on the planned line to hold the knife to cut the cardboard to the gypsum layer. Then you need to carefully turn over the workpiece on the opposite direction and similarly make cuts after which it is possible to attach a rule and raise the edge of the workpiece. Gypsum should crack strictly on the intended line.
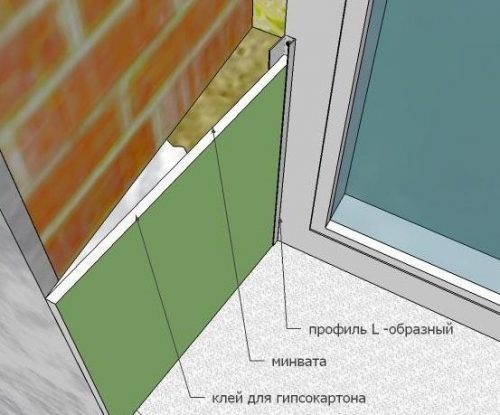
- Next, around the perimeter you need to install a frame made of metal profile in the grooves provided when installing the plastic window. If there are no such profiles, they need to be made (from a plastic or galvanized profile).
- Before attaching a sheet of drywall on a screw, it is necessary to pave a layer of insulation or fill the free space by mounting foam (but then condensate will form on the windows). In some cases, if the minimum clearance is filled with a glue mixture.
- Now you need to cook the adhesive mixture so that everything you need is at hand. The minimum of time is given to the trim, but you first need to apply a little glue on one side, and with the opposite - the bar of the plasterboard will be included in the metal frame of the starting strip.
- The glue can be distributed over the surface not with a flat layer, but in small areas, after which the band is entered and tightly moves into the frame on one side and then it is well pressed against the wall. First, it is advisable to install the ceiling strip, and then the side in the same way. To the upper band of the plasterboard clutch, you need to hold it or rest it with the rails.
- The glue grabbed (this is given to 1-2 hours, depending on the temperature in the room) and you can start the final stage of the work. Namely, applying putty. From how qualitatively these works will be performed, the final result depends.
- It will take the finish putty and primer, as well as a perforated corner (optional).
- First you need to install perforated corners, apply a bit of putty and push it into the solution. Excess the construction mixture should be removed and leave the corners to filure, after which you can begin to scatter the entire surface.
- You need to apply 2 thin layers of putty, between each layer - the gap to complete drying and applying the primer. Final works: Applying primer in 2 layers with complete drying of each layer.
- After the putty will dry up, it needs to be sick (if necessary), then turn the surface to the primer and wait for a complete drying. Then you can paint the slopes in 2 layers of paint with a gap to complete drying.
It was the most time-consuming method of mounting drywall, there are alternative methods for installing slips from drywall with their own hands:
- installation of sheets on the foam;
- fastening on glue.
In the first case, when the clearance is minimal (from the frame), the surface is relatively smooth, and also if it is impossible to screw the dowel due to the fact that the wall is porous, the mounting foam will help.
Works minimize:
- Fill over the gap between the opening and the foam frame, but first we make a deepening (the thickness is equal to the width of the sheet).
- We insert the sheet into this deepening, the foam is applied there to be as close as possible to the frame. Remember that it increases several times.
- After that, the following layer of foam is applied, but in the middle and the latest layer of foam - along the edge.
- Clearly add a sheet of drywall to the surface, because the foam has an extension property.
- After the foam grabs, you need to cut down too much with a knife.
Installation of sheets of plasterboard on glue:
- Perfect for such works dry mixture "Perflix", it needs to be divorced according to the instructions and immediately begin work.
- The surface must be prepared to pre-clean from the top layer and process to.
- To secure the plasterboard band, you need to attach it to a guide profile using self-tapping screws, adhesion and glue the glue.
- Note that glue is grasped quickly, so everything needs to be prepared in advance, cutting the strips. Six glue in small batches.
- To improve the adhesiveness of the gypsum with the surface, press the plasterboard BRom and knock on it with a rubber hammer. Fixation should be kept for an hour, but at least 3 days are allotted at a complete drying.
- A portion of the slope at the outer edge should be left open (where the sheet is attached to the wall) so that the glue fastened. Then everything is spitting, the slips from the drywall are ground and painted with paint in 2 layers.
The main advantages of plastic internal slopes with their own hands
Plastic - easy to work, inexpensive and popular finishing material. If compared with the installation of drywall, plastic does not need to cover the layer of putty, priming and painting, which means you can reduce the scope of work.
Pluses of finishing material:
- easy installation - work can be performed per day;
- durability;
- attractive appearance;
- big palette of shades and textures;
- well combined with metal-plastic windows in structure and color;
- it is possible to hide all defects and irregularities;
- excellent thermal insulation properties;
- pushes moisture;
- easy to care;
- protects windows from freezing and not afraid of temperature and humidity drops.
When replacing old wooden structures on new plastic, it is difficult to maintain internal slopes. During the work, clearances are formed and even the smallest gap can lead to the rapid development of mold. To avoid this, you need to perform the installation of plastic slopes, clean the surface, primed and pave the layer of insulation (minvat, foam, sandwich panel, fiberglass) so that it is adjacent to the window frame.
What you need to work from the materials:
- plastic profile;
- profiles P and F-shaped;
- plastic sheet for slopes (thickness from 8 mm);
- starting strip P-shaped;
- minvata and Construction Foam;
- wooden rail;
- self-tapping screw;
- putty;
- sealant;
- glue for sealing seams.
Recommendations for working with discovery from plastic with their own hands:
- Perform measurements, preparation of finishing material and subsequent installation.
- Fastening wooden rails around the perimeter. During operation, you need to constantly check the smooth attachment by the construction level.
- In the grooves you need to insert a profile to attach slopes to it. If there is a space, laid a layer of insulation per plastic.
- Installation of corners on the sides with the help of a construction stapler.
- Installing plastic panels: Slim layer apply a mounting foam with such accounting that one part of the sheet will be inserted into the profile. First, insert a sheet into the corner, tightly do not press to start the opposite edge. After that, you can press a sheet.
- Seam if you need to treat with liquid plastic.
This is one of the options for mounting internal slopes of plastic, you can still attach slopes on the outer edge directly on the tapping screw or any other fastener. Hats should be plugged and then close the plugs.

