Alignment of indoor surfaces can be made using various materials. Our article we will talk about how to strip the walls with plasterboard.
Content
Characteristics of plasterboard design
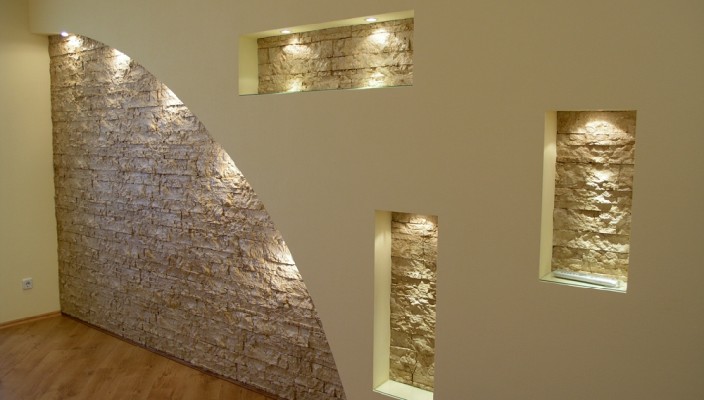
Plasterboard is a universal material. With it, you can create a bearing wall, and to build a new partition. Created structures are created from drywall (for example, niches in the wall).
Walls made of drywall (in the photo) can be fermented with various materials: wallpaper, paint or even tiled. You can purchase and laminated material for which the finish coating will not be required.
For the technology of walls of walls, plasterboard is characteristic:
- high strength and excellent soundproofing properties;
- the presence of a perfectly smooth surface;
- simplicity and speed of installation work;
- the ability to absorb moisture and allocate it into the environment;
- undoubtedly use a large number of tools;
- the possibility of placement inside the walls of electrical and telephone cables, air ducts and other communications;
- probability of material bending;
- ecology of construction (gypsum - natural material);
- available cost.

Perhaps the only disadvantage of the finishing material is weak resistance to mechanical loads. It is forbidden to mount too heavy elements on the walls of plasterboard. Plots where lighting devices, paintings and eaves will be suspended, are subject to mandatory gain using mortgage parts.
In most cases, the design consists of three main elements:
- framework (from galvanized profiles or wooden bar);
- insulation (usually mineral wool);
- plasterboard sheets.
Although there is also a framework of plasterboard mounting technology, when there is stuck to the wall with a special glue.
Selection of material
The operational period of plasterboard design directly depends on the type of room where the material will be used. Plasterboard is divided into the following varieties:
- GLC;
- G CLEM;
- GKLO;
- Glevo.
The walls of the walls of plasterboard GLC can be carried out in all residential rooms that have normal humidity. For the price this option is the most acceptable.
Plasterboard G Clac is moisture-resistant material. Basic applications - bathroom, kitchen, balcony. Due to the presence of hydrophobic composition in the cardboard, the loss of properties associated with absorbing moisture occurs.
 The separation material of GKLO is a material with high fire resistance. Gypsum includes reinforced fiberglass (it does not allow the spread of the flame), and the cardboard is processed by the flame retardant (decreases the combustibility of the product).
Gypsum gypsum is a combined material. He absorbed all the best figures and moisture indicators. Naturally, the price of this type of drywall is highest.
As for the thickness of the material, it is:
- 12.5 mm - for wall decoration;
- up to 8 mm - for the device arches and other curly elements.
Before purchasing plasterboard carefully examines. Invalid defects such as folded plaster or damaged cardboard.
Installation of drywall on the frame
Preparatory stage
At this stage, wall alignment and surface markup is carried out. The following requirements must be complied with:
- measurements are made, based on two parallel walls (this is due to the fact that it is not always angles in old houses equals 90º);
- when conducting markup, you should consider the dimensions of the profile and drywall;
- be sure to notice the location of the doors.
Usually before making the wall from the drywall, the markup is applied to the floor. And then it is transferred to the ceiling and the wall. The perfect option is the use of a laser level.

Creating a carcass
For reliable mounting of plasterboard to the wall, the frame should be built. For its manufacture, you can use a wooden bar (allowed when finishing a warm and dry room). But nevertheless, the best solution will be the use of galvanized profiles that are not terrible temperature differences.
Creating a metal frame for plasterboard involves performing such actions:
- the guide profiles are attached to the floor and ceiling (the presence of the door is taken into account);
- the rack profiles are mounted along the edges of the guide profiles and along the door and window openings;
- near the windows and doors, the front side of the profile should be directed to the window or door;
- the minimum distance from the adjacent wall to the profile is 55 cm;
- installation step of rack profiles - 0.6 m;
- the correctness of the vertical arrangement of adjacent profiles is checked by the level.
The framework of the frame near window and doorways, as well as between adjacent rack profiles, is carried out as follows:
- billets of the profile are cut (their length should be 0.3 m exceeding the size of the opening);
- on both sides of the blanks are made by tags 15 cm from the edge of the profile;
- the side part of the profile is trimmed at an angle of 45º and bends;
- it is equipped with sliced \u200b\u200bblanks on rack profiles;
- for their reliable fixation, screws for metal are used.
In order for the frame to be extended or concave, it is recommended to pull two cord between the angles in the horizontal plane.
Laying Communication and Soundproofing Design
Before mounting drywall, it is necessary to take care of the installation of the respective communications (electrical or telephone cable, air ducts). The appropriate holes are made in the finishing material.
The wiring is recommended to be placed in a corrugated pipe, which will be attached to the wall. If you plan to install lighting devices, then you immediately need to make holes for sockets and switches.
To improve the soundproofing and thermal insulation properties of the plasterboard wall, it is better to use a mineral wool in rolls with a thickness of 6-12 cm (the specific size depends on the width of the wall). Soundproofing material stacked between profiles. If the mineral wool does not fall, then it is not necessary to fix it.
Fastening of plasterboard sheets
Now directly on how to mount plasterboard to the wall. It should be noted that the dimensions of the standard sheet of the material are 2.5 * 1.2 m. In most cases, drywall has to be cut, since one sheet in length is usually lacking.

The procedure for cutting drywall includes such steps:
- sheet laying on a flat and solid support;
- conduct measurements and marker marker of the material cutting line;
- circuit with a conventional knife of the top layer of cardboard on the laid line;
- neat suck of drywall from the cut side;
- out of the sheet;
- cutting the cardboard layer and the dome of the plaster core on the other side.
To carry out high-quality circumcision, use a wooden rail, which is applied to the finishing material. A knife is cut. To facilitate the finishing finish, the extreme part of the drywall is cut under a small angle (20-22º).
After creating a blank, plasterboard mounting is carried out to the wall:
- the side of the sheet takes painting the sideband (up to 5 cm wide);
- installation of the material starts at the bottom of the floor with an indentation from the floor of 1-1.5 cm;
- to fix the drywall to the metal frame, screws are used, which are screwed not only on the edges of the sheet, but also in the middle part;
- the screw screwing step is 20-25 cm, and their hats are deeply deepened in drywall;
- installation of subsequent sheets is carried out in a checker order.
It is recommended to carry out the walls of the wall with plasterboard in such a way that the plasterboard be left in solid sheets, and the jokes of adjacent sheets were located on profiles. Also, the seams must be in various places. The exception is the door and window openings. In these places there should be no joints, since it is fraught with the appearance of cracks.
The process of creating a wall of plasterboard is completed with their own fines from the seams. The reinforced ribbon of the serpent is stacked in the joints between the sheets and is fixed using the starting putty.
Starting putty also covered hats of selflessness. The entire surface is processed by the finish putty. After drying, the surface is determined by the abrasive grid. The plasterboard wall is prepared for finishing finish.

Frameless Montaja Technology
This method of decoration of the walls of plasterboard provides for the presence of a smooth wall. For gluing the material it is better to use the special glue of Persfix.
Frameless installation of plasterboard mounting provides:
- cleaning walls from dirt and fat spots;
- priming surface;
- application of marking with the estimated location of sheets;
- drill in the material of holes for sockets and switches;
- removing the champers on the side parts of the drywall;
- preparation of adhesive composition (for high-quality mixing it is better to use a building mixer);
- application of glue in the center and around the perimeter of the sheet (if the installation of shelves, paintings, or lamps is planned, then applying glue is made throughout the sheet);
- pressing plasterboard to the wall with a simultaneous verification of the correctness of the vertical position.
In order for the plasterboard to make more densely to the wall, you can use a rubber image or a wooden plank and a small hammer that you need to be carefully hit. A day after the normal drying of the adhesive, the joints are sealed, and the surface is trimmed with putty.
Video on the creation of a wall of plasterboard:


