The bathroom of any home or apartment is a special area designed to provide the owners comfort and pleasant pastime. Quality repairs can provide convenience to use the bathroom and favorably affect your health. The bath should be warm, and quite a long time to maintain a comfortable temperature, excessive humidity should not spoil the atmosphere and room. The work of the equipment located in the bathroom, namely the boiler, plumbing, water supply and sewage is often accompanied by irritating noise, so sound insulation is not just necessary here, but is required. Excessive noises should not disturb the residents of the apartment, especially at night.
Content
If you want to save yourself and your relatives from inconvenience in the bathroom, it is necessary to pave the thermal insulation of the walls and the floor of this room. This type of repair work can be made independently and save money to pay the work of the builders.
Do I need to warm the bathroom?
The layout of the house can be built in such a way that one of the walls of the bathroom will go to the staircase or even be a corner. Such a location will not provide due comfort without additional thermal insulation works. If the external walls of the house are not thick enough, you will have to warm the bathroom from the inside yourself. How to insulate the bathroom and what you need, we will try to figure out.
What materials can be used for insulation?
- The selection of insulation materials is quite wide: from the traditional, which are used for many years to new modern innovations of the construction industry. So what is better to warm the bathroom?
- The most common materials are:
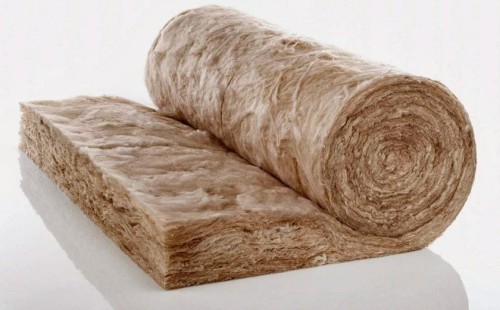
- mineral wool;
- cork insulation;
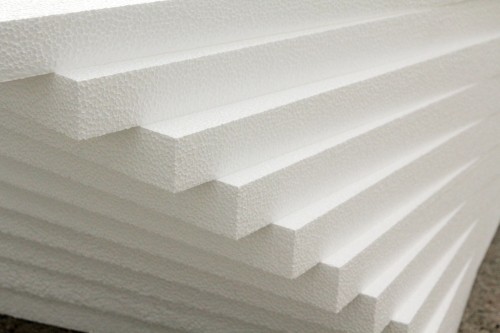
- styrofoam.
- Mineral wool, tested for years and millions of successfully insulated bathrooms, uses specially popularity. This material is not so expensive, but its main advantage is the obstacle to the emergence of condensate. However, the cheapness is not accidental, along with the positive qualities of wool has high hygroscopicity. Couples and moisture gradually spoil the material, so if you still decided to stop your choice on the mineral wool, you need to take care of it with waterproofing.
- The insulation from the traffic jam will cost a little more expensive because it has a more wax impregnation. When using such a type of insulation, the workflow will break into several stages - the main and preparatory. First, it is necessary to thoroughly project to the inside of all walls, and then stick the insulation itself with a special glue. Despite its cost and step-by-step work, the cork insulation is an effective means to hold heat in the bathroom.
- Thermal insulation of walls by foam sheets is the cheapest and affordable way of insulation of walls. It is not necessary to not necessarily hire professional builders, these works do not require high qualifications and greater experience. The foam just needs to be attached to the wall with a special glue. If drywall is used to finish the surface, the foam foam is attached using a special frame made of galvanized metal structures.
Insulation foaming
- The insulation of foam effectively and does not cause special hassle. A complete list of tools that need to be stocking for this kind of material and works:
- foam sheets;
- special glue;
- finish putty;
- spatulas in the set;
- rubber roller;
- construction knife, string, hacksaw on plasterboard.
- Prepare everything you need, you can start work. The main thing is to stick with a clear sequence and developed technology:
- preparatory work: Clean the surface of the walls from pollution and residues of previous coatings;
- during the primer, apply a special mounting solution for alignment and impairment of the surface;
- prepare the glue solution according to the manufacturer's instructions;
- cover foam sheets in the size of glue using a toothed spatula;
- enclose sheets to the surface of the walls, slightly pressing over the entire surface, do not apply a lot of effort, the foam - the material is fragile and can be broken;
- gently rolling the attached foam sheets with a rubber roller, ensuring a uniform distribution of the solution and good quality gluing;
- apply to the surface of walls with foam layer of the finishing putty;
- wait until the surface dry, and then read it with sandpaper and cover with varnish.
Warming using "warm" plaster
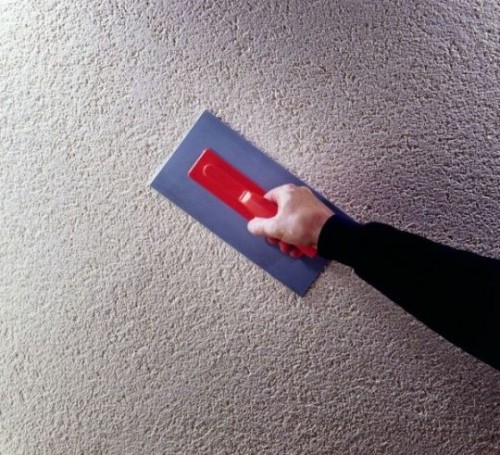
- Recently, the heat insulation began to use "warm" plaster. This method of insulation has a number of features. The basis of the composition of this material is an ordinary cement, but as a filler acts specific additives, which provide a decrease in thermal conductivity.
- On sale you can find three compositions "warm" plaster, with various fillers:
- the composition comprises expanded vermiculite, the advantage of which is ease and very low thermal conductivity;
- composition with wood sawdust and cellulose, which, unlike the first filler, under the action of steam and moisture gradually comes in disrepair, and foci of mold appear on the surface;
- the composition with the addition of polystyrene foam, which, due to granular polystyrene foaming, is not affected by moisture and steam, so its use allows you to produce high-quality thermal insulation not only walls, and the ceiling of the bathroom.
- The use of "warm" plaster has both positive and negative aspects. The following points can be attributed to the positive:
- wall shockting does not require special skills and time;
- before insulation, there is no need to level the surface;
- such material is characterized by good adhesive properties;
- after surface treatment, there are no so-called cold bridges.
- The lack of "warm" plaster can be attributed to the following:
- for a high degree of thermal insulation, a rather thick layer of plaster is needed, approximately 1.5 times higher than the thickness of the polyfoam sheet;
- no need for additional finishing material.
- Warming technology has the following technology and sequence:
- prepare the surface of all walls;
- apply a primer layer;
- mix the dry adhesive mixture in proportion according to the instructions, it is important that it will be necessary to use for 2 hours;
- apply the plaster with uniform layers with a special wide spatula, each layer level up in width.
- The very first layer should be within 2 cm. It is important to give the surface to dry completely, it is usually from 4 to 5 hours, and then already begin to apply the next layer. Do not hurry, non-compliance with technology leads to cracking and rapid coverage.
Bathroom insulation in a panel house
- The owner of the panel house apartment decides himself how to insulate the bathroom. When choosing materials and technology, you need to take into account the loss of useful space, cost and subsequent efficiency.
- If you use isolon or foam, you will significantly win in space, and in the case of insulation of the wall with a bathroom by penplex, then you lose at least 5 cm.
- If, when using foam and mineral wool, you install them on the crate, then the losses will be quite significant, within up to 10 cm. In this case, the quality of insulation you get satisfied high, especially if the wall is bordered with the street or staircase. But it all depends on the size of the room.
Bath insulation
- Often bath rooms equip steel baths. They are strong enough, reliable, durable and affordable. However, the steel bath does not keep warm and the water in it quickly cools. This is a great inconvenience for lovers to soak in a foam driver. Similar flaw can be eliminated, warming it on the outside. This procedure is easy to do independently, without the involvement of specialists. The easiest solution for the thermal insulation of the bath is the use of an ordinary mounting foam as insulation.
- Treatment of the bottom of the steel bath will significantly reduce the thermal conductivity of the material and will increase the sound insulation of the noise produced. The easiest way to use polyurethane sealant. On average, the standard size is needed about 4 cylinders.
- Warning work on the insulation of the bath must be produced before it is installed, because to process the bottom installed bath is evenly impossible. Either do it immediately, or you have to dismantle it, which is not desirable.
- For the sheat, it is enough to install a drain siphon, strengthen the supporting legs and the guide profile. After such uncomplicated manipulations, your bath will be completely ready for installation - now proceed to its insulation.
- Prepare the following materials and tools:
- mounting foam;
- gun;
- knife;
- putty;
- glue;
- fiberglass.
- As usual, work is starting with surface preparation. The bath must be flipped over and clean the surface from garbage, and then moisturize.
- After that, prepare cylinders with polyurethane for laying on the surface. To do this, take a cylinder and hold it under the jet of hot water. Experienced builders enjoy such a reception to ensure the volumetric release of foam. Then softly press on the lever start to lay the composition in the form of a snake until you cover the entire surface.
- It is not necessary to apply the composition on the siphon and a small space around it, it may be necessary to replace this part, the same applies to the hole for overflow.
- Starting important from the bottom. Having finished covering it, wait 15 minutes to frozen, and continue to apply the composition, making sure that the sealant does not flow. Working with sealant requires compliance with caution, he should not get to other surfaces, and even more so on the bare skin of the hands. Wash your hands with ordinary soap is impossible, you need to use a special solution.
- Work in overalls, covering hair and clothes gloves. Paul stack, cover all items and walls in bathroom protective equipment. In the event of a cylinder break, which sometimes happens, scattered splashes will instantly cover everything around and instantly freeze.
Walls and ceiling
- Walls and ceilings can be insulated with foam in two ways:
- glue with a special glue;
- use special fastening.
- If you chose the first way, then be sure to clean the surface before gluing, and then evenly apply glue to the foam and attach sheets to the wall. For a more durable attachment, special fasteners are used.
- After the foam flap sticks, it is necessary to put a putty with a layer of uniform thickness. It is important to understand that such a way of insulation of walls in the bathroom does not imply the use of tile for further lining. After putting down the walls, you can paint the moisture-resistant paint.
- The second way of insulation of the walls of the bathroom with foam is carried out using the crate. It can be wooden or metal. The choice of its design depends on the choice of the further method of cladding the surface of the walls. With this method, drywall or plastic panels are used. After installing the crate, the sheets of foam plates are tightly fit into space between the racks. Small slits formed as a result of installation plates are poured by mounting foam. In this case, the method of fastening the foam can be dispensed without subsequent putty of the walls.
- It will be fine if you put a putty to the metal grid - this will serve as an additional protection of the insulation from rodents, which can cause significant damage. Mineral wool can be used as a insulation. Wool, like foam, stacked with dense strips throughout the wall area. To avoid education on the walls of condensate, the cotton must be sewn with a special film for insulation from steam.
- Nothing is too complicated in the insulation of the walls with the above methods, no. They are available to anyone without the use of special skills. For those who have never done this, you can see a special video with step-by-step instructions how to insulate the bathroom with foam.
- Heat the ceiling after completed work on the insulation of the walls. Ceiling insulation starts with framework for suspended ceiling. It is possible to mount the foam and mineral wool directly to a rough-based ceiling, but such a fastening is less durable and more complicated than fastening on the frame.
Floor insulation in the bathroom
- In order for the bathroom to be warm and comfortable, it is necessary to insulate the floors, especially for apartments on the first floor. An excellent solution of the problem of the warm floor is the arrangement of an electric or water heating of the surface.
- Get out of the bathroom on the warm floor is definitely nicer and safer for health, besides, warm floors increase the total temperature in the room. Electrical mats are very popular for these purposes. Installing such insulation is simple and costs without prior preparation. Before flooring, you can see the elementary video about how to insulate the floors in the bathroom, and everything will be passed like oil.
- Advantages of electrical heating of floors before water:
- electrical mats will cost inexpensively;
- heating of the floor will be autonomous and it is independent of the main heating system of the apartment or at home;
- such a system will serve without failures long enough;
- this method has a high degree of reliability;
- warming mats does not occupy a lot of useful space, since the material thickness is very small, and the heating of the floor using the water system takes up to 8 cm space.
- Installation of electric mats has several stages:
- preparation of the floor surface;
- fastening of electric mats on the prepared base;
- the process of adjusting the comfort temperature mode.
Take water treatments in a cold bathroom at least unpleasant, and also there is always a chance to catch a cold and get sick. Permanent heat creates a favorable atmosphere that will allow to relax and enjoy water procedures after a working day. And the morning souls will help to wake up and tune in for a successful day.


