Do you want to make repairs on your own? This is the right solution, so you can save money and perform almost all the work yourself. Available option to finish the ceiling is the whiten. Refresh the ceilings are preferably in each room to repair to be completed.
Content
If you decide to make a ceiling whitewash with your own hands, then you need to first prepare the surface so that the new whirlwinds are smoothly, and the work done pleased.
Preparing the ceiling to whitelle
First you need to pay maximum attention to the ceilings - if before that he was bitten by ordinary lime, but you decided to go to another way, then you need to wash off the old layer almost to the very foundation. This should be done necessarily, if you want to paint the ceiling with paint or chalk whitewash do.
It is quite natural that all pollution on the ceiling, and these are dust and greasy spots, it is necessary to wash off or clean it. If you got a dwelling with an old whitewash, then it needs to get rid of it. Lime layer can be washed or watch. If you cannot decide how to do, choose the first method. First you need to thicken the ceiling with warm water (with the help of a foam roller), wait 10-15 minutes, and then consider lime with a spatula or wash off with a foam sponge. So you will quickly cope with this part of the work, and the room will not be dusty. If you choose a second way or a dry method of cleansing the old whitewash from the ceiling, then prepare for the fact that there will be a lot of garbage and dust in the room. It is advisable to immediately store the floor with dense polyethylene, cover the furniture that remained indoors. Putting work clothes, do not forget about the headdress and protective glasses.
If you do not know what your ceiling is bitty, it's easy to find out. It is necessary to simply moisten a small plot on the ceiling, and then spend your fingers on it. If the whots became dark, and the finger remained clean - this means that your ceiling was treated with a lime solution. If you managed to easily erase from the surface, but at the same time your fingers became white, it means that the ceiling was treated with a chalk solution. If the surface was covered with water-based paint, then the ceiling will remain clean - you will not see any changes.
How to wash off whitening from the ceiling (lime or chalk):
- It is necessary to store the floor and furniture with dense polyethylene (you can use any material that does not let in moisture).
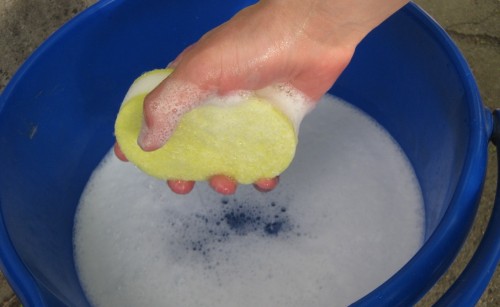
- Make a ceiling processing solution: You need to pour warm water into a bucket or bowl, add liquid soap (or grate any soap on the grater).
- Prepare an old foam washcloth or a rigid brush.
- Begin the ceiling moisturizing better from the edge. Water a small plot on the ceiling, wait a little and proceed to work. If you immediately wet the whole ceiling, then you can only lose time and effort - the ceiling will quickly dry and you will have to start all over again.
- You can scrape a wet whitewash as a rigid brush and a narrow spatula. If the ceiling is a thick layer of chalk or lime, then you need to substitute a bowl so as not to pollute the half.
- The remaining whitewash must be washed with a sponge dipped in a warm soap solution. Work until the ceiling is clean.
If you see that a small layer is small on the ceiling, and the surface is clean and your task itself is only to refresh the old whitewash, you still need to moisten the ceiling so that the new layer fastens better.
You shot off the ceiling - now you need to explore every section on the ceiling more closely, so as not to miss pollution. These may be fatty areas, mold or rust stains. You can get rid of pollution if you treat the ceiling with a solution of copper sulfate (10%). First you need to try to rinse the fat, mold or rust with warm water, and then treat the surface with antiseptic solution.
With the ceiling in the kitchen, the situation is different, as the surface quickly absorbs GAR and fat. To return the ceilings to the former freshness, it is necessary to be treated with a solution of hydrochloric acid (the acid is divorced with water in a 1: 3 ratio). Just do not forget that it is necessary to work with chemical solutions only in gloves, and furniture and all surrounding items must be covered.
Sections with fatty stains can be treated with a solution of calcined soda (a stain must be pre-moistened), and then the area is wetted with water.
If you are all done correctly and noticed after drying, that stains or drifts were manifested on the ceiling, you can try to paint. Prepare a limescale and add synthetic olive into the solution. You need to take 20 parts of lime and 1 part of the oil. It is preferably to handle such a mixture of spots, while you do not make sure that they are painted. You can try to neutralize stains using a solution prepared from liquid glass. It is necessary to take 2 parts of the water and add 1 part of the liquid glass.
Now you know how to get rid of the old whitewash and cope with this task yourself. If you are all done correctly, you can only admire the work done and go to the next, no less important stage - whiten the walls and the ceiling.
Types of blots for the ceiling
You can whiten the ceiling with lime, chalk or water-level paint.
The lime solution is easy to prepare independently, the lime is sold in any construction store, it is just a penny, to put the blotch simply, she skips the air well, which means that the ceiling will "breathe", and the lime repels the bacteria.
Of the shortcomings, the following can be distinguished: rarely when it turns out to achieve perfect white surface. Over time on the ceiling, a seminary lime solution, yellowish stains can manifest themselves, and even the lime whirlpool lowers the humidity in the room.
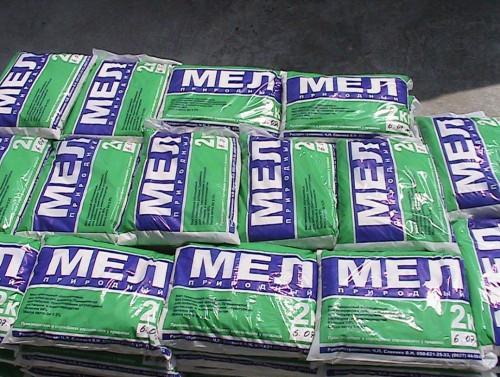
Chalk solution - the cost is low, sold in any construction store is easily applied and also "breathe." The disadvantages are as follows: the ceiling, whitewashed by the chalk solution, seems to be whiter, but over time it starts to grip and gradually turn. In the room quickly becomes dusty and dirty, besides this, the chalk whitewash is afraid of moisture.
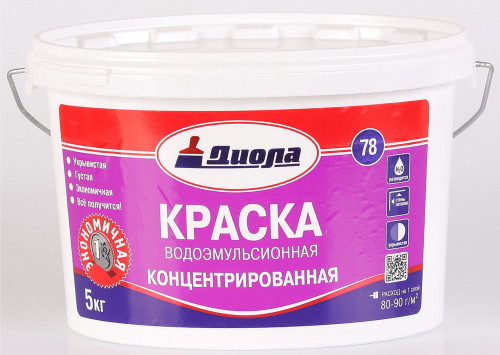
The water-making paint is characterized by the fact that it is already sold at the finished form, it is not necessary to spend time on breeding and preparing the solution. The surface treated with paint is perfectly white and smooth. Such a ceiling is resistant to external damage, it is not erased. There are disadvantages: the most important ceiling "does not breathe."
The choice remains for you, but most people who prefer freshness and perfectly white shades choose the plain ceilings with chalk. To prepare a solution for plating a ceiling in an area of \u200b\u200b10 m 2, It is necessary to dilute in 5 liters of water glue (only 30g), add the crushed soap and 3 kg of chalk (you need to pre-sift). To get rid of the yellow shade, you need to put in a solution of blue powder (no more than 20 g).
How to cook lime mortar? You need to dilute in 5 liters of water (temperature +40 oC), blue powder (only 40 g) and almost 2 kg of lime (1.7-1.8 kg).
How to check the readiness of the solution: you need to put in a ready-made lime solution for whitewash any metal object (plug or spoon), and then remove it. If the whirlwinds flow from a spoon and leaves no trace, then you made too liquid solution and it is necessary to add a little more lime or chalk powder. Just remember that adding powder must be gradually.
Ceiling leaving glasses will allow you to get rid of small cracks on the ceiling and prevent the reproduction of bacteria.
Tool for work
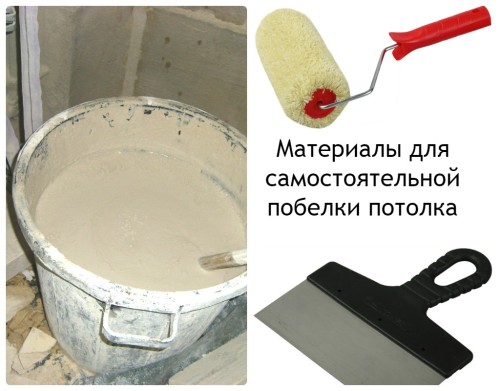
To work smoothly and without stopping, you need to prepare everything in advance. This applies not only to the preparation of the surface and the preparation of the solution for whitewings, but also the availability of all necessary fixtures and tools. The main object for plating the ceiling is a brush. Buy a brush with a natural bristle, up to 20 cm wide. Before you start working, you need to soak the brush in water (warm) for 1-2 hours. During this time, the tree on which the bristles is fixed will swell and secure each bristle well. This method will allow to achieve an ideally smooth surface and during the work of the bristles will not fall out and stick to the surface.
After completing the work, the brush must be pretty wash in water and leave until complete drying.
You can perform spins not only with a brush, but also a foam roller and even a vacuum cleaner, only this option is considered rapid, but not clean.
Teaming ceiling lime
Consider the popular version of the ceiling ceiling with a lime solution. You can prepare the blots in a traditional way or take advantage of this recipe: it is necessary to prepare 1 l of water, add 3 kg of lime (hawed), a clumsy salt (100 g) and aluminum alums (200g). Even in this solution you need to add blue or any dye (optional). All components need to mix well and add more warm water to bring to the volume of 10 liters.
The main rule when paving the ceiling on an old whitewash or on the cleansed surface is the ceiling moisturizing. You can handle the ceiling with a sprayer or use the foam roller.
How to beat the ceiling whitewash:
- Stir the lime solution.
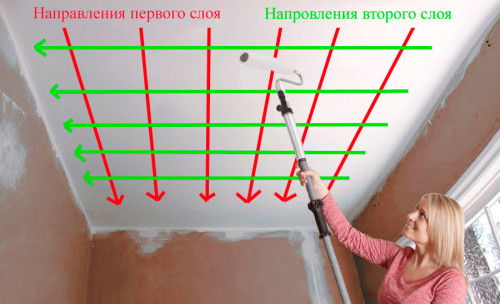
- Finish the brush to lime, apply several smears perpendicular to the light source (windows).
- Go through the entire ceiling area.
- The following layer of lime needs to be applied parallel to the window. Such technology will help avoid the strips after drying the solution.
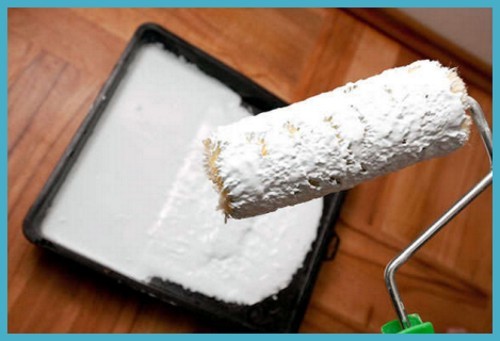
- There is another, easier application of limestone ceiling: the use of foam roller. Then you can cope with the task faster.
- It is necessary to pour a little solution into a special pallet (cuvet), omit roller into it. Roller roller on the edge of the pallet and wait a bit when the glasses of the surplus of the lime solution. Everything can be processed.
- The scheme of application of lime is as follows: First you need to make a layer towards the window, and then apply the second layer perpendicularly.
- Try not to leave dry areas, it is better to make a small backrest (up to 5 cm) to be confident that the entire ceiling area is covered.
- Places where does not get a brush or roller, you need to additionally be treated with a thin tassel.
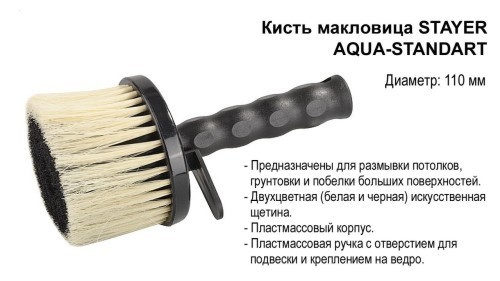
If you have chosen chalk as a whitewash, then you need to use a special brush, it is called "McList" or rent a spray gun. Then the layer of whitewings will be smooth. You need to start working from the corner and stick to the rule - first applies the first layer across the source of lighting, and then along the sunlight. If you ignore this rule, the bands that cannot be painted are visible on the ceiling after drying. Then you have to wash off the whitewash and start everything from the beginning. And do not forget that you first need to wait, when the first layer is dry, and then apply the next one.
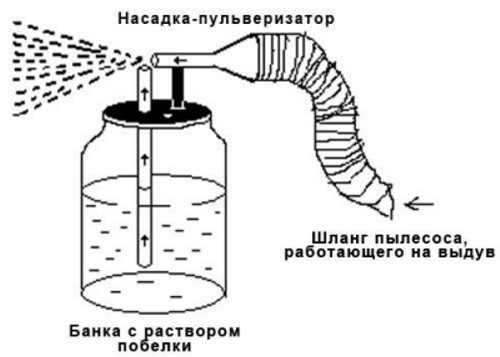
There is another wonderful method of plain ceiling with an ordinary vacuum cleaner. It is necessary to attach a sprayer to the vacuum cleaner, pour the finished solution into a separate container (best, if it is a small plastic canister with a lid). Then you need to attach the canister to the vacuum cleaner and insert the hose with a pre-drilled hole in the lid. On this, everything remains only to turn on the vacuum cleaner and send the sprayer to the ceiling. Just do not forget to break the solution first and pinch the air outlet hole (air valve).
How to bother the ceiling evenly? It is necessary to hold the sprayer at a distance of 1 m from the ceiling and do rotational movements. To achieve a smooth and smooth surface without divorce, you need to impose several layers. And best of all 3-4. Small defects of previous layers can be hidden if you apply a thicker subsequent layer.
Ceilings of the ceiling of water-level paint
In order not to mess with the preparation of the solution from lime and chalk, you can buy a ready-made water-emulsion paint and quickly cope with the task. What is good paint? It allows you to achieve uniform coloring the ceiling, as a result, the surface looks more beautiful. Just do not forget that the ceiling needs to be cleaned from the previous layer of blissing more thoroughly, otherwise the new layer of paint will fall not exactly and will peel.
The principle of application of water-disposal is the same as working with a solution of lime and chalk. First, the first layer is applied, and the second must be put perpendicular to the first. Then the divorces will not be as noticeable.
To get a smooth and beautiful ceiling, you need to put several layers, just wait until the first layer of paint will dry up.
What else do you need to know
The plains of the ceiling - the occupation is complex, you need to be patient and not lazy.
So that the process does not occupy a lot of time, it is important to take into account these recommendations:
- discuss in advance the number of materials, plus the value of the tools;
- while you need to close all the vents and doors so that there is no draft. In addition, it is necessary to close the blinds on the windows so that the sun's rays do not fall on the ceiling, otherwise the whitening can crumble;
- when you apply a layer of whitewash, make sure that the lime or chalk solution is distributed on the surface evenly without droplets and influx;
- observe safety equipment - work in a headdress, put on glasses and gloves.
How to whitewash the ceiling, you can learn from this video. Footage:


