
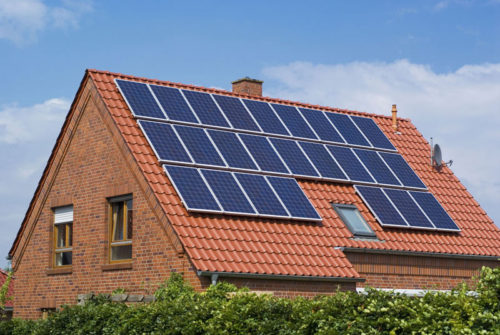
The arrangement of the modern private house is not without the use of auxiliary mechanisms. Heating boilers, water pumps, pool filtering systems - all of them were created to simplify the life of a person. Each system requires a large amount of energy, not to mention the lighting of residential premises and the local area. If you use a common power grid, then in the end at the end of the month you can get an impressive account for paying utilities. To save, you can equip the house using solar panels, while doing everything yourself. Initially, you will have to spend money, but subsequently you will see that the result is evident.
Content
Characteristics of solar panels for home
Initially, heliosystems were used in space technologies. With the development of progress, they were modified and improved, thanks to which they became widely available. To replace outdated panels that were used in calculators, high-tech photocells came with higher energy efficiency indicators. All solar panels contain special elements (two compounds of silicon plates), which play the role of a semiconductor.
Dignity of solar panels for home
The main benefits of solar cells include the following indicators:
- Light panels.
- Environmentally friendly battery functionality. Heliosystems are absolutely harmless to the external environment.
- Fast system maintenance. You will not spend a lot of time to care for batteries and the production system and the accumulation of electricity.
- Ease of installation. Supports of solar panels do not require additional cable laying.
- Silent. The design is fixed, thanks to which the noise level of the functioning system is reduced to zero.
- Long service life. With proper care, the batteries will serve dozens of years without needing to repair or replace.
- Saving. First, the purchase and installation of the helium system may seem the costly, but over time you will appreciate your choice.
Of course, its most economical is considered the most basic advantage of such a system. It is precisely because of this indicator, more and more owners of private houses choose helium systems that are required to ensure the structure of electricity, taking care of the preservation of your money.
Disadvantages of solar panels for home
If you are going to make a power generation system, using solar panels, it is important to pay attention to all the "minuses" of such a project. Although they are a bit, but they also have.

The disadvantages of energy saving batteries made using solar panels include the following:
- There are enough long and labor production process. To create such a system, a lot of time and patience will be required.
- The panels are afraid of dirt, which can reduce the properties of absorption of light rays, or to bring them away at all.
- In order to power the house of the large area, it is necessary to use bulky panels that will have a sufficiently large mass. Sometimes it is not possible to install such roof panels.
- The impermanence of functioning. Due to the fact that the weather is changed, and with the onset of the winter period, the amount of cloudy days only increases, solar batteries will not be able to constantly perform their task. The same applies to night time.
Method for installing solar panels for home
Each house has its own feature of the structure, so the place of the future placement of the solar battery is better to take care in advance. Sometimes it happens that this is impossible at all, then you need to find a place near the house.
By installing the solar battery, you can use the following ways:
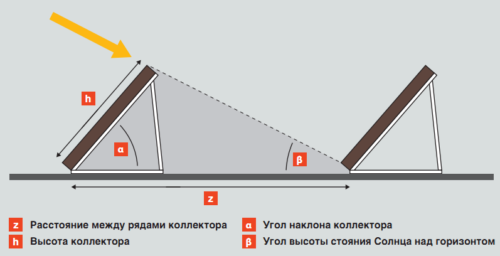
- Stationary. In this case, the panel is placed in such a way that the facial part is directed to the south. At the same time, it is necessary to put it so that the angle of the horizontal tilt and the latitude of the terrain coincided. In order for the panel to absorb solar light with maximum efficiency, another + 15 ° is added to the resulting value.
- Mobile. For this method, the installation of the solar battery is characterized by a special traverse. It turns the panel in the direction of the sun. The process is similar to the movement of sunflower heads during the day. Thus, the sun's rays fall into the panel at an angle of 90 °, increasing its efficiency. If you want to use this method, then note that you have to spend money on the traverse drive and the system of control.
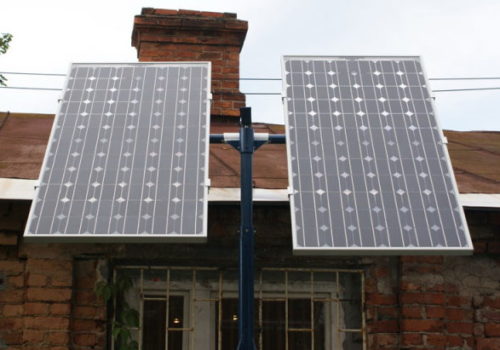


When choosing a way to install your battery, keep in mind the weather factors. It is important to pay attention to the amount of energy consumed. Sometimes it is better to install the panels on the traverse, and spend on this some amount, but subsequently the system will more effectively perform its task.
Features of the installation of solar panels for the house
Before starting the immediate assembly and installation of the helium system, it is better to consider all the nuances. They will help you avoid mistakes, then the system will work as efficiently as possible.

To mount the solar system in its own home adhere to the following rules:
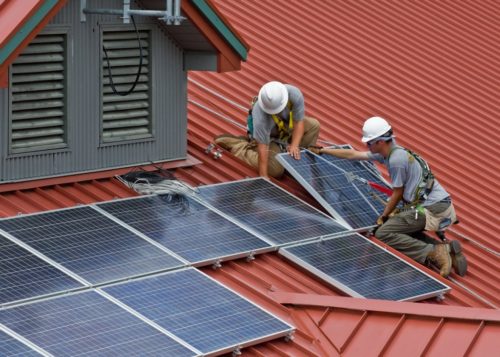
- choose a place on the roof of the house for which the sun's rays most often come. If it is impossible, then find such a place on the plot. Then the panels will need to be installed on the supports. Consider, even that there are no objects near the shadow on the solar panel;
- set the panel under the right degree. To find out the latitude in which your home is located, you can use the GPS navigator, or see the coordinates on the Internet, for example, in Yandex Maps. Do not be lazy to change the tilt of the panel during the year. Depending on the region, it can increase to 10 degrees in summer, and decrease to the same value in winter;
- always follow the cleanliness of the panels. If they are contaminated, or covered with a snowy crust in winter, they will not work. If the solar battery is high, then keep in mind that you should have access to it;
- in case you mount a lot of panels, make sure that they will not discard the shadow on one another.

Do not neglect the installation rules in order to avoid the loss of helium performance. If you want to achieve a battery of maximum efficiency, then pay attention to each above item separately.
Solar panels for home with their own hands. Step-by-step instruction
If you have gathered to assemble and mount the energy saving system, it is better to be fully armed. In theory it may seem that this process is quite simple and uncomplicated, but it is not. Heliosystem assembly may require some skills and knowledge used in electrical installations. In case you did not have experience with electricity, it is better to buy a ready-made kit and install yourself. In the extreme case, you can ask for a more competent person by providing him with all the necessary props and material.
Choosing the main components of the Heliosystem
The solar battery plays the role of just the primary converter, absorbing the energy of the sun. To make a workable savings and energy saving system at home, it is necessary to consider each component separately. This will help to better understand the principle of operation of the helium system, as well as other features of its functional.
Below, we give the composite elements of the helium system, using which you can collect the simplest version of this design, among which:
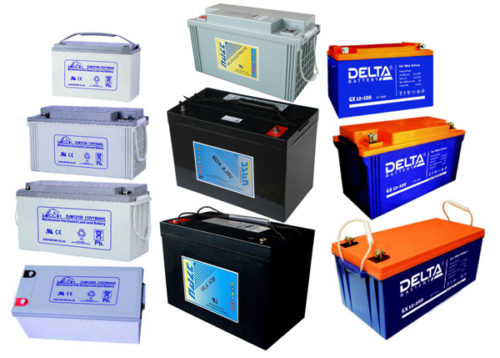
- Rechargeable battery (AKB). Plays the role of sun energy drive. It is believed to consumable, because it over time loses its saving properties. If you want to equip a small house, then you will need ankb with voltage at 12V. For the premises of a larger area, this parameter may increase to 24 V or 48V. Also when choosing a battery, pay attention to its container. What it is more, the longer the system works offline. Be sure to learn about the level of the self-discharge (than it is lower, the longer the AKB will last).
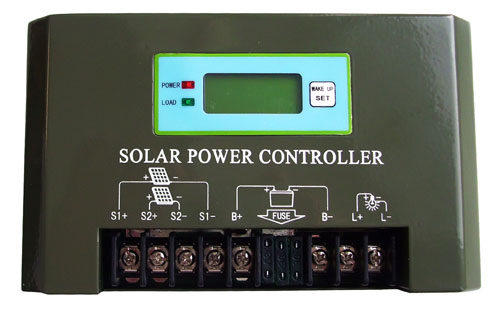
- Battery charging controller.This device is designed to control the battery capacity. It is usually represented in two versions: PWM (direct connection of the battery to the solar battery without voltage conversion) and nomm (used for systems with voltage above 28 V). If you have gathered to equip the cottage to come to come several times a month, it will be advisable to use the PWM controller. If you need a round-the-clock system of power generation, it is better to purchase a referral controller. It will be a bit more expensive, but will allow you to use more powerful heliosystems (more than 400 W).
- Voltage inverter. Converts constant voltage of AKB in 220 V. When choosing an inverter, be sure to ask about its power. It is also important that it has a function of built-in overload protection, as well as charge limiter. It is better to describe all the desired requirements consultant, then you will select the necessary device in accordance with the parameters of the helium system. Do not forget to report on the availability of household appliances with electric drive, such as a washing machine or fan.


Material and tool to create solar battery
In order to independently make a heliosystem, take everything you need in advance. Below will give a list of all components that will be needed to build a particular system element.
These include:
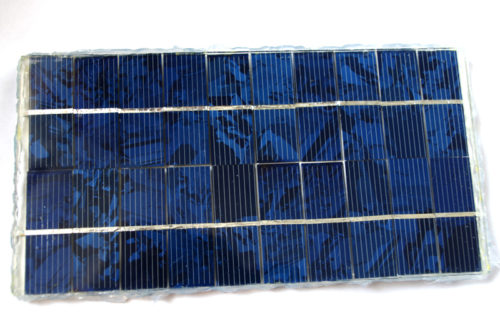
- photo cells from polycrystalline silicon for "absorption" of solar energy;
- aluminum corners for frame;
- plexiglas, transparent polycarbonate or walled glass for the protective layer;
- a set of conductors for connecting photocells;
- soldering iron, rosin, tin or silver;
- fastening elements, construction knife;
- multimeter, drill, rolled, Skotke diodes;
- vacuum stands.
Useful advice: for future design, it is better to buy composite parts of one company. Such a scheme will be more reliable than collected from different components.
How to make a solar battery do it yourself
If you are going to create a charge controller and a solar panel for heliosystem with your own hands, then it is better to immediately buy everything you need. Occasionally, you can find a sunny battery collected from the primary means personally. In this question, you need to have some knowledge of the assembly of electrical appliances, and also good to use the soldering iron.
To independently make a solar battery, you must follow the following instruction, acting in this case:
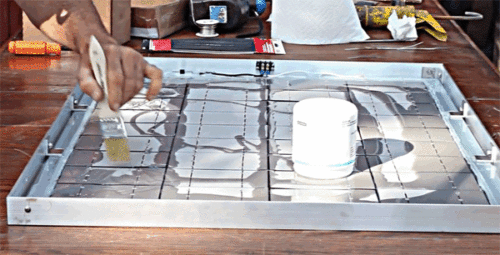
- To create a frame for photocells, it is best to suit a tree or solid plastic. The use of other materials is unacceptable for considerations of safety regulations. As the basis, moisture-resistant plywood with a thickness of at least 4 mm is suitable. The size of the frame depends on the number of photocells. As a protective side, it is good to use the rail from a wooden array that should be previously treated. It should pass around the perimeter of each photocell. At the heart, drill holes for contacts, after which it is processed by bitumen.
- Special protective agents are applied to the resulting form, after which they are so ground, paint and leave to dry. It is best to use the facade paint of white color without an acrylic content.
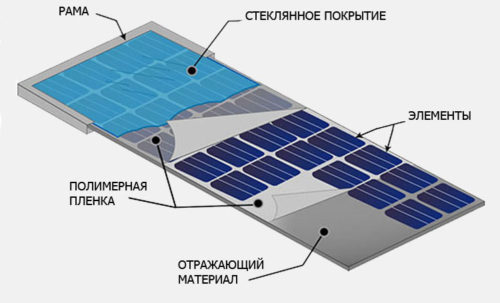
- Fix converting blocks on glue or special latches. We connect all contacts in accordance with the provided scheme. Use solder with a large tin content of either silver. For fixation, the gas soldering iron is also perfect.
- On top of the photocells install the protective cover of the plexigla. To do this, we advise you to purchase molecular glue in advance. Glass must cover the entire surface of the panel completely. All slots are sealed with bitumen or atmospheric-resistant silicone.

Having done everything consistently, you will get a reliable durable battery for converting sunlight. Be sure to take away all the cracks to avoid moisture in them. Observe the pole when connecting the contacts.
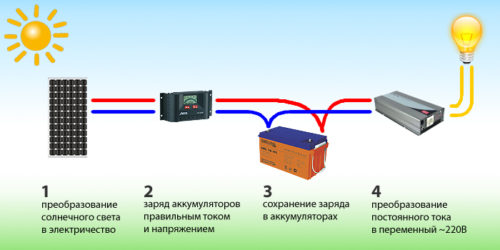
Solar Battery Connection Scheme for Home
The final stage of the installation of the solar battery, manufactured personally, remains.

To do everything right, use the following algorithm:
- The charge controller is connected to the battery using an output terminal.
- Connect the battery. Be sure to observe the same pole (plus to the plus, minus to minus). Otherwise, the battery is simply the battery of the battery.
- Let's supply the battery from the battery, placing the conductors to the input terminals of the inverter.
- Now you can enable the controller with the inverter. Electricity will start charging the battery.
As you can see, assemble and mount this design is possible if you adhere to the correct sequence of actions. Use high-quality materials to assemble heliosystems, then you will receive a durable design that will save you a round sum of money. There are also solar panels that are collected by hand from transistors. For us, the above-described option remains acceptable.


