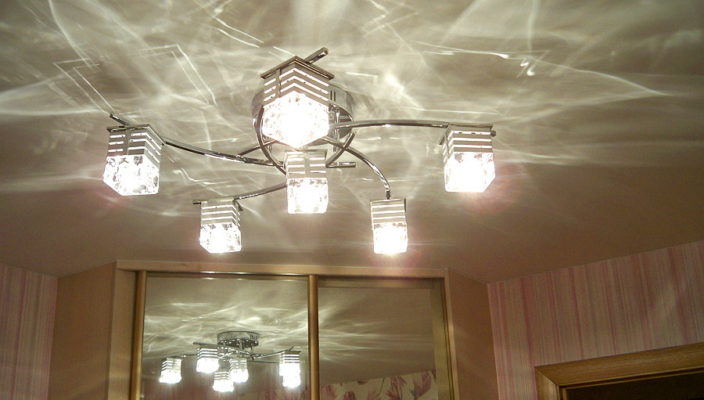
The chandelier is an important element of any interior of the room. During repair work, many are faced with a problem associated with its installation. You can perform this work in several ways, it all depends on the type of chandelier design.
Content
- Methods for fastening chandeliers on the ceiling
- Installation chandelier on the ceiling. Types of ceiling chandeliers
- Tools for setting chandeliers on the ceiling
- Installation of the ceiling chandelier of classic type
- Installation of the ceiling chandelier with your own hands
- Ceiling chandelier installation scheme
- Installation chandelier on the ceiling: video
Methods for fastening chandeliers on the ceiling
- Basically hang chandeliers with a large mass that are not able to withstand drywall structures. For them, its type of fixation is provided. Accordingly, another method is used for other products.
- The chandelier can be suspended with the ceiling in two ways:
- using the ceiling hook;
- on the bar, which is fixed directly on the ceiling.
- In the first case, the mount is carried out like this:
- a hole is done in the ceiling, the diameter of which coincides with the diameter of the hook;
- anchor is inserted into the hole;
- anchor tightened into the hole.
- Anchor hooks are rarely applied. Their installation is carried out very simply, no disassembly is required. Basically, this mount is used if the weight of the product is from 5 kg.
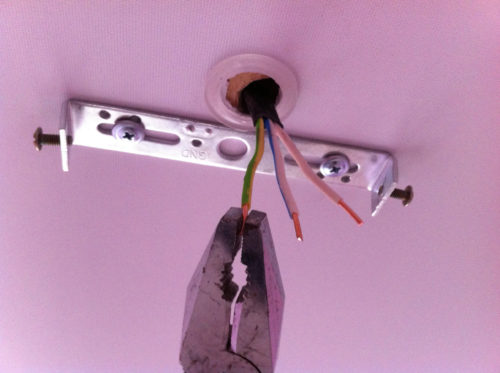
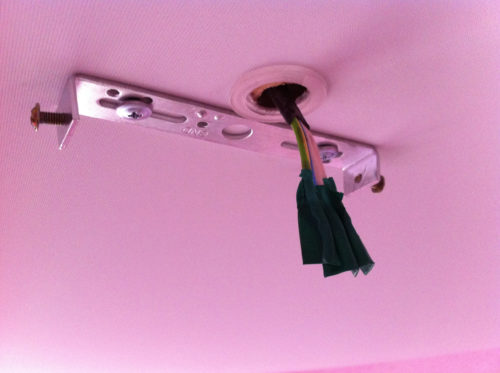
- The second fastening option today is used more often than the first. The essence lies in fixing the chandelier on the bar with the help of screws. There are two categories of such slats:
- standard: This group includes conventional direct single slats;
- cross-shaped: This category includes structures consisting of two direct slats, crossed together.
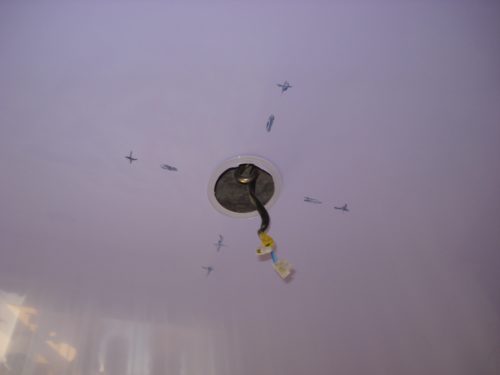
- Installation of the plank is carried out a little more complicated than the hook. It will depend on the size of the bar and its fastening site. Therefore, before starting work on creating holes, you need to note the places of their location as you as possible with the help of a pencil. To do this, it is enough to attach a design to the ceiling surface and outline the place of the future mount.
- After that, you need a perforator to do the holes at the outlined points. In these holes, then you need to insert a dowel. Fastening the plank is carried out using self-use.
Installation chandelier on the ceiling. Types of ceiling chandeliers
- Chandeliers fastened to the surface of the ceiling are divided into two categories, depending on the type of fastening:
- classic;
- ceiling.
- Classic chandeliers are attached to the hooks, and the ceiling - on the planks. In the first case, a hook is installed, a special suspension is performed in the form of a tube or chain, and the chandelier itself is hanging onto the suspension. The suspension length can be different, respectively, the height of the structure may vary.
- Such chandeliers may have more than one tier, which allows you to evenly distribute light within the room. But this type of construction has a disadvantage: such chandeliers are mostly very cumbersome, so they take a lot of space. Because of this, they are not suitable for each room, they can only be used in spacious rooms. It is also not recommended to use them in low ceilings.
- The second type of construction, on the contrary, is most suitable for small rooms with low ceilings. Such chandeliers are attached to the planks directly to the ceiling, do not have suspensions, therefore they do not occupy a lot of space. Mirror reflectors can be installed to enhance the illumination that contribute to the distribution of light. Such chandeliers most often have a view of the plates in which light sources are mounted or plaffones are outlined.
Tools for setting chandeliers on the ceiling
After the type of chandelier is installed, you need to make a selection of tools that are needed for installation:
- screwdriver;
- voltage indicator;
- perforator;
- nippers;
- ladder;
- mounting unit;
- passatia;
- insulating tape.
Installation of the ceiling chandelier of classic type
- Installation of this design must be started from the hook selection. It should be durable. Start mount a hook. For this:
- with the help of the perforator, it is necessary to make a hole in the ceiling, not far from the location of the wires elongated from it;
- in the well-done hole, set the hook to the anchor system;
- create two levels of the insulating layer;
- if the instructions for the chandelier there is a mark about what should be grounding, it must be connected.
- After that, you can proceed to the preparation of wires:
- the circuit breaker in the meter in the entrance must be turned off;
- check, the voltage must be completely absent on the network. You can do this using a special indicator. It must be applied to each of the three wires. If there is a voltage, the device will glow red. Phase wiring are equipped with black or brown insulation, zero - blue;
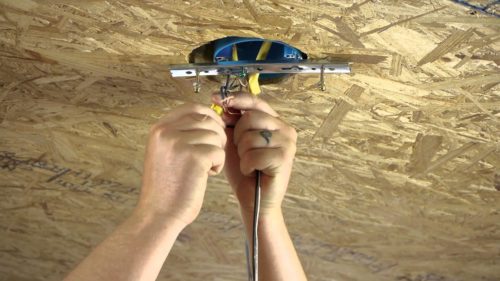
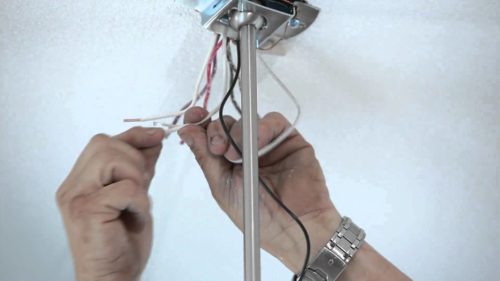
- find two phase and one zero wiring. They are connected to the double type switch. A zero wire is attached to the mounting box, and the other remains - to the switch;
- all three wires need to be cleaned from the layer of insulation on the 4th mm, not more. To avoid closures, spread them to the sides;
- find the same wires in the chandelier. They are in the box. When isolation is not marked, determine the wires using the indicator;
- in order of queue, start turning on the wires of the product into the socket. It is impossible to touch the remaining time. As soon as half of the bulbs turn around, remove one of them and replace it on the third. Must start shining the rest of the lamps. As a result, it should be possible: one wire is always in the outlet, and the rest when connected in the order of the queue ignite a certain part of the bulbs. The wire that does not change its position will be zero.
- Please note: connect to the electrical network is allowed only when the wires were de-energized.
- Start the suspension of the design itself:
- on the mounted hook, suspend the design;
- connect both zero wires on both sides;
- these manipulations need to be carried out with the remaining wires.
- Please note: under no circumstances can be interconnected if they are based on different types of metal. If the corresponding wires are made of different material, then you need to use a block. On both sides of the wires will be attached to it using screws, voltage when connected will pass through the terminals, which will avoid direct contact between the wires.
- Check out the product. Its inclusion should occur without problems, the sparks should not arise. If everything is fine, then the cap can be tightened near the base.
Installation of the ceiling chandelier with your own hands
The installation of this type of chandelier is carried out a little different. Separately buy mounting planks and fasteners are not necessary - they must be complete with the chandelier itself. Consider the sequence of work.
- Turn off the automatically switch located in the entrance.
- Make sure the network has been de-energized, use the voltage indicator for this.
- Start performing work from the location of the future chandelier. Make sure that the decorative part of the design will completely hide the place where the fastening is made, and the wires. The adjacent design to the surface of the ceiling must be dense, without any gaps. Planning placement should not create any interference.
- Please note: if there is a hook from the old chandelier, it is not necessary to cut it. Just adjust it to the ceiling so that it does not interfere with installing a new design.
- Next, it is necessary using a drill to do holes in the surface of the ceiling, which will be inserted by a dowel.
- With the help of screws, attach the bar to the surface of the ceiling.
- Before the direct fastening of the chandelier, you need to combine the appropriate wires of the energy system of the house and electric power supply. When moving to this stage of work, make sure that the home wiring was really de-energized.
- If the switch is classified, then the wiring should consist of 2-3 wires. One of them is zero, others - phase and ground wire. The last of them may not be.
- Determine each of the wires. If there is no label, use the voltage indicator.
- Connect the corresponding wires with each other through the terminals.
- If the switch is two-block, then the wiring must be two-phase wires.
- After the completion of these works, you can go to the last step - the luster fix. To the mounting bar, cement the decorative part of the structure, so that the connecting holes are compared. Make a decorative type nut holes. Thus, the lighting device is finally attached to the surface of the ceiling.
- Take up the installation of lamps, plafimons, etc.
- Turn on the current and check the operation of the light bulbs.
How to mount chandelier if the ceiling is made of drywall
- In the case where the chandelier is attached to a drywall ceiling, the mount should be carried out using a collet stud. Its installation occurs just as an anchor. But it has a slightly different design, which helps to make the area of \u200b\u200bthe load on the drywall surface larger.
- Too heavy chandeliers are mounted on the hooks, which are attached on the concrete part of the ceiling. To do this, in the plasterboard layer you need to make a hole. At the same time, the hook should be located so that its edge extends from the hole to a sufficient distance to fix the device.
- Light chandeliers are better attached to mounting planks. At the same time, the plank is attached directly to the ceiling by dowels.
How to install a chandelier for stretch ceilings
- In this case, heavy structures are hanging on the hooks that are mounted in a concrete ceiling. To preserve the integrity of the stretch design, the ring of plastic is glued to the displacement of the hook.
- Light chandeliers are mounted using slats installed on the bar. This item must be firmly fixed on the main ceiling.
Ceiling chandelier installation scheme
- In the network, you can view examples of the chandeliers of the chandelier to the ceiling. They are based on the same principle. Some differences also exist, but they depend on the type of chandelier.
- If the design is fixed on the ceiling on the mounting bar, the product on the diagram will be depicted attached to the plank fixed on the ceiling by screws.
- Otherwise, the construction of the design to the hook, fixed on an anchor, which is located in the ceiling hole can be depicted in detail.
- Before starting work, it is better to get acquainted with the schemes so that no extra questions arose.
Recommendations for installation chandeliers on the ceiling
In the process of setting the chandelier, you need to perform the following sequence of actions.
- Observe all safety regulations.
- Be sure to turn off the electrical energy on the network.
- Check the wire voltage indicator.
- When connecting the wires, it is not recommended to use a twist method with subsequent insulation. This method is very unnecessary, it may later have problems. The best option is to use terminal blocks.
- Disconnect all elements from the design that can be easily damaged during the installation process. The same applies to all decorative details.
- Each of the connected contacts must be very good insulated. Otherwise, a short circuit can happen.
- Grounding electrical wiring must be performed efficiently.
- It is not recommended to buy cheap products of low quality, because They break very quickly, quite often fail.
- When the chandelier is attached to the concrete ceiling to fasten the design, it is best to use anchors.
Installation chandelier on the ceiling: video
Today in the network you can find a lot of video instructions for installing chandeliers. They will have an indispensable assistance in the design process of construction. Combining theoretical knowledge with visual viewing of the installation sequence will help prevent the emergence of many problems that often arise from people who are involved in mounted chandeliers. The rollers will help to install better and without any questions.

