Recently, the laminate is increasingly used to finish the walls and the ceiling, which allows the room to look very original. But most recently, this material was used only as an outdoor coating.
Content
- Laying of laminate on the ceiling. Laminate composition
- Tools for mounting laminate on the ceiling
- How to make a batter for laying a laminate on the ceiling yourself
- How to prepare the ceiling to laying laminate
- How can I put laminate on the ceiling, walls and gender
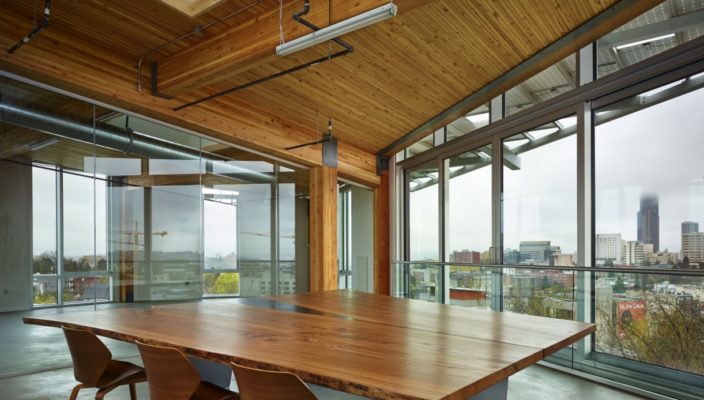
- Laminate ceiling: Original ideas in the interior
Laying of laminate on the ceiling. Laminate composition
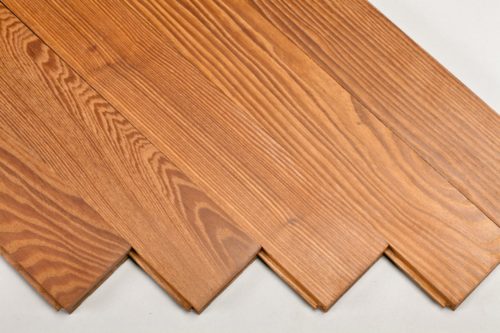
- On the base of laminate from DVP, chipboard or MDF fix the paper layer with a pattern, often imitating noble breeds, natural stone or ceramic tiles. The pattern is covered with an acrylic or melamine layer. This composition is characteristic of the cheapest coating material. For laying on the ceiling, light-colored laminate is often chosen.
- For better samples before laying the protective layer using the shaped rolls form a laminate texture. This type of material is not very suitable for the floor, since the rough surface is rapidly contaminated over time. But it will decorate the walls and ceilings well, creating a natural tree effect.
- The lower layer of laminate is made of special paper, which is impregnated with water-repellent substance. He not only delays moisture, but also makes the material more durable.
- The edges of the laminate panels can have a tongue lock. It is a longitudinal comb and a groove. For more reliable laying on the ceiling, the material is suitable with a lock, but you can neatly put a simple laminate, since no one hooked it on the ceiling.
Advantages and disadvantages of laminate on the ceiling
- Laminate is distinguished by its practicality. He has proven itself well both on the floor and on the walls or on the ceiling. But there are some restrictions that you need to know when choosing a ceiling.
- Advantages of laminate on the ceiling:
- does not create dust;
- easy to install;
- insulated and soundproofing effect;
- there are no conditions for the appearance of condensate in lattice voids;
- a large selection of textures and drawings of laminate;
- not withering in care. Just enough sometimes wipe it from dust;
- resistant to ignition.
- Disadvantages of laminate on the ceiling:
- the material is afraid of high humidity, so it is not worth putting it in the bathrooms, saunas and indoors without heating;
- before laying a laminate, you need to perform waterproofing the ceiling;
- the use of toxic resins in the production of laminate. Toxic evaporations are completely weathered in a month of regular ventilation;
- the need to align the ceiling before laying laminate;
- the need to install furring.
How to choose laminate ceiling
It is important to remember a few guidelines to help you choose the right material for finishing the ceiling laminate.
- Do not be too picky to the protective layer of the laminate. On the ceiling it will not be subjected to strain, so it is enough decorative qualities. In addition, you can choose cheaper.
- Choose lightweight panels of small thickness.
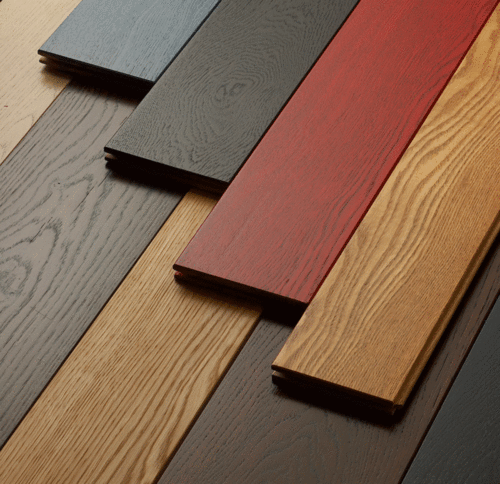
- Carefully take the color. All types of premises are well suited by light laminate under the white oak, the Arctic tree, Karelian birch. Dark shades should not choose for small rooms, but they will look original in spacious halls. This design is effectively looking in large rooms of catering, living rooms and through halls.
- If the laminate is laid not only on the ceiling, but also on the floor or wall, you can experiment with different shades. Monochrome laminate in this case will not look harmonious.
- The smaller the junctions on the ceiling, the aesthetically coverage will look like. Therefore, select the panel length, based on the size of the room. For example, for a room with an area of \u200b\u200b2x6 m, the optimal will be the choice of laminate boards with a length of 1.5 m. In this case, the ceiling will be only 1 junction.
Tools for mounting laminate on the ceiling
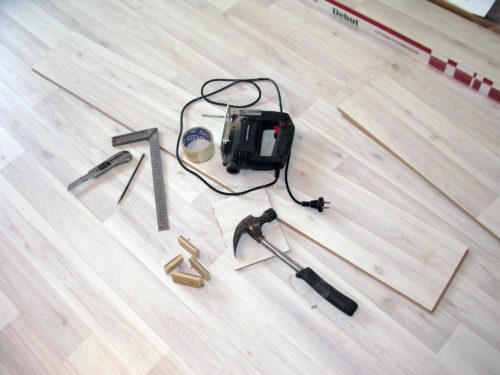
To prepare material and work surface for laying, you must have a minimum set of tools:
- electrolovka for trimming panels and additional sawdills;
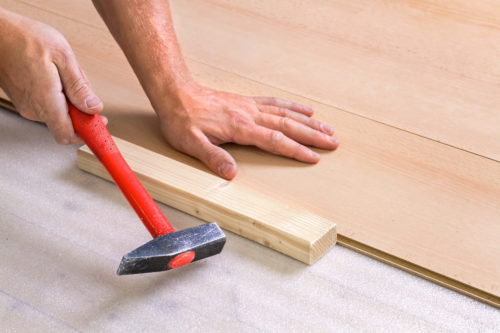
- hammer, with which you have to customize the plates;
- ruler and square;
- roulette;
- pencil for marks;
- limiting wedges;
- bracket for fitting panels;
- callorez;
- perforator;
- drill.
How to make a batter for laying a laminate on the ceiling yourself
- Sewing the ceiling with laminate is very convenient with a special hammer. It will come in handy for deep riding small nails. It can be made independently from Kerner, which is in any locksmith, or a metal rod with a diameter of up to 8 mm.
- One end of the rod with the help of the emery circle is sharpened to a truncated cone with a plane of up to 4 mm. After that, in a tree bar makes the appropriate recess. It should accurately repeat the dimensions of the processed end of the rod so that the item is firmly fixed and did not hang out. Well, if you secured the workpiece on the rod with the help of a hammer.
- We connect the harvesting and the end of the rod with a brine. Then in the center of the booze, we turn the place where we will drill. Then, with a drill or drill of small power, we make a neat recess under the top of the nail.
- With the help of this tool, you can adjust the promotion of the nail and fixing it in such a way that it is almost impaired.
- Laying the laminate on the ceiling on its own with the help of a booze is even easier than with a drill or a screwdriver, since its weight is much smaller, and all work is done above the head.
How to prepare the ceiling to laying laminate
- For reliable laying of laminate, it is better to get rid of the layer of plaster. And if it is more than 6 mm in thickness, and even has an uneven surface, then it is necessary to remove this layer.
- Then you need to calculate the shaft step, focusing on the size of the laminate panels, and the size of the rail. The lattices racks must have a thickness of more than 15 mm, and width of 30 mm, and pass on the joints of the panels.
- Squares of the crates should not be greater than 50x50 cm. Instead of squares, you can make rectangular cells of the crates. On the perimeter of the ceiling you need to lay a ray with a width of at least 5 cm.
- If the wires in the concrete ceiling are between the stoves, you do not need to change anything. If the wiring was in the plaster, and after removing this layer it became open, it is necessary to cover the plastic boxes or fix each 12 cm by a small amount of silicone.
- Now we turn to the markup on the ceiling of the place of laying the label with a pencil and drilling holes for mounting nails. Lags are one-piece parts of the crate, must have a length from 40 to 60 cm. Those elements of the crates that will go across, it will be necessary to nail with nails for 4 cm from the edge.
- The length of the nail must correspond to the formula: 3 cm + rack thickness. Holes for nails should be approached under the dimensions of plastic sockets. It is necessary that their depth to be equal to the length of the socket with the addition of up to 1 cm on the folding particles.
- For holes in a concrete ceiling that you have to make a perforator, you need to take the drill bit with a diameter of 1 mm less than the size of the socket. To be confident in a suitable result, you need to make a test hole at a rapid place and insert a nest into it.
- Due to the fact that the concrete can be completely different quality, the size of the bit will have to be selected, taking into account the features of the crumb.
- The joints of the laminative panels often decorated with bars of wood, similar to ceiling beams. If you will use boxes with emptiness as beams, you can put wiring and attach lighting devices.
Laying crates for laminate on the ceiling
- First to be put in lags. We press the rail to the line with the prepared holes and mark the place of attachment on the rail. Then rake omit and make holes in it for nails.
- Nails are scored on the rack thickness and raise it. We apply it to the ceiling and drive a nail until it stops. Do not try to drill or score a nail on weight, it is very tiring, and there is a high probability of error. Similarly, nail the transverse elements of the crate.
Laying of laminate on the ceiling on the crate
- Laminate panels are laid, retreating 2 cm from the edge of the ceiling. This is done in order to swallowing from dampness material not collapsed the ceiling. Fixing the laminate on the ceiling can be performed in different ways. If the tipped material, then you can use the adhesive, or small nails placed by the neglection in the tongue groove.
- Before installing the laminate panel, lubricate the clamp elements with special glue on wood with wood sawdust. Also wake the seams if you do not install beams. Carefully compare the shades of glue and laminate before buying.
- We start laying the laminate from the far corner of the room. Adhere to the retreat from the wall 2 cm throughout the ceiling perimeter. After laying the laminate, we establish ceiling plinths that hide the gaps between the trim and the walls.
- A good advocate in the installation of laminate on the ceiling is the Internet and interested in such a finish of users who have posted a lot of video clips to the network.
Laying of laminate on the ceiling with glue
- If the ceilings have a perfectly smooth surface, then you can lay a laminate on the adhesive base. To prepare the ceiling you need to perform the following actions:
- we apply several layers of putty;
- each layer must dry completely;
- the last layer is sanding with sandpaper;
- apply a layer of primer.
- After that, you can glue the laminate. To do this, we apply glue to a small ceiling area and a laminate panel, then press the board and hold as much as indicated in the glue instructions, usually about 20 minutes. Pre-prepare the backups that will support the panels on the ceiling.
- Carefully read the adhesive instruction. It is possible to use the respirator and protective equipment for work.
How can I put laminate on the ceiling, walls and gender
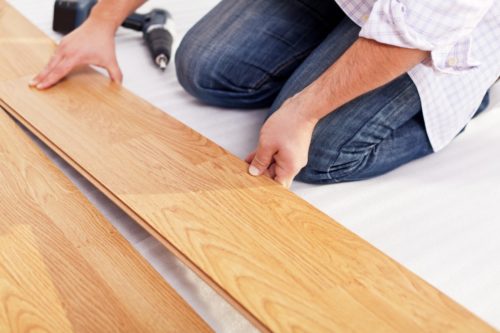
Both on the floor and on the ceiling laminate can be laid in several ways. This is a straight laying, diagonal and styling in the form of a Christmas tree.
Straight laminate laying
- This is the easiest type of laying, which is most suitable for newcomers. It is necessary to lay the plates of laminate from the door in parallel with the windows with light rays. In this case, the light will hide the seams between the panels of the laminate, and the surface will look perfectly smooth.
- Laying panels across the light rays visually pulls out the room in the direction of installation. This quality can visually expand the corridor or hallway.
Laminate diagonal laying
Laying the laminate on the ceiling diagonally also visually makes the room wider. This method looks very effectively, but it is considered uneconomically and is available only to professionals.
Laying of laminate "Christmas tree"
This pattern on the ceiling can be reproduced only when the laminate is selected with specific locks. Such material is still needed. Due to the special design of the panel, the angle of 90 degrees is connected.
Laminate ceiling: Original ideas in the interior
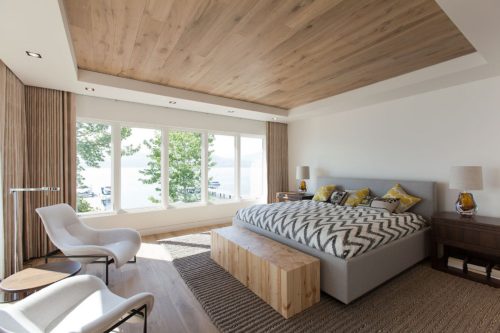
- Laminate on the ceiling is not yet very common in the interiors of the apartments. This allows you to create an original design in the bedroom, living room, in the kitchen or attic.
- The minimalist style in the interior will perfectly complement the cloth from the laminate on the ceiling. It will also be great to look at this material above your head, if the room is decorated in Japanese style. The classic style of the room is no less successfully echoes the ceiling decorated under the tree.
- Not necessarily in the design of the room the entire ceiling to wash the laminate. It is enough to make a separate small fragment, lay out the panels around the chandelier, make the transition of the material from the wall on the ceiling.
- Thus, it is possible to very effectively allocate the room zone, for example, the working part of the kitchen, a dining area, a sleeping area.
- Glossy and dark shades of laminate under the tree are attached to the room of respectability, and the old barn board will help reproduce the rustic style.
- If you are afraid that low ceilings after laying the laminate will be even lower, it is best to arrange with this material only a small part of the surface. Such an appointment on the contrary will help blur the limited space and visually add space to the space.
I would like to believe that you were convinced that the laminate on the ceiling is very appropriate and looks great. Therefore, look for suitable ideas on laying a laminate above your head and boldly embody your ideas.

