
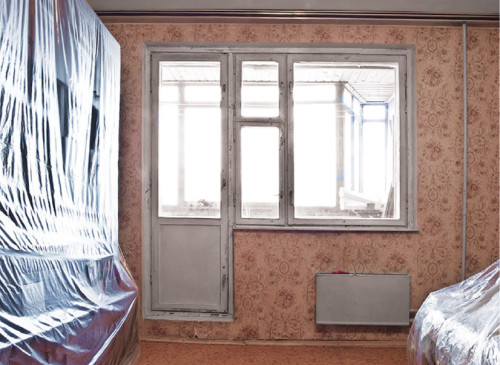
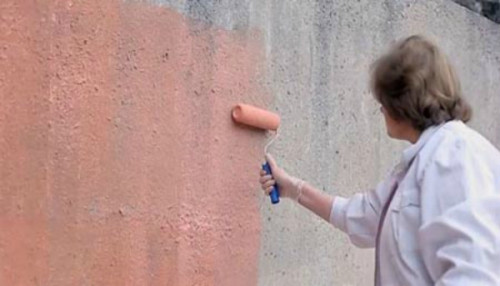
Before you decide on the choice of wallpapers for your apartment, it is important to properly prepare the surface. To change the "Dedovsky" method of aligning the surface of the wall with the help of newspapers, more modern options came, designed to prepare a concrete base quickly and as much as possible. The rough and uneven base can spoil the workflow, and even even the most expensive and beautiful wallpapers will not look at your wall, but only spoil the interior of the room. Further lifetime of wallpaper directly depends on how qualitatively work will be performed at the preparatory stage. A faithful solution will be the preparation of concrete or any other wall with their own hands. The work performed by the personally, will be excellent experience, besides, will not require additional costs.
Content
Preliminary preparation of concrete walls under the wallpaper
Getting Started to prepare concrete walls, it is important to remove all the garbage and dirt from the surface. In addition, if you started shook wallpapers in the old apartment, then dismantling the old paint or tile can not be avoided. To achieve high-quality sticking wallpaper, it is necessary to first prepare.

Tools and materials
Preliminary preparation is very important, since it is from her that the quality of further work depends.

For the convenience of performing preparatory work at the preliminary stage, it is necessary to acquire the following tools and materials:
- perforator, Bulgarian, spatula, hammer, ax;
- capacity for water, paint brush, knife, gun for sealant, reinforcing tape;
- protective film, construction bags, gloves, glasses, respirator, overalls.

Properly selected tools and materials will make disassembly and other works related to the preparation of concrete walls under the wallpaper.
Preparatory work
To protect the interior items, which may be damaged while dismantling, it is better to immediately prepare everything as it should. Try to free the work space to the maximum. Remove tables and chairs, drag the sofa or bed to the next room. In the case when the household items do not seem possible, use the construction film and other infrident means. Old slices of fabric Cover electrical appliances and other interior items. This will protect the coating from small chips that may appear due to pieces of concrete. The floor is made with a film and lock the painting scotch.
Dismantling of the old coating.
Before aligning the surface, first of all it is necessary to get rid of the old coating. The adhesive of new wallpapers on top of the old will become the fastest way, but note that the quality of the finishes will be at the lowest level.

Consider the ways to dismantle the old coating on the example of the following surfaces:
- Paint (To remove one or more layers of old dried paint from the wall surface, it is better to immediately get a necessary tool. To remove the paint already peeling, use the spatula, which can be pre-sharpened with the help of a grinder and grinding disk. Update dried pars in paint in such a way as if You turn the cutlet in a frying pan. Only do it stands with greater intensity and frequency, otherwise this stage will delay for a long time).
Use an ax for removing hard paint to remove paint. Make small notches at a short distance from each other. Do not be afraid to damage the concrete surface, or knock down the previous plaster. Do not forget about safety regulations. With dismantling work of any kind, you always use protective elements of clothing.

- Wallpaper (often represents a few glued layers of wallpaper and newspapers. This happens when the surface is not prepared, but simply glue the new wallpaper on top of the old).
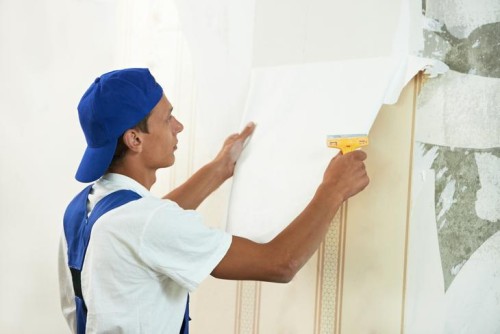
Often, remove the thick layer of wallpaper, which almost tightly entered the surface is quite difficult. But there is one small trick that will help make dismantling work quickly and easily. To do this, it is necessary to do as follows: Part of the wallpaper that you want to remove, to rush. Use a flywheel brush or sponge that will allow water to penetrate all the layers of old wallpaper. Give the old dried glue to spill, which will allow in the future with the easiest to remove several layers at once. In this case, you can take advantage of the same sharpened spatula or special scraper, which can be purchased at any construction store.

- The tile (to prevent the future wallpaper can also be plated, such as: tile, marble or decorative stone. All of them have a similar method of laying, so they are dismantled equally).
The tile is attached to a concrete base by means of adhesive connection. Special glue mix, after hardened, holds the tile on the surface of the concrete wall. To remove the tile and prepare the wall under the wallpaper, it is necessary to knock down the desired area using the perforator and the nozzle "blade". Start the tile in the suture connections. This will help to avoid small fragments, due to which the tile will fall off entirely.
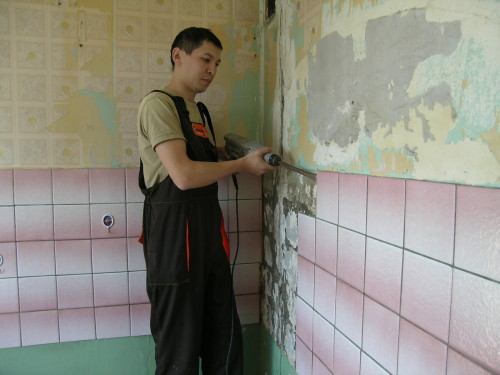
Work in compliance with safety. Use special shoes that protect the legs from heavy slaughter slabs. The remnants of the adhesive to the surface of the glue can be removed using an ax or hammer.

Pay dismantling work at this stage special attention. The thoroughly you clean the surface, the better the next stage will pass. Do not forget about the use of protective clothing during dismantling work.
Seeling cracks
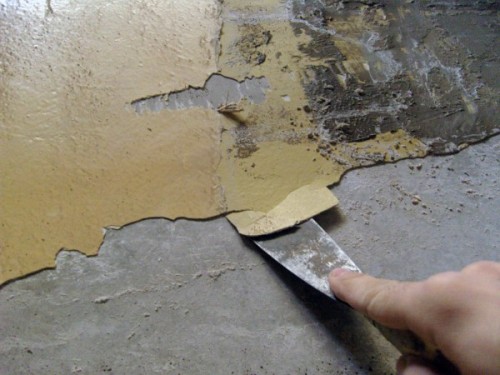
Due to the uneven precipitation of old buildings, cracks and chips can appear on the surface of the walls. Their size directly depends on the level of precipitation. Cracks are better to immediately close, because with the further sediment of the building, they can increase both in length and width.

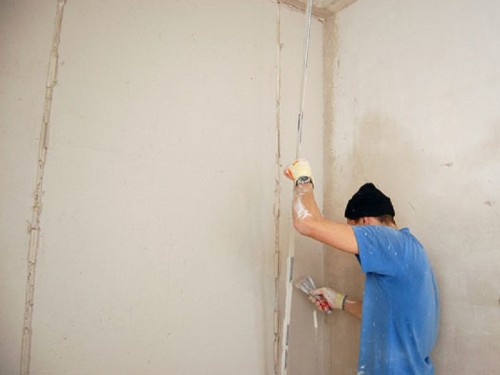
In order to close the cracks of a small depth, use a special sealant. It completely fills the gap. After the sealant completely curses, it reliably fixes the concrete wall, without giving the crack to spread.
For deeper slots, it is better to use a plastering solution. To do this, impose the required number of plaster, and with a spatula, consistently fill in a crack with a solution. Place a piece of the reinforcing mesh on top of the exhaust crack and wake the solution again. The final strength of the sealing of the crack will be achieved after complete drying.
Alignment of concrete surface
Any master knows that a properly prepared foundation for wallpaper is 50% of the success of the goal. When the concrete surface is smooth and does not contain cracks and roughness, then the blending of the wallpaper becomes pleasure. The work will pass quickly if you adhere to the rules and technologies that will allow to align the surface of the concrete wall qualitatively.

Plaster
In order to prepare a surface under vinyl, paper or fliesline wallpapers, first of all you need to apply the starting layer of plaster. It will allow rudely to align the foundation for future wallpaper.

To plaster a concrete wall, you must make the following actions:
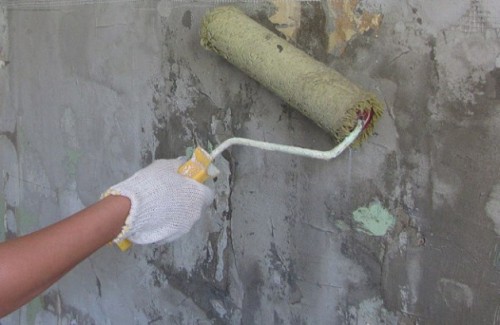
- Load the wall by concrete contact. This will give an additional roughness of the base, and will make it possible to achieve uniformity of the surface.
- Source the surface of the wall of a special soil-paint. Evenly roll the primer along the wall. This can be done using a special roller. These actions will allow to achieve better adhesion, which will allow plaster thoroughly gaining a wall on the wall surface.
- Evaluate possible height differences to identify problem areas. Explicitly discovering bugs easier to knock down with a perforator. The recesses are further closed with a solution.
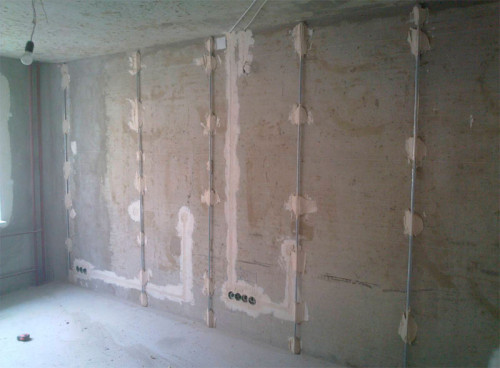
- In a vertical position, install plaster beacons using a conventional cement-sand or plaster solution. Note that they should be located at such a distance from each other so that in the future you have been convenient to work as a rule. Do not forget that they must be mounted in the same plane. To do this, apply along the lighthouse at first the rule, and then the level. If the beacon dips - carefully pick it up if it lacks height - add a solution.
- When the beacons are in the same plane, and the solution was removed, it's time to start the primary plaster base. At this stage, you can immediately let the floor of the solution in a large container. After reaching the desired density, arm with a spatula or bucket, and begin to "throw out" the wall. Move from top to bottom, gradually removing the excess layer of plaster with the help of the rule. Consistently move from one section to another. After the solution completely filled all empties, let him dry, but not completely.
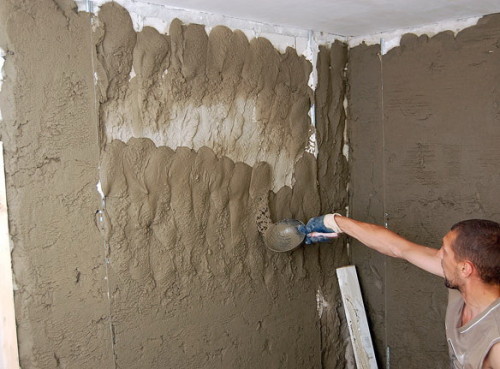
- Now arm yourself with foam or polyurethane semi-port average size. Begin to rub the primary layer with circular motions. This is necessary to remove the coarse hardened parts of the plaster and seal the air cavities in the solution to achieve greater smoothness of the base.
- Carefully remove lighthouses. If you leave them in the surface of the wall, then over time they rust. Rust will begin to penetrate the surface of the wallpaper, which will significantly worsen their appearance, thereby spoiling the interior of your room.
- Trenches, which remained after dismantling lighthouses, close the repair solution. Use a spatula for this.


Take advantage of the work related to the application of the primary plastering layer with all seriousness. To achieve the best results, use concrete contact and penetrating primer. When the primary layer of plaster is applied, you can proceed to the next step.
Shplanke
To better understand the question related to the putty concrete walls under the wallpaper, pay attention to minor nuances that will arise in the process of work. Properly performed actions at this stage will allow to simplify the process of sticking.

In order to apply the finishing layer necessary to prepare a concrete base under the wallpaper, are applied as follows:
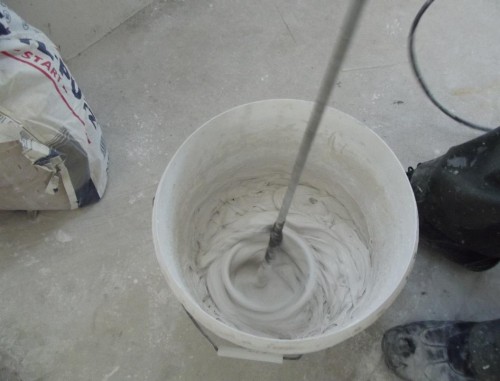
- Mix the shp can in a small container. Please note that the shplanke solidens much faster than primary plaster. It is better to mix a small amount of solution to avoid premature drying and overpowering the material. You can also take advantage of the finished shtquils on an acrylic basis. They cost much more expensive, but have less consumption and best indicators, unlike dry mixtures. Many plasters professionals argue that it is much more convenient to work with ready-made splocks and faster because it is not necessary to spend time on constant knees.
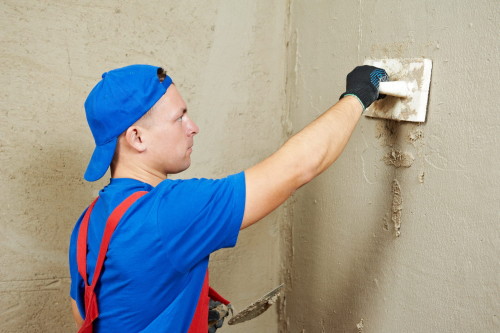
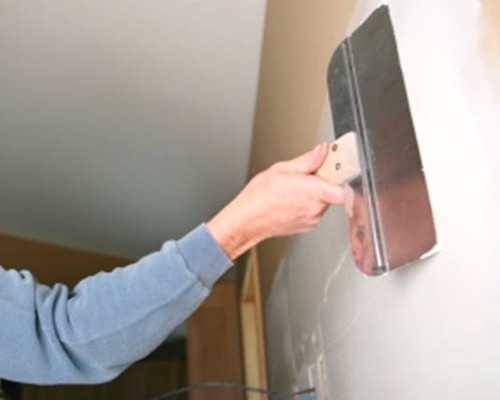
- Using a wide spatula in a pair with a small, start to apply the shplanie on the wall. Cress the spatula with an edge at a low angle, gradually smoothing the solution on the surface of the base. Give the solvent to dry.
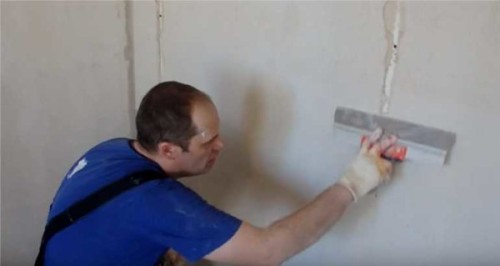
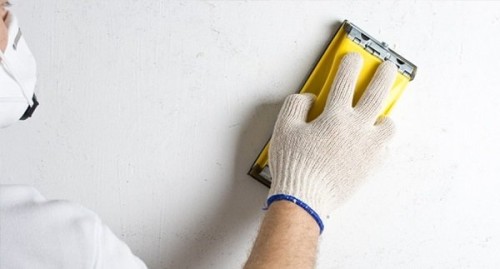
- When all irregularities are smoothed, it is necessary to lure the wall to rid it from the waves arising when applied by a spatula of the solution. As an abrasive, use sandpaper on a tissue basis p 60 or p 80. Fasten it into the holder and the circular movements to consider extra education. For small irregularities, use the emery of a larger fraction, for example: p 100 or p 120.
- Treat the surface penetrating colorless primer, and then let it dry.


For the qualitative execution of plates, observe the correct sequence of actions with your own hands. The quality of further work directly depends on how correctly the previous layer is applied.
To understand more detail on the preparation of the wall surface to stick wallpaper, the following video will help:
We hope this article fully helped you understand how to prepare, plaster and put the surface for any kind of wallpaper with your own hands. If you comply with the correct procedure, using modern tools and materials, the preparation of concrete walls will be trained quickly and efficiently, and the wallpaper will serve you for a long time.


