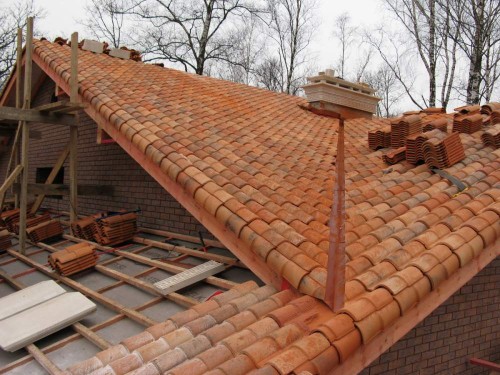
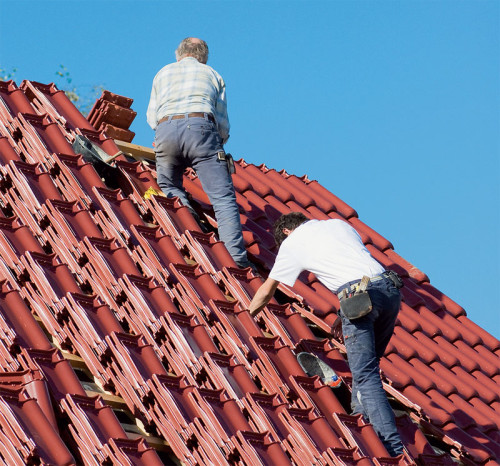
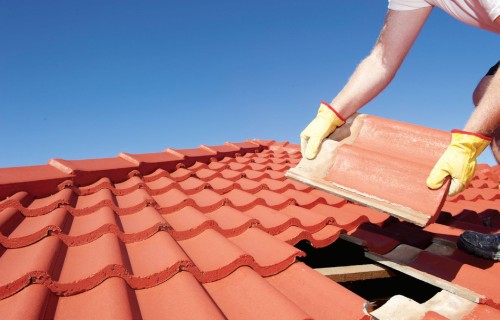
Ceramic tile is quite popular roofing material. It has a lot of advantages. In particular, it is durable, well transfers the temperature differences and the impact of precipitation. Today, the secrets of the skill of laying this material are available literally to everyone.
Content
It should be said that the tile was not always like that it is known today. She has undergone changes in its design, for a long time, while construction is used. In addition, there were quite a lot of species of this material. There are species of tiles that have special fixing grooves in their design, due to which reliable fixation is ensured. When carrying out installation works, the tile to the crate is increasingly fixed with galvanized fasteners. The roof, covered with tiles, does not need painting, repair work. In addition, it slowly heats up and cools. Further details about the procedure describe installation of the material.
material characteristics
Today in the raw material from which the tile is made, various substances are added, including various natural components capable of changing the color. To expand the color palette, special processing is used, namely, glazing and affairs.
Let's deal with whether it is worth using tile as roofing material. After all, its installation is quite complex and time consuming. The laboriousness consists at least that there are many elements and everyone needs to be laid separately. It would be easier for the roof of metal tile or ondulin.
What are the advantages of ceramic tiles before other materials?
- First of all, it should be said that it is an environmentally clean material. Ceramic tile is made of clay when complying with all necessary requirements. In the process of production, each tile is subjected to burning at high temperatures (1000 degrees), which is why it acquires a brown-red shade.
- Of the advantages, it is still worth noting a long service life. Tiles as roofing material can actually serve about a century. For the whole of this period there will be no corrosion.
- The tile itself is a reliable, durable and non-combustible material. At the same time, she has good sound insulation properties.
- It is also worth noting that the roof covered with tiles, has aesthetically attractive appearance.
- How roofing tile material is good because resistant to ultraviolet rays and precipitation. It is impossible not to note the simplicity of replacing the tried plots.
The steeper the tilt of the roof, the better the ceramic coating will look. If the angle of inclination is more than 60 degrees, then it will be necessary to pay the time to fasten the duch. In any case, the rafter system must be strong enough. To do this, use massive bars, which will be able to withstand not only the weight of the coating itself, but also the weight of snow accumulated condensate and the wind load. In addition, the design should securely hold the additional elements, in particular, the insulation and the attic windows when they are presented.
As a base for clay tiles, the flooring is usually used from a board, which consists of a pair of layers, namely clamps and controls. If the attic is not planned to be insulated, then it will be enough to put a rubberoid. If the attic is planned to be arranged by attic, the waterproofing film or roof membrane is usually settled.
Types of material
In size, ceramic tiles are divided into three types:
- small-format
- average format
- large-format.
Tiles of small format per square meter requires about 18-22 pieces. The same area of \u200b\u200bthe average format type of material will be needed from 12 to 22 pieces. Large format tiles per square. M must be purchased only 8-10 pieces.
To date, you can find many types of tiles. Consider some more details some of them:
- Dutch Tile. S-shaped tiles. They allow us to provide high-quality water removal in a short time. Of the useful properties, it is worth noting their mobility, which is particularly relevant, if necessary, to reconstruct the old roof. Ceramic tile of this type is quite reliable. To ensure mobility in the design of the lock, there is a free move.
- Bobrow Tail. This type of material is flat tiles of small dimensions. There are no grooves on the side. They are usually laid in parallel rafters. Due to the small size of the material, the roof can give the configuration of any complexity. This species, in turn, is divided into several subspecies. They differ in the configuration of the lower part. So, it can be acute, rectangular or oval. All tiles have spikes, with which they are fixed for the rails. It is usually placed in one of two ways: Crown or scaly. Awning method is an installation of one row for each crate and hazard dressing. The scaly method implies the installation of ceramic tiles of flakes in a row with the arrangement of the rail closer than with aimeden method.
- Saddle tape tile. The most common form for covering simple roofs with one or two slopes. When using such tiles, the compound is obtained sufficiently dense. The seams are almost unnoticed. This is much achieved due to the presence of longitudinal grooves. All rows of tiles are fixed to the crate by wire.
- Grocery stamped tile. This kind of material is equipped with longitudinal and transverse grooves. This allows for tight connection of all elements of the installation.
Laying ceramic tiles
Preparatory work
These activities include the following steps:
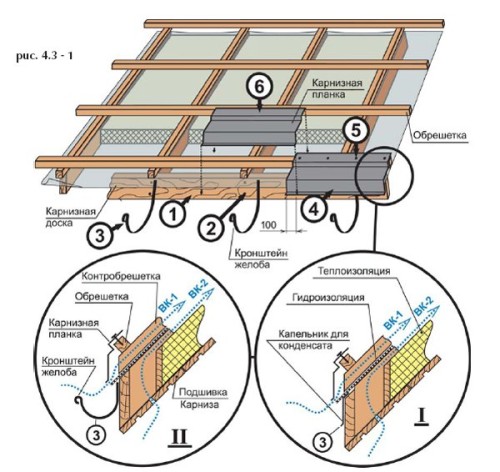
- Before you begin the installation of tile, to finish the installation of fasteners holders gutters drain and if you want to arrange protection against birds.
- Then you need to check the smoothness of the fixed crate. The deviation here is allowed, but not more than 3-4 mm for every two meters. Roofing, as a rule, is delivered to the place of work on wooden pallets. To protect the material from precipitation, it is recommended to cover it with something.
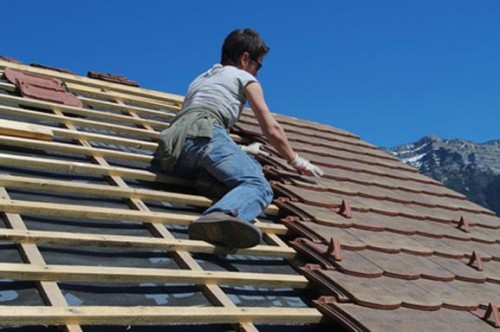
- At the beginning of the installation work, the tile is usually raised upstairs and unfold over the entire surface of the roof with stacks of 5-6 pieces. It is necessary that the load on the roof during installation remains uniform.
- During the preparatory work it is important to correctly calculate the number of tiles required for the roof mounting. To do this, you need to measure the size of the width and length of the skate. At the same time it is necessary to take into account the bias of the roof. The width of the material can be found, for example, according to the information on the package. This value must be used when calculating. It is also important to take into account the slope of the skate, as well as the fact that the tile is mounted with the allen.
Calculations Tips:
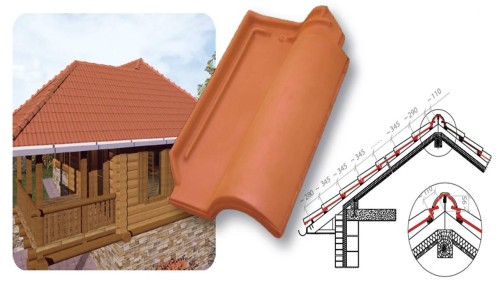
- So, if the angle of inclination is 25 degrees, then the nourish must be about 100 mm. For a slope with a tilt of 30 degrees, 80 mm is enough. If the angle of inclination of the skate 40 or more, then the nest must be at least 45 mm. It is equally important to learn the useful area of \u200b\u200bone tile sheet. To do this, you need to subtract the value from the length of one tiles, obtained at the previous step.
- It turns out the useful length, which must be multiplied by the area of \u200b\u200bthe useful width. The final value will be a useful area. In addition, it is necessary to calculate the necessary number of tile sheets, requested to cover 1 sq.m. Roof. It is calculated simply enough - for this, the unit is divided into a useful area.
- To calculate the required amount of materials, the resulting result is multiplied by the total number of square meters of the roof. After that, the calculated indicator needs to be rounded into the biggest.
- It is necessary to take into account that for each slope the calculations need to do their own. During installation work, it may have to trim separate parts. Therefore, the material may be required more than it was obtained when calculating.
How to lay ceramic tile
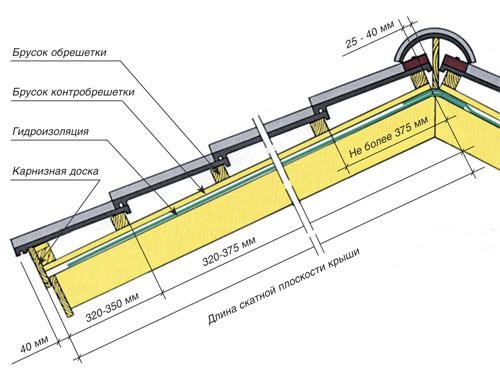
If the roofing material is placed on waterproofing, then it is necessary that the last air is enough. For this, you usually make at least two ventilation gaps. So, one of them should be between thermal insulation and membrane of waterproofing. It can be done in two ways. The first of them implies the use of the crate, and the second is the installation by laying the edged board. Installation must be made parallel to the skate. As for the thickness of the material, it should be at least 55 mm. If the waterproofing is made of diffuse film, then the ventilation channel is not necessary.
The second clearance is made between the coating and the membrane. Thanks to it, it provides sufficient ventilation for the main structural elements, which, in turn, increases the service life of the materials used. This ventilation gap is usually done by installing the counter-exchange. Cover the waterproofer need the entire area of \u200b\u200bthe roof. Works are recommended to maintain from the bottom, and from there to gradually move towards the roof of the roof, i.e. In the upper part of the roof. Waterproofing is placed horizontally with the adhesive. To lock this layer is conveniently stapler or using a solid tape.
The flooring is similar to secure the perimeter. It is necessary to do this at a distance of about 200 mm from the edge, taking into account the possibility of removing extra moisture. For this purpose, special grooves are made. After that, the lamp is mounted on the plane. It is important to check how it was correctly installed. For this, control measurements are made. If deviations are detected by more than 5 mm, the design will need to be aligned by lining wooden jersey. Tile is a rather heavy material. Therefore, it is recommended before work, as mentioned above, lift all the tiles on the roof and distribute them on the surface with stacks of 5-6 pieces.
Order order:
- At the beginning of the installation work, the top number is recommended to lay out so that it is placed parallel with the skate. Then the lower rows are laid out. This is usually done parallel to the scene. The tile is not fixed to the crate. This is done only after the ranks will be posted.
- Next is the following series. To fix the tiles, it is better to adhere to the recommendations that specialists give. They are usually indicated on the packaging of goods. After that, it is necessary to put skate and frontal parts.
- The edged board on the roof rustle is stacked so that it only touches the point of fastening the ceramic tiles. At the place of intersection of the rod of the roof and the front, the material is most likely to be customized in size by trimming the grinder.
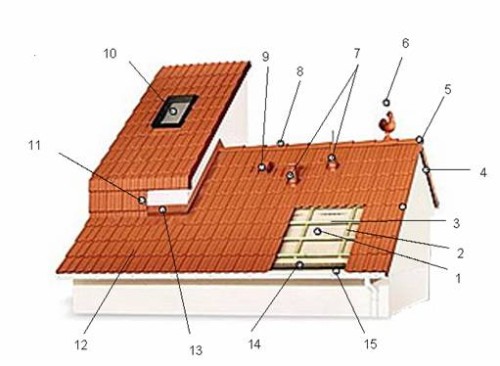
- On UNDOVA, the tile can be laid using half-tiles. The edged bars are styled under the grooves, and the reconciliation is arranged waterproofing with overlap. After that, aluminum gutters are strengthened.
- To protect the roof from snow along the end, special strips are strengthened from the other side. Cover the roof tiles can be both independently and hire specialists for this. The second option is more suitable if there is no experience in such work at all. The installation price is better to find out in advance, but, naturally, laying the ceramic tiles with their own hands will cost cheaper.
- If it is necessary to cut the tile for mounting the folds, then for this, first with the help of the pencil, there is a cut place, and then the material is cut at this mark. Before laying a sliced \u200b\u200btile, you need to remove the crumbs from the working surface, which were formed during cutting.
- To make lower backstairs, it is necessary to attach the rail. Its thickness should be such that it is one level with the whole design. For installation, rails are used galvanized nails or self-tapping screws.
- To make a horse, you need to make an indent to 22-42 mm from the edge of the skunk boards, then attach the upper ride. When the upper case is mounted, it is necessary to attach a skateboard with a thickness of at least 40 mm. Her height should allow the tile to lie so that she, being laid on the top row, did not touch the skateboard in any place.
- A special plastic element is fixed on the edge of the skate to impart the design of the hungry species. On this, the installation of ceramic tiles can be considered completed.
Ceramic tile: photo


