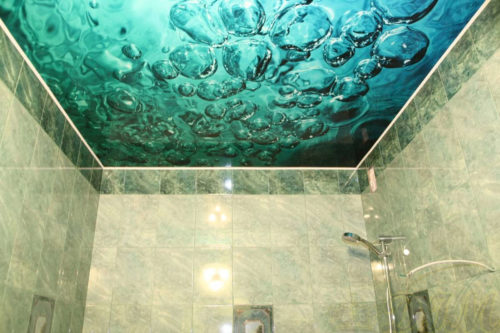
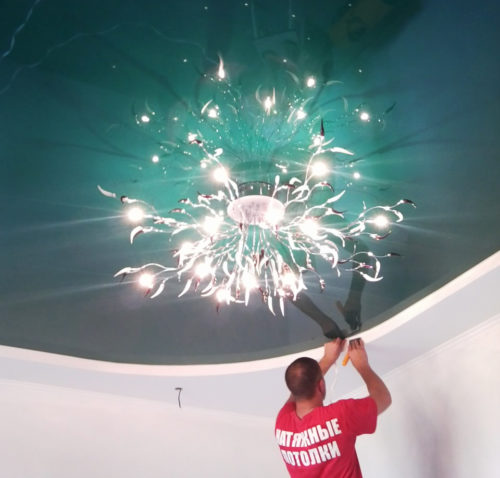
Stretch ceiling - a modern and stylish solution for finishing the surface. Due to its unique characteristics, the material is in demand. About how the tension ceiling is mounted in the bathroom, and it will be discussed in our article.
Content
Characteristics of stretch ceilings
The main "plus" of the stretch ceiling is a perfectly smooth surface. Moreover, it does not require much effort to achieve this effect (as when leveling the ceiling with plastering or suspended structures).
Also, the advantages of the stretch ceiling include:
- attractive appearance;
- a varied assortment (with imitation for various natural materials);
- the speed of the installation work (only 3-4 hours);
- the long operational period (reaches 40-50 years);
- undoubtedly care of the ceiling;
- waterproof (withstands the water load of 90-100 l / m²);
- the ability to conceal communication lines (pipes, wiring, ventilation boxes);
- lack of condensate (which is especially important for the bathroom);
- excellent thermal insulation and sound-repellent properties (due to the presence of air layer).
The disadvantages of finishing material include:
- high price;
- sensitivity to temperature (the power of the lamps should not exceed 50-60 W, even if there is a ring for thermal insulation);
- the intolerance to the negative temperature and sharp temperature fluctuations.
Types of stretch ceilings
There are several varieties of stretch ceilings. They are classified depending on:
- manufacturing material;
- design forms;
- type of texture.
Tension ceilings manufacturing material
For the production of stretch ceilings are used:
- PVC film;
- the cloth.
The ceiling of the polyvinyl chloride film is the most common option. It is heated with a heat flush and stretch on the frame. After cooling, the film becomes smooth and stretched as much as possible.
Tissue tension ceiling is covered with varnish. Differs in low weight and safety. But it has a significant drawback - when moisture can be spoiled. For this reason, this material is better not to use in the bathroom.
Form of stretch ceilings
Depending on this, the criterion of the stretch ceiling for the bathroom can be:
- flat;
- in the form of arches;
- cone-shaped;
- wavy.
Flat ceiling is a classic variant, masking irregularities and height differences. The design can be arranged both parallel to the old ceiling or floor and at an angle.
Original arched stretch ceilings will suit those who do not like standard solutions. In such a design, the walls are an integral part. The height and bending arches can have different sizes. In the corners, the arches are placed communication lines.
Wave-shaped ceiling can a variety of outlines: a shallow wave, a sea calm or storm. Waves can be located around the perimeter or over the entire surface. The most spectacular waves on the glossy dark color ceiling.
The stretch ceiling in the form of a cone is practically not used in the bathroom. It is more suitable for premises where there are columns.
The texture of stretch ceilings
Depending on the texture, the finishing material happens:
- matte;
- glossy;
- satin.
The matte stretch ceiling is the cheapest variety. A little bit like a plastered surface. The matte design is ideal for a classic interior with a straight plane.
The glossy surface will visually increase the area of \u200b\u200bthe room. What is especially important for the bathroom. The glossy ceiling is ideal for the decoration of the room, which rarely falls the sunlight.
Satin ceiling resembles a surface that is covered with paint with light glitter. He has a reflective and pacifying effect. For this reason, it is commonly used when finishing a bedroom.
Features of the choice of stretch ceilings
When you acquire tension ceilings for the bathroom close attention is paid to the interior of the room. In particular, the colors of the stretch ceiling must be harmonized with the prevailing color of the room.
The main criterion is the color of the floor. In most cases, a ceramic tile is stacked in the bathroom. The color of the ceiling should not be very different from the color of the floor covering. Of course, you need to take into account the colors of plumbing devices, mixers and furniture. But this is only a secondary factor.
After purchasing a finishing material, you should prepare tools for installing a tension ceiling:
- laser roulette;
- thermal gas gun;
- gas cylinder;
- screwdriver;
- drill;
- perforator;
- spatulas with different lengths;
- 4-6 climb clips;
- wrench;
- screwdriwer set;
- hammer;
- metal scissors;
- stationery knife;
- pliers.
Installation of the stretch ceiling in the bathroom - Installation work
The device of the stretch ceiling involves the implementation of such actions:
- preparatory stage;
- marking work;
- fastening a profile under the ceiling;
- laying electrical wiring and other communications;
- installation of fasteners for lighting devices;
- fixation of polyvinyl chloride films;
- installing lighting elements.
At the preparatory stage:
- the bathroom has all the furniture;
- the floor is covered with cardboard;
- old finish is removed;
- close up too large cracks and irregularities;
- cleared mold or fungus (if available), and the area is processed by an antiseptic;
- the scheme of the location of the lighting devices is determined, which is designed to the floor.
Next, according to the instructions on the installation of stretch ceilings, the profile is fixed under construction:
- the line of the baguette is placed (usually at the level of 3-6 cm from the old ceiling, and when installing point lights, it must be at a level of at least 12 cm from the old surface);
- according to the marked line to the wall, a profile is fastened with a step of 8-10 cm;
- in places of contact, adjacent fasteners are located so that the extreme part of the baguette is reliably fixed;
- in the corners, the profile trimmed at an angle of 45º and bends;
- when circumcised baguette is polished with a file or sandpaper.
At the next stage, electrical wiring and lighting elements are stacked:
- the location of the chandeliers and lamps are placed on the ceiling;
- for a chandelier, a hook is screwed up to 30 cm long from the reinforcement with a thickness of 1 cm;
- the cable is stacked in corrugated tubes and is attached to the ceiling with clamps;
- in the locations of the lamps and wire chandeliers are produced with a reserve of up to 30 cm;
- stands for point lamps are attached to the overlap.
The stretch ceiling itself in the bathroom can be attached in 2 ways:
- harpoon;
- strapikov.
Capoon method for installing stretch ceilings in the bathroom
It is a time consuming, but also the most reliable way to fix the ceiling of PVC films:
- the room is heated by heat flush to 40º C;
- the canvas gently unwound and heated to 60º C;
- the base end starts into the angle of the ceiling (it is noted from the famous brands);
- in the opposite corner diagonally, the second end of the stretch structure is attached;
- two remaining corners are recorded;
- the canvas is heated using a heat gun;
- the rubber spatula is attached to the sides of the finishing material (in the direction from the center to the corners);
- first, the parties opposed to each other are equipped (when the ceiling is tensioning, the gun should be directed to the middle part of the canvas).
When the tensioning ceiling device can not be too heated by the canvas. If there are still a challenges on the material, then it is possible to remove them by additional heating with a cannon.
Strapboard method of installing stretch ceilings in the bathroom
Refers to a more common option, since it is characterized by a low cost of work. But also has a significant drawback - there is a possibility of the output of a wooden stapper from the groove.
Stages of work:
- the room is heated with fan heater to 50-55º C;
- the stretch ceiling turns around and is attached to the baguette with clothespins;
- the material is attached to the head of the profile angles;
- the canvas moves under the profile from the corners to the middle part of the baguette (first on the opposite sides);
- excess material is cut off;
- baguettes are closed with decorative plugs.
A day later, work on the installation of lighting devices is held:
- from pre-designed points on the floor, the laser levels are conducted to the ceiling;
- thermocolt under the lamps are glued onto the cloth;
- after drying the adhesive inside the rings, the holes in the canvases are cut with a sharp stationery knife;
- there is an installation of racks in the level of the rings;
- muffd up light bulbs up to 60 W.
Video about the stretch ceiling in the bathroom:


