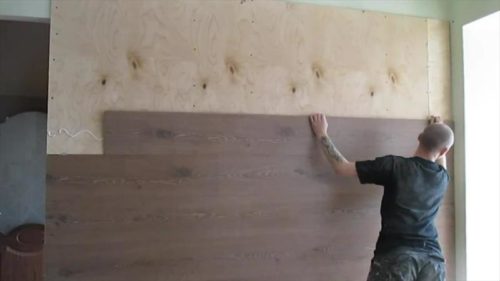
Laminate on the wall can be an alternative to the usual ways to finish the interior. Stacking technology is available to any ownership skills with construction tools. But before making choices and proceed to work, you should study information about this material.
Content
The arguments "for" and "against" laminate on the wall
The advantages of laying laminate on the walls should convince those who doubt this decision.
- Laminate is safe for people's health: it does not highlight volatile chemical compounds.
- The service life when laying on the floor can exceed 10 years, and when installing the wall - several times more.
- Forms a perfectly smooth surface, so that you can effectively align the walls.
- Efficiency: For mounting on the wall, you can use a panel with a low class of abrasion.
- Aesthetic attractiveness: For interior design, you can choose a panel, a pattern of the decorative surface of which mimics natural wood (both dark and light rocks), brick or natural stone.
- Practicality: The material does not attract dust, care is allowed using household chemicals. You can wipe with a damp cloth.
- Easy installation: work can be performed without special training using conventional tools.
Laminate flaws should be taken into account:
- It can not be used to finish premises with high humidity (bathrooms, kitchens, balconies, loggias, basements).
- Not applicable in rooms with temperature drops.
The need to install laminate on the wall in the premises is associated not only with the desire to decorate the interior with the ability to obtain a durable, wear-resistant surface.
How to choose laminate for walls
Laminated plates are produced in three variants of the castle compound:
- adhesive (rarely used);
- clicking;
- packing.
Read more about the features of each type.
- Adhesive Laminate: The panels on the principle of "spike-groove" (without locks) with a special glue are connected. For laying on the wall apply only under the condition of perfectly level base - on liquid nails.
- Clean laminate: panels with a more complex compound mechanism and engage with each other. It can be laid on the wall after mounting a wooden crate. For reliability, small nails are used, which are driven into key grooves. Docking spaces are optional.
- Plumbing panels: side faces are equipped with a complex lock. When connecting to each other, the panel is not sampled. To install on walls with a solid crate on the back side, glue is applied zigzago-like.
Laminate Mounting Technology
The laminate installation instruction depends on the selected method of preparing the base. The perfectly smooth surface can be created in three ways:
- applying plaster;
- installation of a solid crate;
- align the walls of plasterboard.
The first two ways combine high demand quality requirements. Check is performed using the building rule and level.
To work, you must have at your disposal tool for laying laminate:
- electrolovik;
- roulette;
- hammer carpentry (Cyanka);
- spatula (for cleaning panels from excess glue);
- level (to control the quality of the surface);
- barbed wooden (they packed the slats when connecting joints).
Phased description of the process of finishing the wall.
- The number of laminate is calculated. It should be purchased with a reserve - at least 10% of the faced area.
- Preparation of the foundation. Recommendations for laying laminate prescribe the wall alignment in such a way that the drops in the level are not more than 2 mm each 1 m². For mounting, the crates use bars with a cross section of 50 × 50 or 40 × 50 mm, as well as plywood sheets with a thickness of 10-12 mm. Another option involves the alignment of the surface with plasterboard after mounting the crate of metal profiles. You can maximize the space by applying plaster on beacons with subsequent grinding.
- Laying the first panel: When standard laying, the upper left corner is selected for the start.
- Installation of panels: With liquid nails applied to the back surface with dots or zigzag, laminate is fixed on-site short-term pressed. Laminate laying glue is applied to the joints, after which the panels are connected. Barlock is used for fittings: it is attached to the junction and the xy can be bought so that the panels are connected without clearance. It is allowed to use nails and curvators: they are attached to the panels directly to the slats.
- Installing plinths. They will close the gaps between laminate, floor and ceiling.
Tip: Shpunte laminate can be shown without the use of Brousa and Cyan. To the previously laid panel, the new joins the corresponding face under some angle. After the lock elements are engaged, the panel presses to the base of the wall.
Methods of laying laminate on the walls
Solving how to install laminate on the walls, choose from three ways:
- traditional: panels are oriented horizontally either vertically;
- diagonal (allows you to visually expand the space);
- christmas tree.
Important: With a diagonal and horizontal layout of panels, the direction of propagation of natural light is taken into account. It is recommended that the sun's rays passed along the junctions of the long sides of the laminate. Thus, the compounds will be less noticeable.
The horizontal and vertical panels are mounted with a displacement of each subsequent row no less than 20 cm relative to the previously laid.
When laying a Christmas tree, more material is spent, and therefore the laminate must be purchased with a large stock - at least 15% of the wall area.
At the end of the article on how laminate laminate is stacked - video with specialist comments.


