After self-installing plastic windows, it becomes necessary to beautifully arrange window openings. This can be done in different ways: traditional - to plaster and sharpen the surface or make slopes on the windows alone from modern materials - drywall or plastic.
Content
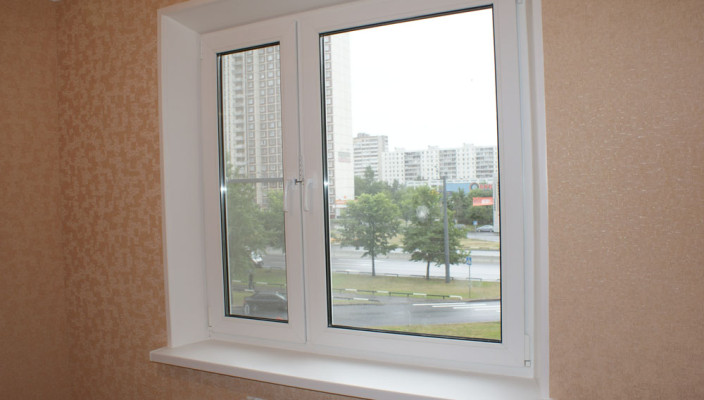
If everything is done neatly and according to the rules, the result is a beautiful window opening. He not only harmoniously fit into the interior, but also allows you to keep warm.
What are the slopes
Sucks is the inside of the wall adjacent to the window. It may be outdoor - it is located on the side of the street, and inner - located on the side of the room.
What are the slopes on the windows from the outside? Often this part of the wall is made to plaster. Lighter materials are not suitable, because due to changing weather conditions, the slopes will quickly come into disrepair.
If you consider slopes for windows from the inside, then questions appear: is it possible to make them yourself and how to properly set the slopes on the windows.
First we define the need for slopes. Currently, the classic picture of the installation of popular metal-plastic windows is such - the window unit is inserted into the opening, attached to the holders (metal strips screwed into the wall) and foam. If after some time it does not close the foam with a stronger material, due to temperature differences and moisture, it will begin to collapse and cannot provide good insulation. Installing the slopes will protect the seams and will not allow the windows to be covered with an embryo.

What could be the slopes?
Consider the options for slopes, revealing weak and strengths:
- Plaster. Classic option of slopes. To independently cope with the work, you must have certain skills. The process of time consuming and does not always justify expectations. So, after a few years (a, maybe immediately after winter), the plaster begins to lose attractiveness, fastens and cracks. In order for the slopes to look beautiful, it is necessary to pay a lot of time to work, as you need to wait, when the first layer is dry to put the next one. The final result will depend on the quality of work. It is not always possible to smoothly sharpen the wall near the window. After the completion of plaster works, it is necessary to wait some time so that the plaster is stucked and only then project the surface and apply a layer of white paint. In general, the fulfillment of work will have to take 2-3 weeks. In addition, such slopes do not protect the windows against fogging and do not cope with the tasks of heat conservation.
- Ducks from plasterboard. This material can be called universal, because of the drywall you can make suspended ceilings, niches, arches, align the walls and make self-smooth slopes. Durable material, provides good thermal insulation properties. In order to prevent moisture penetration, it is desirable to purchase moisture-resistant plasterboard and additionally insulate the walls. The underlying condition - plasterboard can be installed on the slopes only in dry rooms. Where elevated humidity is better not to use this material. Installation of drywall is also not easy task. It is necessary to first prepare the walls: plastering the surface, apply a layer of primer, then perform installation of drywall slopes. Next, you need to apply a thin layer of putty, to predelve and then paint the surface. The process is also considered time consuming, only work on the installation of slips from drywall on time is performed faster than the standard sloping plaster.
- Out of plastic. This is a universal finishing material. The slopes from the plastic are easy to install, they are attractive, do not burn out in the sun. With the correct selection of the shade of plastic under the color of the window profile, you can achieve the perfect look. To ensure the right heat and sound insulation, it is necessary to put a layer of minvata under the plastic panel. The advantage of slopes from plastic - ease of installation.
- Wooden slopes. It rarely arises the need to install the slopes from the tree. Only in the case when the installed modern wooden euro windows were installed. For slopes, solid wood species are suitable: larch or oak. This is an expensive finish material, so it does not in demand.

Installing slopes on windows with your own hands
Consider a popular option for finishing window openings - installation of slopes from plastic on plastic windows.
To cope quickly with work, it is necessary to prepare such materials and tools in advance:
- plastic strip (length 6 m, thickness not more than 8 mm);
- starting plastic strip (P-shaped);
- f-shaped plastic strip;
- rake (can be wooden, thickness 10-15 mm);
- insulation, the mineral wool is best suited;
- perforator or drill;
- scissors for metal, sharp knife;
- level;
- stapler construction;
- self-tapping screw 4.5 mm and 95 mm;
- white silicone.
If you just recently put new windows, then the protective film can not be removed until it is up to the completion of the installation of slopes.
Step-by-step finishes of windows:
- Right up on the slopes (it doesn't matter, in what condition this part of the wall remains) I will press wooden slats. ATTENTION If, after setting the windows, part of the wall adjacent to the window was destroyed, then you must first attach these sections to minimize the consumption of the insulation.
- Fix the rail is needed with long screws (95 mm). Rake placing so that they do not remain inside the wall and did not appear out.
- You can prepare the wall with the help of a perforator if you remove part of the putty and achieve a perfectly smooth surface. Then the rake will fit tightly to the wall. Check the rack mount with a building level. As a result, it should be like this:

- On the edge of the slope, you need to fill the plastic P-shaped strip on the screw of 4.5 mm. In the free opening of the plastic rail, you need to insert a strip to form slopes. So we get a perfectly smooth surface. If the P-shaped bands intersect in the corners, then you need to cut unnecessary to connect both ends and get a smooth junction.
- Now it is necessary to plant a plastic rail "F-ku". The grooves of this rail and P-shaped (it is already installed) must be located opposite each other. The remaining bands (they will be located above the opening), you need to cut the grooves "F-ki".
- After everything is docked, the excess building material is cut by scissors. Thus, we will have an outer beautiful corner of the slope located on the wall. This method of working with plastic is convenient, as it is not necessary to put the wallpaper additionally in these places. The stripe can be closed defects around the window.
- Now it is necessary to fill the empty space inside the window opening. To attach plastic to a wooden rail, you can use the construction stapler, trying to attach the rail as close as possible to the first rail ("F").

- Next, we insert the plastic stripes sequentially, first the first strip in the groove of the previous one before clicking and so on until all the space is covered with plastic clapboard. Do not forget with each band lay a layer of insulation. As a heater, we use mineral wool.
- The last barcode is to check the work done. If it did not work out to make the slopes perfect, the joints can be filled with a white sealant, inserting a balloon into a gun. Surplus remove a special soft spatula. Try to work as careful in order not to spoil the work, since the sealants are looking ugly.
We looked at one of the options for installing slopes on the windows using the initial profile. You can do otherwise and perform the installation of slopes on the windows without a profile.
Procedure for performing work:
- Around the window frame, it is necessary to make a sharp knife in the mounting foam of 1 cm deep, the width of the outbreak is 1 mm. It will be the place of attachment for the first profile.
- Insert the initial profile into the holes. Schip can be made independently, for this, the plastic panel needs to be cut across (use a sharp knife), and then along. You can easily split the panel into 2 parts. In your hands you will have the top and bottom layer. Lower the lower layer is left to insert into the homemade hole and plant a free end on the self-tapping screw. This is a great savings option, you can save on spikes and work without a fastening element.
- Further, on the panel adjacent to the window, you need to stand up with a sharp knife strip (1 cm width) to make a neat outline on the intended line. It is necessary to cut the top of the panel to disconnect the plastic into 2 parts.
- Next, we work in the same way as in the first embodiment - type the panels until we approach the edge of the window opening.
- To make a moisture between the wall and the panel and did not multiply the bacteria, it is necessary to insulate this space. Mineral wool is suitable as a heater. As you can insert panels, do not forget to lay the layer of insulation.

Installation of slips from drywall
You can make slips from drywall. It will take moisture-proof drywall, anti-grapple mixture, metal profile and putty. The work is extremely simple: the sheet of the desired size is cut off first. You just need to carve out 3 blanks from drywall: for mounting the upper slope and side.
With the help of adhesive mixture (liquid nails or special glue for drywall), it is necessary to glue the wall to the wall, plant a plastic corner.

After drying, apply a layer of putty, primer and when the building material will dry up - the final stage will be painting ready-made slips from drywall.

How to make outdoor slopes on the windows
If you thoroughly approach the question of decoration of slopes on both sides, you can save on energy and maintain heat indoors. It is necessary to purchase a special plaster with thermal insulation characteristics. Gypsum, pelite, mixture of gypsum with perlite or vermiculite.

The procedure for performing external work on plastering of slopes:
- First we cut a strongly protruding foam, we clean the surface from dust and contamination.
- First of all, it is focusing on the upper slope, as this is the most difficult part of the work.
- We need to install the grid for applying plaster layers. Depending on the thickness of the layer of the solution, choose and the thickness of the mesh. If you need to put a thick layer, it is best to use the grid "Rabita".
- In several places we screw the grid with a dowel.
- Now you can start working, but it is desirable to determine the configuration of future window slopes - they can be deployed or straight.
- We take the marker and spend on the window frame line (with a plumb). This will be the plaster limiter. Try not to capture large areas, it is best to look at the configuration of the window opening. If it turns out - we do the slightly straight, no - we turn a little, making a small angle.
- At the angle of the window opening, we set a wooden rail (using a construction level).
- We attach the rail on the nails, the mounting foam or a mixture of putty for adjustment.
- The beacon also needs to be fixed on the surface from all sides. So we prepare the window opening to apply plaster.
- We will prepare the solution. It must be medium, not liquid and not thick. We mix the mixture of a drill, so it will be more convenient for you to control the delicate of the solution.
- Depending on which there will be a thickness of plaster, thump a rough or first layer of solution on the grid and wait when it grabbing.
- If you immediately apply a lot of solution, it will not hold on and "floats" down. These are unnecessary problems: time loss and material.
- With the help of a wide spatula or rules, we are on the slope so that the tool is pressed close to the rake and the lighthouse. Thus, you can control the amount of solution and prevent it to get out of the slope.
- When it is necessary to put too thick layer of plaster, throw the solution into several methods. Before applying the next layer, you need to wait 24 hours when the previous and prejudice the surface is grabbed.
- The last layer of the solution you need to "pull out" with a wide spatula so that it turns out a smooth surface. When the plaster grabbing, irregularity can be filled with putty.
- At the last stage of the laying of the solution you need to put the rail guide, which will make an angle.
- When the slopes are frozen, you must once again be primed and cleaned with a brush.
- Now you can proceed to the formation of the outer corner. Rake carefully remove, with a grinder or a special tool form a neat beautiful angle. To do this, first on the one hand, we close the angle to the tool (seaterury), and on the free part we apply a little solution.
- Work is almost completed. It remains quite a bit: it is necessary to walk through the entire surface with a wide painting tassel (plunge the tool into the liquid solution) to smooth out all the irregularities and then apply the sealant layer.
- After complete drying, we bring beauty, and at the same time and fix the work done. We use a special acrylic sealant instead of paint. It will protect the surface from the penetration of moisture, and at the same time will allow you to get a beautiful white color of slopes.

How to make slopes on the windows from the sandwich panels, watch the video tutorial:


