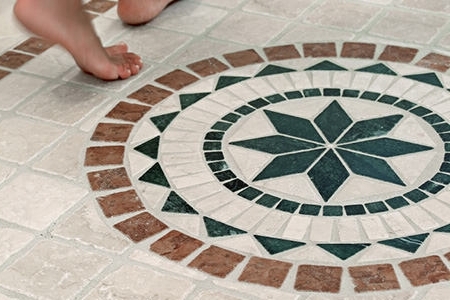
Ceramic tiles for the floor - a unique building material, superior to all its characteristics of natural breed tiles. At the same time, modern technologies make it possible to give it the form of malachite, granite, marble, as well as other stones. Ceramics can mimic texture fabrics, wood and decorate any room.
Content
The ceramic tile for the floor, the price of which varies depending on the manufacturer, is practically not affected by nature, so it is used to arrange shower cabins, pools, kitchens, on stairs, etc.
Advantages of floor ceramic tiles
- has increased strength;
- refractory;
- is hygienic and environmentally friendly building materials;
- easily cleaner;
- not sliding;
- has different sizes;
- has a wide selection of colors, forms and textures;
- long retains the appearance;
- resistant to the appearance of fungus and mold;
- ideal for warm floors;
- withstand high temperatures.
Floor ceramic tile: features
- manufactured by pressing high pressure presses;
- has low water absorption;
- resistant to abrasion;
- has a homogeneous structure;
- shockproof.
Such facing, as a ceramic floor tile, remarkably hides the surface flaws and is an excellent choice for many rooms and even the streets. However, in the process of its acquisition, it is necessary to carefully examine the characteristics of the product and listen to the consultant who will familiarize you with the peculiarities of each product. For example, for the bathroom, the pool hall and other humid premises, it is recommended to choose anti-slip tiles, for dining room, kitchen and household rooms - resistant to temperature drops, impact-resistant and resistant cleaning, for holls and living rooms - without complex ornaments, unusual textures. and bright colors.
As for ceramic tiles for floors, it will become the perfect option for tracks, stairs and the front door.
Ceramic tile floors: regulatory requirements
Floor arrangements with ceramic tiles must comply with the main regulatory requirements:
1. Permissible deviations:
- from the floor of the floor - 4 mm;
- from the rear edge of the coatings - not more than 0.5 cm;
- the thickness of the coating is not more than 10% of the project size.
2. Not allowable deviations:
- slots and gaps between the walls, floor coating and plinths;
- cutting coatings on separate cards with the exception of colored products;
- cracks, potholes on the surface of the coating.
3. Norms:
- the ledges between the elements of bonding and the coating should not be above 2 mm;
- the width of the seams should not be more than 6 mm with a handle and 3 mm when vibrating;
- when tapping, the finished surface, laid out of the ceramic tile, should not publish a modified nature of the sound;
- in the process of acquiring tiles, it is necessary to take 10-15% more consumables;
- the base for the tile should be durable and smooth;
- not allowed to deviate walls from vertical more than 5 mm;
- tile laying can be produced on cement mortar and glue composition.
Ceramic tile floors
1. Stop the tile on the wooden base should be started with a detailed examination of the old coating, which can be made of laminate, be boarded and parquet. Usually such floors consist of:
- Chipboard, chsp or plywood sheets;
- black floor of boards fixed on lags;
- wooden lag.
In addition, wooden floors can be covered with paint or layer of varnish. You can remove them in several ways:
- thermal method;
- chemical;
- mechanical.
2. Next, you should pay attention to the lags, a draft floor and overlapping. If the latter is made of concrete, then you need to put it on top of it:
- waterproofing (polyethylene foamed);
- normal or moisture-resistant plasterboard, which is fixed to the base with the help of a dowel.
You can also put lags in a step of 40 cm, and at the top of them to attach chipboard or plywood by fixing the latter on the self-tapping screw. To prevent the rotation process under this design, it is necessary to drill small holes in it.
3. To increase the rigidity of the floor on top of it, you can put in two layers of the sheets of Gisokarton. At the same time, the first seams must be in the middle of the second. Laying the tiles on such a base lined with sheets of GVL and G Clac is practically no different from the installation technology to a regular screed, the only one - the special tile glue is applied.
4. When preparing a draft floor installed on a tree overlap, the mandatory step is the installation of lag. However, before installing chipboard or phanee on them, it is necessary inside the parchment waterproofing layer.
Thus, aligning in terms of lags, an absolutely flat surface should be created, leaving between the draft variant of the floor and the walls of the gap of 10 mm, which is subsequently inhibited by the mounting foam.
5. Next, we produce the coating processing with a preheated oliff or protective impregnation. After that, we put the painting grid on it and let dry.
When the surface is ready, fix the stack on the tapping screw. On top, we apply a mixture of large sand, liquid glass and water in proportion 2: 2: 1.
6. After the base dried, you can start laying the ceramic tile on the wooden floor, pre-bay the basis of a special self-confined solution.
Laying tiles on the floor and preparation of the base video:


