Among the many modern floor materials for finishing the floor in the kitchen should be highlighted with ceramic tiles. The correct choice and compliance with the laying technology determine the service life of the material. In this regard, it is important for repairs to familiarize yourself with how to choose a tile on the kitchen and how to put it.
Content
Pluses of ceramic tiles for floor in the kitchen
Advantages of ceramic tiles:
- high mechanical strength: Outdoor tiles withstands the weight of any kitchen furniture and household appliances (up to 30 thousand tons per 1 m²);
- abrasability resistance: ceramics can serve several dozen years depending on the variety of material and load;
- practicality: Tile can be washed with any (including those containing abrasive additives) by means of household chemicals;
- is a non-combustible material;
- not afraid of water;
- chemically active compounds, and does not react with chemicals (environmentally friendly material);
- has high thermal conductivity;
- it is aesthetically attractive: due to the variety of shapes, textures and colors of ceramics, you can pick up various options for finishing the floor in the kitchen.
Ceramic tile selection criteria for kitchen flooring
Requirements for tile in the kitchen are associated with the features of the room operation. It is recommended to choose ceramics with the following set of qualities:
- The drawing should not have a deep relief: dirt and the floor falls into the furrows and grooves and the floor loses its initial look.
- The surface of the tile should not be slippery: the glossy front side is dangerous when water gets into it.
- Color: even small dirt stains are noticeable on the ceramic tile of white color. It is better to choose material with a motley and small non-volumetric pattern.
- Size: Large tile visually reduces the room, which is undesirable for small kitchens. Large patterns should also be avoided.
What does marking on packaging and ceramic tile label
It is necessary to explore the information on the package. Special characters and inscriptions on it indicate important performance.
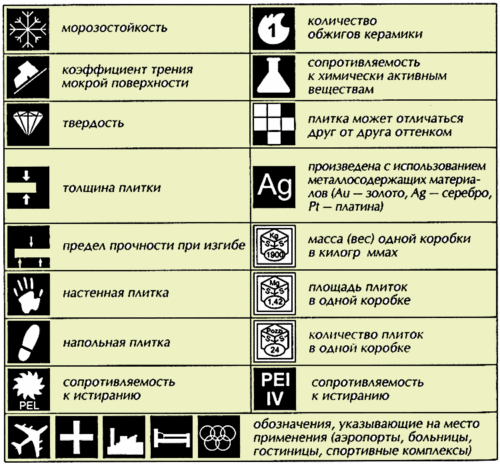
- The image of the feet on a black background indicates that in the package - floor tiles. The wall is denoted by the image of the brush.
- Foot on the background with hatching means increased wear resistance.
- Snowflake on the package - the tile is frost-resistant (for outdoor work).
- The characters "AA" denote the acid resistance. The decrease in this characteristic is indicated by the characters "A", "B", "C", "D".
- Friction: This property of ceramic tile indicates how slippery it is. Checking is done like this: you need to pour a little water on the front side of the tile and rub it with your finger. Feels defined whether such a surface is dangerous for the kitchen. It is recommended to acquire ceramics, the friction coefficient of which (denoted by the symbol R is not lower than 0.4 (satisfactory), but better - 0.75 (safe).
- Wear resistance. The characteristic is indicated by the symbols of PEI (according to the international classification) indicating the class (Roman numbers). For the kitchen, you should choose a tile with marking Pei III, PEI IV, PEI V.
- Water absorption: This feature for the tile used for the floor in the kitchen does not matter. For internal works, ceramics with the lowest water absorption group denoted by the Roman number III is suitable.
- Heat conductivity: Quality is determined by the coefficient in the range of 0.2-0.8 W / m ° C. For the kitchen, if installing a warm floor system is planned, the material with the highest coefficient should be selected.
How to detect a marriage of ceramic tiles: recommendations
When choosing a tile, you need to check its quality as follows.
- Caliber: The term denotes the real sizes of tiles. When choosing, you need to make sure there is no big difference in width and height. For this, selected samples from different boxes are folded into the stack and put on the edge. Speakingly check whether the ends lie in the same plane. The same is carried out by turning the stack on the other side. The first grade tile is marked with a red stripe on the packaging and the back side, the second variety is a blue stripe, the third - yellow.
- Geometry: nine tiles fit in three rows of three pieces. The rectangle formed by them must be the right form. Otherwise, if the seams between them are wider than 1 mm, the defect will be noticeable after laying.
- Planetary: The term denotes how much the surface of the tile differs from flat. It is checked by the presence of planetary by the application of the front side of one tile to another. The norm corresponds to the gap of no more than 0.5 mm. It is necessary to check about 10% tiles.
- Thickness: there should be no big discrepancy. Checking is carried out using a metal line: its edge must be combined with the front surface of a row of tiles laid on the table. If the gap is obvious to several millimeters, it is better to abandon such tiles. It will be difficult to put it right.
- Defects on the front side. The tile with the cracked icing, with stains and drifts should be discarded and exchanged.
Important: Multiple repetition of a special symbol indicates an increased appropriate material quality.
In the kitchen room, it is recommended to install ceramic tiles with wear resistance not lower than 3rd grade (according to European classification). Ceramics of domestic production should be the 5th grade (in accordance with the requirements of GOST).
Types of floor ceramic tiles
Depending on the raw materials used and the method of production distinguish the following types of tiles:
- Ceramic tile: made of a mixture of clay, bowl and mineral additives. After firing is covered with matte or glossy icing of any color. The technology allows you to apply a drawing on the front surface.
- Porcelain stoneware is obtained by a dry pressing under high pressure and a special clay firing. The firing is performed under high temperature conditions. As a result, a material close by its properties is obtained. It is characterized by low water absorption and resistance to abrasion and temperature drops. The structure of the porcelain stoneware is homogeneous throughout the thickness of the tile.
- Clinker (happens to glazed and unlawed): The tile is made by extrusion and high-temperature firing, as a result of which the material acquires high wear-resistant qualities. The clinker does not absorb water and is easily cleaned from any contamination.
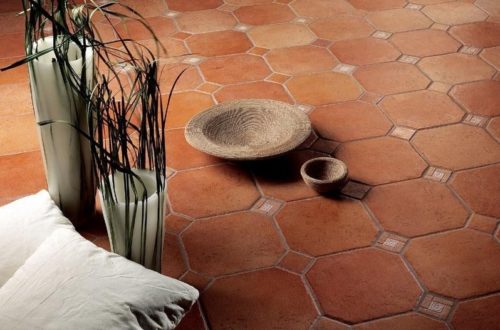
- Cotto: production method - extrusion. It differs from the clinker of the surface texture (only unlawed) and color: for Cotto, colors close to "brick". Used designers to give the effect of antiquity. It needs additional protection with hydrophobic means, in order to avoid the appearance of difficult-scale spots.
- Porcelain: It is characterized by durability, resistance to chemicals and pollution. In the production process, "in mass" is painted (adding pigment in raw materials).
- Maitolika: Raw materials in the workpiece are pressed and covered with colored glaze, after which they are annealed twice in the oven. As a result, the tile becomes durable and moisture-resistant.
- Further: for manufacture, high quality clay is used, which is ignited twice. The final products extends white, which serves as a background for the surface of the drawing. The front face protects the coating of glass glaze.
Important: For decoration of floor joints with walls, a border is used representing a special shape of a narrow tile.
Calculation of the amount of ceramic tile
Preparation for laying the tile at the stage of counting the number of materials should be made in accordance with the following rules.
- When laying in the usual way, it is necessary to acquire a tile with a margin of up to 10% of the amount calculated on the kitchen area.
- If a tile with a pattern is selected, which when laying requires combination, the tile stock must be at least 15% of the area. This is also required when laying the tile diagonally.
- The amount of glue depends on the quality of the base to which ceramics will be laid. If the drop in the level does not exceed 3 mm, the flow will be minimal (the glue is applied with a layer to 5 mm). For large drops, you will need more glue. Its consumption also depends on the magnitude of the tile: how it is larger, the greater the amount of glue is required to apply it.
Technology laying ceramic tiles on the floor
It is necessary to have at its disposal equipment for mounting tiles in the kitchen. It will take the following to work:
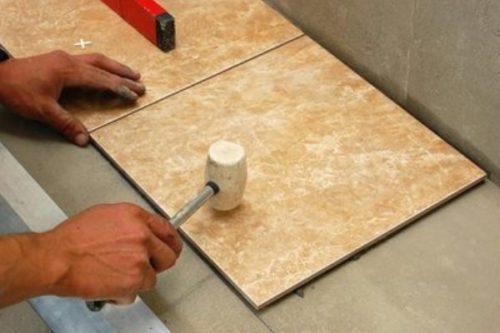
- rubber hammer (about 1 kg): They are hesitated by tiles, tapping on it so that the adhesive mass is completely outset all empties;
- togglewood: The width of the teeth is chosen depending on the size of the tile (10 mm - for the tile with a side of over 30 cm and 5 mm - for smaller tiles);
- kelma (trowel) - for overlapping glue on the tile;
- plastic crosses: Their thickness also depends on the size of ceramics;
- marker: They celebrate a line for cutting;
- roller for applying soil;
- construction level;
- roulette;
- aluminum rules;
- mixer for a drill (nozzle-whined) - to knead the adhesive mixture;
- slab;
- bulgarian and a circle with diamond spraying;
- plotchiki nipples: they create round cuts for the circuit breakers of communications;
- capacity for kneading glue;
- capacity for the preparation of the grout mass (for dry mixtures);
- the spatula is rapid (for one-time work is used rubber);
- rag (for cleaning tiles from grout).
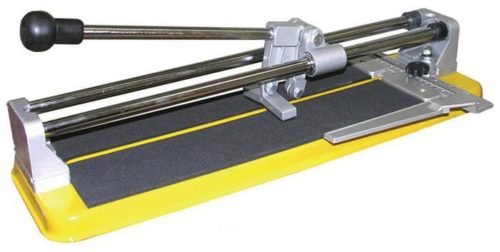
IMPORTANT: When choosing a tile cutter should take into account the limit on the width of the tile (no more than 400 mm). Wider tile cut through a professional tool or grinder.
Methods for cutting ceramic tiles
Installation of tiles with your own hands can not do without the need to cut the tile. This is necessary if the row cannot be finished with a whole tile or it is required to get around the pipes. In this case, from the methods listed below should choose the optimal one.
- Using electrical tiles. With the help of a diamond circle with water supply, the tile can be cut quickly, efficiently and without dust formation. Given the high cost of equipment, the method is recommended to be applied in the case of a large amount of work.
- We cut the manual stoveture. Special machine with clamps and manually moving on the guide cutter. The method is effective for self-decoration of the kitchen.
- Application Bulgarian: The tile is cut on the applied markup. The method is effective for cutting high strength ceramics, but there is a disadvantage: the line of the cut is not ideal.
Rules for laying outdoor ceramic tiles
Instructions for laying ceramic tiles in the kitchen provides two preliminary stages of work:
- preparation of the base: At this stage, the base is aligned (a screed is performed) and processed by primer;
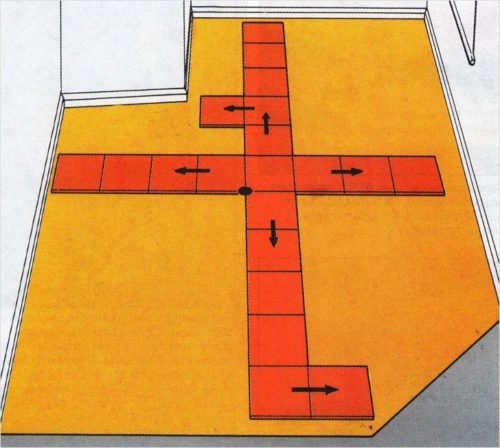
- marking: It is necessary to prepare a scheme of laying tile, given the kitchen layout.
Laying tiles is performed in compliance with the following technology:
- Starting from a long corner, we glue the tile on the base, for which we applied the glue onto its back side by the cylma and evenly distribute the toothed spatula along the entire surface.
- We place the tile on the spot and press it, tapping the rubber hammer. It is necessary to control the horizontal position of its position in two dimensions. Excess glue remove with a dry cloth.
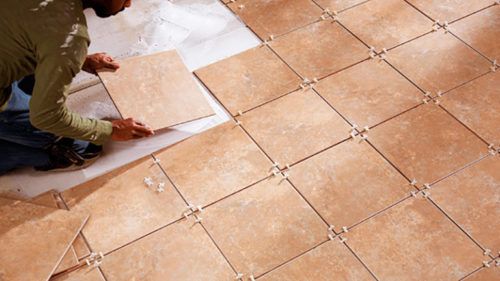
- We stick the next tile at the same level. We establish remote crossbars between the tiles: they will form a seam of a certain width.
- After soaring the glue, we remove the cross and fill the seams of the griming mass, causing and rubbing it with a rubber spatula. Surplus remove the rag.
- Perform wet cleaning.
Tip: It is important to properly put the first tile, as it sets the level and direction to the following.
Ceramic tile laying methods
Before starting work, you need to select the method of laying ceramics. Among many, you should choose a few most popular.
Standard laying of ceramic tiles
The easiest method at which the tile is placed in a row parallel to the wall. In this case, each subsequent row is pasted without displacement.
It is important to correctly distribute the tile on the floor surface in the row to eliminate narrow trimming. This is performed as follows.
- We find out how many whole tiles can be laid in one row.
- We remove one tile.
- All other tiles in a row lay out from the center in the edge. The space on the right and the left will close with two incomplete tiles, the width of which will be sufficient not to ruin the general appearance.
This method of laying will require additional costs of the material, but everything is compensated for aesthetic appeal.
Tip: Start stacking need from the second row, leaving a place for the first. Otherwise, there is a possibility that all tiles will fall with the displacement.
Laying ceramic tiles diagonally
The advantage of the method is a visual increase in space, which is important for a small kitchen. The disadvantage is in the increased consumption of tiles associated with the need to cut each tile adjacent to the wall. You can use for this square tile.
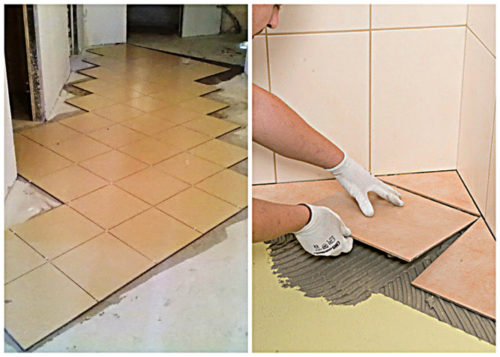
The first row is stitched along the marking line connecting opposite angles. Subsequent ranks are pasted in both directions from the first.
Laying of ceramic tiles "Split"
The essence of the method is that each subsequent row relative to the previous one is stacked with the displacement of exactly half the tile length or with some displacement. As a result, the floor will look original.
Laying of ceramic tile christmas
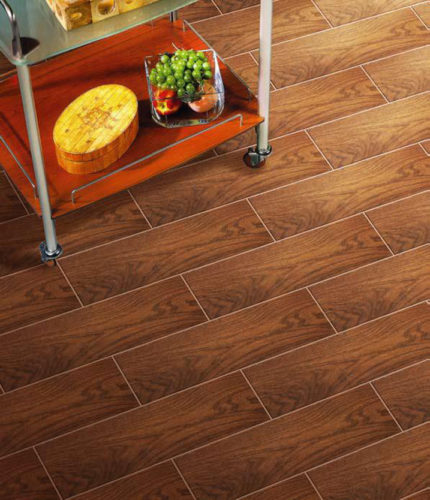
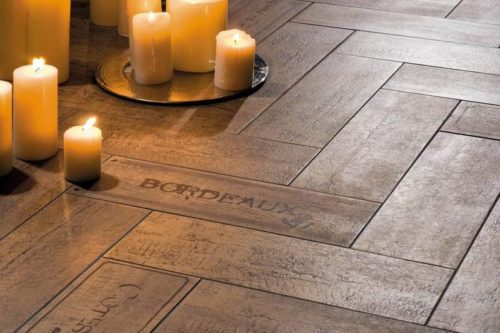
The type of laid tiles in this case resembles a classic parquet. For the method, it will be successful to the use of ceramics with a coating that imitating natural wood.
The method is recommended to be used in the kitchens of the wrong shape. It should be borne in mind that the number of waste is minimal.
Carpet method laying ceramic tiles
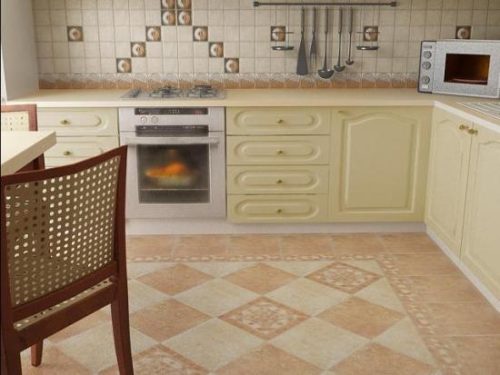
The difference between the method in the use of tiles of different collections contrasting in color and excellent by texture, by the presence of a pattern. At the beginning of the tile (as a rule, the darker) is laid out on the perimeter of the kitchen, and the middle part is filled with ceramics of light tones, thereby creating a type of carpet. The method is good for the selection of food intake areas for "island" kitchens.
Types of grouts for seams of ceramic tile
- Cement grout: prepared from Portland cement, but can partly consist of sand. Dye, water-repellent and antiseptic substances are added. Applied seams with a width of at least 5 mm. It is not recommended for tiles with enamel: the sands can damage the coating.
- Epoxy molding: not afraid of the effects of chemicals, resistant to ultraviolet. There is no fungus on such a grip, it can be washed with means of household means.
The color of the grout is not necessarily chosen in tone tile, it can contrast with it. Choose a grout mass follows the tile pattern.
In the conclusion of the article on how the ceramic tiles in the kitchen is selected and is selected - video with specialist comments.

