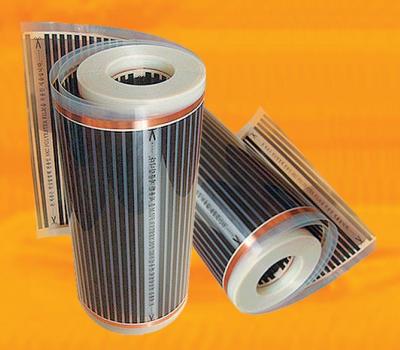
Infrared warm floors today are far from wondering in the market of heating systems. Some even managed to experience all the delights of such technology on their own experience.
Content
The demand for infrared film floors is actively growing, especially in conditions of continuous increase in tariffs for centralized heating and gas. This technology attracts, first of all, the economy and simplicity of installation. In order to install such a floor qualitatively, it is not necessary to seek help from a specialist. All work can be carried out on their own. Let's talk about this further.
Infrared film floors: main characteristics and advantages of application
Infrared warm floor, uses infrared radiation to heat the room, which gives a lot of advantages. Among them:
- low electricity consumption;
- high efficiency due to heating not air, but surrounding objects;
- ecology and complete safety for the health of others;
- reliability in work, which is provided by parallel compound of carbon heaters;
- the possibility of mounting infrared floors for any type of flooring (linoleum, carpet, ceramic tile, laminate, cork, etc.), as well as on any surface (vertical, horizontal or inclined);
- easy dismantling and re-installation.

In addition, with the help of infrared film, it is not possible to produce heating, but only a separate part of the room, for example, a workplace or a plot for children's games, a staircase or a balcony.
Installation of infrared film floor: the main stages of work
Preparatory work
Before moving to the installation of infrared floor, you need to prepare the necessary materials and tools for this in advance, namely:
- a set of warm floor, which consists of a roll of thermal film, special contact clamps, temperature sensors, thermostat, electrical wiring and insulation;
- heat transfer material;
- scotch;
- Fiberboard, if you need a carpet or linoleum, or the so-called noise-canceling substrate for a laminate with a thickness of about 3 mm. It can be replaced by the usual polyethylene film;
- thermal insulation material (technical cork or foam, mineral wool, etc.);
- scissors, knife, level, screwdriver indicator and some others.
Next, proceed to the preparation of the foundation.
- Infrared warm floor must be laid on the perfectly clean and smooth surface. Experts allow a slight difference of height to 3 mm. You can use the level for checking. If the surface meets these requirements, then immediately moving to the next step of work, if not, the floor is aligned, carefully dry and remove the residues of the solution.
- At the preparatory stage, among other things, they constitute an infrared laying scheme. There are features here. In particular, this system is better not to be installed in places of permanent location of large furniture or home appliances.
- In addition, to start laying the first row is necessary, retreating at least 10 cm from the walls of the room.
- At the same time, if the infrared floor is the main source of heat, then it must cover the entire area of \u200b\u200bthe room at least 70%.
- It is very important to determine the place of installation of the thermostat. Experts recommend doing this at a distance of approximately 15 cm from the floor. When all organizational issues are solved, you can move to the installation of isolation.
Installation of isolation

Insulating isolation, although an intermediate stage, but it plays great importance in the installation of infrared warm floor.
- The waterproofing layer helps protect the entire system from moisture exposure, and thermal insulation - to avoid unnecessary heat loss during operation, thereby reducing the power consumption.
- As thermal insulation, you can choose a technical cork if a ceramic tile will serve as a finish coating for a warm floor or any special material (foam, an avoor, etc.) for other types of flooring.
- The thermal insulation material is placed by the metal side up, gently straighten over the entire surface and glue the joints with scotch.
Next, go directly to the laying of the system itself.
Laying of the infrared warm floor system
- Infrared film is placed on top of the heat-insulating material according to a predetermined scheme. At the same time, it is worth remembering that the warm floor should be mounted with copper contacts down towards the wall, where the thermostat is located.
- The so-called contact clips are connected to the very edge of the copper strip, after which the wires are connected.
- If there is a need to cut the infrared film, then this is done neatly, strictly on the placed lines, and the locations of the cuts and connection of the clamps with the wires are necessarily isolated with bitumen mastics.
- To comply with safety standards, a warm floor is placed in such a way that there remains a minimum gap between the adjacent panels in about half a hundred.
Connecting infrared warm floor

After laying the infrared film has been completed, go to connect the system itself to check its serviceability.
- To begin with, a thermal sensor is connected to the bottom side, which is well isolated.
- Next set the thermostat. As a rule, it is plugged in stationary, however, the possibility of its installation is not excluded using a conventional outlet.
- Wires that connect the infrared film with the thermostat, better hide under the plinth.
- At the final stage, a warm floor is connected to an electrical network to a first place to test its operation.
- Next, go directly to the installation of the finest coverage.
To learn in detail about how the infrared film floor is made, you can on video:


