Today, the choice of wooden doors in the store is pretty great. Everything is limited to the financial side of the question and personal preferences. However, not a single, even the most beautiful door, will not be reliable and durable, if there were gross errors when it was installed. For all the time, the rules and technologies for installing wooden doors, which are recommended to follow. Before you get acquainted with these standards, you need to understand the difference between different types of doors. The house usually sets no more than three types of doors - these are interroom, balcony and entrance. Obviously, the latter should be stronger, massive and warmer than two other types. After all, these doors have direct contact with the street. Entrance doors are similar as balcony, should be quite hermetic. Despite all these differences, the installation of the doors of different types is not much different. We will tell about all the intricacies of this question further.
Content
Preparatory stage

Before installing a wooden door, you need to competently equip the place where it will be delivered. In particular, you should prepare all the necessary tools, materials and a door frame in advance. And the latter usually do separately. In some situations, it is required not just to put a new door, but replace the old cloth to the new one. In any case, the doorway must first be plastered, polished and covered with paint or varnish. To improve their skills, it will not be superfluous to know how manufacturing and installing wooden doors. This will help you without any particular difficulties to spend all installation work. It is worth saying that the price of installing wooden doors is quite high, so to reduce the financial costs, you can perform these works personally.
Phased block assembly block

The door block consists of two structural elements - boxes and door leafs. They are connected with each other special canopies. Therefore, to build, first of all, prepare these parts. Let's describe this process a little more. Most often, the problem occurs with the door frame. Therefore, we will consider working with it first. The design includes several elements - three or four planks interconnected. Two of them are support racks, and the rest are considered to be connected parts (jumper and threshold). Moreover, the threshold is not always in the design. If it is present, then such doors are usually used as interior.
The phased installation of a wooden door with their own hands:
- First, the timing is trimmed by the desired size. In the closed state, the roles of the support elements are performed by the protrusions located in the upper and lower part of the vertical racks. These supports need to be removed after trimming the bar.
- Then parts of the box are connected to the self-tapping screws into a single design. After assembling the box on the desired rack, you will need to make grooves for loops.
- When the door frame is collected, it will be necessary to prepare the door cloth, which will require, in particular, to cut other parts of the loops, as well as set the handle and lock in place. It is easier to make it easier than collecting the door frame. So, it is originally cut pieces of canopies. In this case it is very important to correlate the grooves on the box with locks on the canvas. So that everything happens, it is enough to perform all actions in a certain sequence.
- Consider further stages of work in more detail. So, you first need to prepare a place under the door loops. This can be done by manually by the chisel. Places under the loop need to be done so that the sides remain indents into several centimeters. The same applies to the distance from the bottom edge of the loop to the lower edge of the door.
- When the places under the loop are ready, you can begin the preparation of structural elements of the box. To do this, you need a knife stood and circular saws. Parts of the box are cut across the edges at an angle of 45 degrees, and then the side vertical design of the design is applied to the door canvase.

- The next step is the markup of places for fastening the loops on the door jammer with compliance with the gap of 4 mm from above and 1.5 mm below the door.
- When it is done, you need to drink the grooves under the loop. This can be done similarly to the cutter or chisel. Next, loops are placed in the finished holes. Then, with the help of a drill, the holes are located, where the screws will be screwed. If this is not done, then cracks on wood can appear when screwing the screws. After that, the loops are fixed to the doorway through self-tapping and screwdriver.
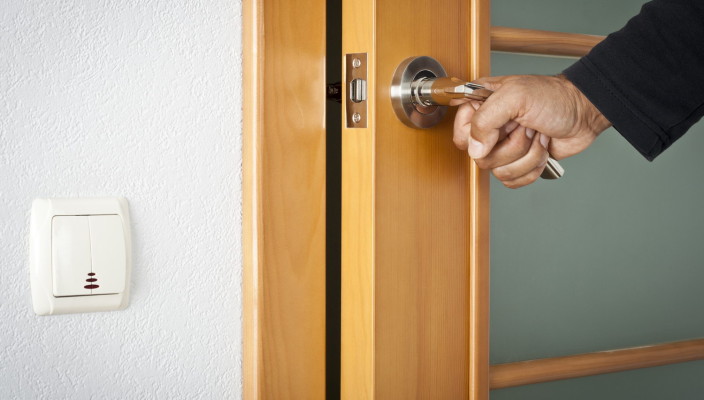
- It's time to do a latch. So, in the location of the latch, you need to make a hole of the required diameter. This is done at the level of 10-11 cm. For convenience, you can turn the door. When the hole is ready, you need to mark the exact form of the groove. For this, the latch is simply attached to the hole made and the contour will be burned.
- Next, the chisel on the previously made markup is made a deepening, which will be inserted by the front plank latch. After that, a valve is inserted into the hole in the door, the upper part of which should not be visible on the outer surface of the door. Then the valve must be pulled out of the door in order to schedule the holes on the holes under the handle. After that, these holes are drilled.
- Now the latch can be inserted into the resulting recess and fasten through the screws. After that, you can place pens and decorative lining on both sides. When you finish with this, you can move to the installation of the box.
- In general, the assembly and fastener of the door frame is considered a rather difficult stage of work. First, the edges of the box elements must be trimmed at an angle of 45 degrees for a successful connection with each other. Crop parts can be used with stusl. When it is done, openings are made in the end parts, which can quickly and firmly fix the design, without even resorting to assistance.
- When all the box elements are ready. They need to be adjusted on the width and height of the doorway. After that, the details of the design are laid on the floor and are connected using self-samples through previously made holes.
- After successful assembly, the box can be attached to the doorway. In places of grooves from the loop, it will be necessary to make holes, without which it will not be possible to attach the box to the wall. Then the design is installed vertically in the opening and fixed to the wall in the waterway by means of dowels or large screws.
- The box should stand strictly vertically. To control it, the construction level should be used. The lower part of the design is fixed in the same way. Important moment: Between the box and the wall should be the gap for wooden wedges. It will make the design more rigid. Next you need to achieve that the box is tightly attached to the wall.
- If the box and canvas are assembled, then at the next step of installing the inlet wooden door it's time to connect them into one design. To do this, carefully take the door in the vertical position and the loop on the canvas. Put on the loop on the door frame. When it is done, we can assume that the door is successfully assembled. It remains only to install the assembled design in the doorway, but about it below.

- When the box will stand securely in its place, you can hang the doors. This is usually done using self-tapping screws. Hinges should close the heads of the screws.
- When it is completed with this, it is necessary to check the installation of the design. For this, open and close the door leaf. In the closed state, the door should not spontaneously open, and in the open - it should not close itself. If the test is successful, then the upper part can be fixed by wooden wedges, which mentioned earlier. Due to this, the maximum stiffness of the doorway is achieved.
- Next should be done by installing the fixing plank. To do this, the door must be closed and on the box opposite the latch to make markers with a conventional pencil. After that, the openings are drilled on the marked place. It is important that they coincide with the crop levers.
- Then the door must be closed again and check how the hole matches. If everything is in order, the wooden wedge is put. After that, through the box, holes for self-drawing are done. As a result, when the installation of the fixing strip will be completed, the self-tapping screw will not be noticeable.
- When the shut-off bar is installed, it will be necessary to check the size of the gap between the door frame and the door itself. Fix the box with wedges is only if this clearance is normal.
- After fixing with wedges, all the gaps from the wall side are filled with mounting foam. This will improve thermal insulation. In addition, the fastening will turn out more durable. When the foam is applied to the front surface, the platbands can be fixed. On the inside of the connection of the box and the door you need to fly and apply paint. If it is necessary to install a second inlet wooden door, the order of the above described works is repeated.

Installing sliding doors
Installation of the sliding door is easier than installing a swap type of web. Despite this, it is necessary to treat such work with full responsibility. After all, from how correctly they are made, the duration of the operation of the door depends.
The installation process of the sliding door consists of several stages:
- For the first stage, it will take a wooden bar, the length of which is twice as much as the door width. This timing will need to attach at an altitude of 8 cm from the vertex of the doorway. After that, the guide is attached to it, and the carriages with rollers to it. When this is done, do not forget to close the ends by the limiters. Otherwise, the rollers will fall out when moving along the guide.
- At the second stage, metal brackets will be needed, through which the door will be connected to the rollers. These staples need to be fixed on the top edge of the door leaf. After that, in the lower end, the web needs to choose a groove for the running of the bottom roller.
- At the third stage, the door is temporarily hung in its place. It is fixed in this case by connecting the bracket with carriages. So that you can mount the bottom roller, slides slightly slightly. It will be more convenient to insert a roller in the groove that you need to do. When it is inserted, move the roller in the opposite direction until it is wound. Before removing the door, you need to place the lower position of the roller.
- At the fourth stage, the door is removed, and the conductor is screwed to the floor. Further actions will be similar to those were completed earlier, but will be performed in the reverse order. Thus, first put the door to the bottom roller, after which the upper part is fixed.


