The pavement tile is considered an old view of the coating, but today it enjoys great popularity. In contrast to the poor-quality asphalt, which cracks and forms a holes, the pavement serves much longer, almost without losing their decorative characteristics. We will talk about laying a paving slats with your own hands in this article.
Content
Types of blocks and ways of installing it
What do neither say, and lay a paving slave it is much easier to make a path from asphalt. Among other things, with a small tiled size you can easily control the width of the paths and its uptime, and during the installation process you do not need to use heavy massive technique.
Manufacturers of paving slabs paving stones recommend to lay material with one of the three main ways:
- on the sand pillow;
- on a pillow of sand and cement;
- on concrete solution.
The easiest and lowest way is the installation of tiles on the sand. This method is best used when creating garden paths, since moisture through the tiles will fall into the sand, and from there go to the soil.
Laying tiles on a mixture of sand and cement is considered a more durable and reliable way. The ingredients are mixed in the proportion of 1 to 5 and are used in dry. Pouring such a pillow, it is placed on it, and after watered with water. As a result, the mixture is hardening and grabbed with tiles.
An even more durable method of laying paving slaves on a concrete solution. This process will take you more time, but the coating will last much longer.
We will deal more with the views and characteristics of the pavers. It is believed that such material was invented many years ago, in the 19th century they were separated by streets and bridges. Modern factories still produce paving slaves, giving her more diverse forms and shades. Today it is not accepted to bring the tile of the passage of the passage, since it has long come to replace the cheaper and simple asphalt production. However, in many European cities and now you can meet such a coating on the roads.
Among the goods, which is presented in the construction market, the most affordable price, but rather quality is a blocking of Russian production. Materials from which such a tile is made, there are several, the most popular today is the stone, clinker and concrete.
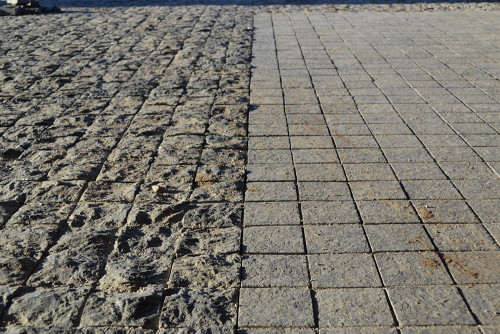
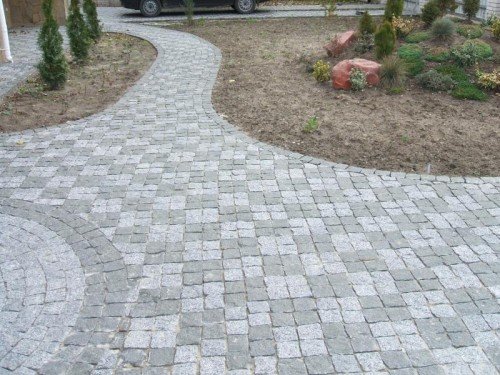
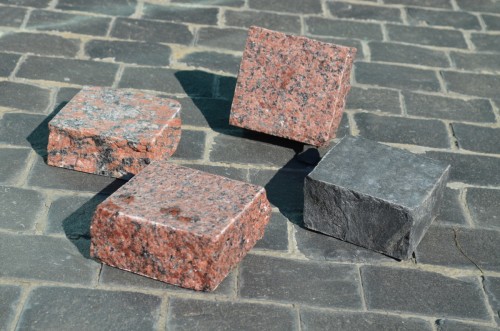
The most durable and solid, and, accordingly, durable, remains a tile of natural stone. Russian paving slave has different forms: rectangular, round, curly. Tints of the coating are also different, depending on which dye is added to the raw material in the process of producing material. Stone paving slave painted in that color, which is characteristic of a specific breed. For the manufacture of such paversing, stones with increased hardness are most often used: granite, marble, basalt. The easiest of handling and affordable is the granite tile.
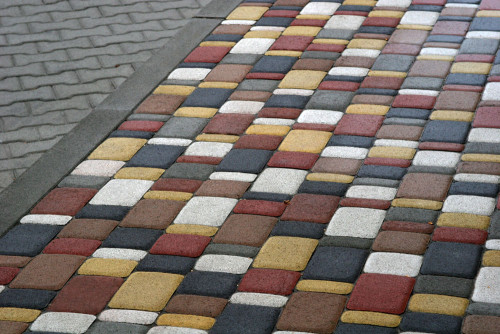
A cheap path of the paving coating is a concrete paving slave, which is made from cement-sand mixture with adding pigments and other components that improve the characteristics and strength of the material. Concrete for such a material is used especially dense, and in the process of production it is subjected to vibropressing. The concrete pavement is clearly fitted with each other the same dimensions and forms, it is easy to lay it, and due to its strength characteristics, it can serve a lot of years.
There is another kind of paving paving slabs - this is a clinker. Such a coating is made from clay of particularly durable varieties. Clinker tiles due to its composition components has a natural red-brown shade, resembling brick. The clinker paving slave is rather durable, well withstands all sorts of loads and is not afraid of temperature drops, for many years it retains its shade and does not change the form. Using it in a combination with other types of tiles, you can create beautiful compositions.
Benefits of paving slabs paving
A blocking from similar materials is distinguished by a number of advantages:
- High strength, long service life and reliability - these are the main advantages of this material. Such a coating is reasonable to use in private construction for the packing of garden tracks and courtyards, especially if you have not saved on the construction of the house and built a truly durable structure.
- Since the component composition of all types of blocks includes solely natural natural materials, the coating itself is environmentally friendly. It does not carry danger or for people nor for the environment, since it does not distinguish any poisonous components into the air.
- Laming is the perfect option for garden paths. It does not cause water and puddles are not formed, the entire liquid after the rain immediately seeps into the slots between the tiles and goes into the ground. This makes the use of the coating convenient and comfortable.
- Even artificial paving slaves can stop several dozen years. Natural stone and clinker are even more durable. Even now, stone coatings, laid several centuries ago, still retain their integrity.
- Laming - wear-resistant material that is not terrible frost, heat, sharp temperature fluctuations. It is well used in the regions with harsh winters.
- Such a coating is perfectly repaired. In the case of which the damaged element can be replaced by another, without dismantling the path as a whole.
- Laming has both high decorative qualities. It looks attractive and appropriate in any landscape design and combines with a home of any style.
- You can put a pavement on your site yourself, it will only be necessary to explore the right technology of work. In the process itself there are no difficulties, you will need a minimum of materials, and special technique is not needed at all.
Installation of paving slats with their own hands
Materials and tools
To put a paving slave for sidewalks yourself, you need to stock such devices:
- workshop;
- larger for marking;
- by pegs;
- wooden or rubber Cyans;
- vibrotrambovka;
- rakes;
- construction level;
- metal pipe;
- watering or spray hose;
- broom;
- cement brand M400 or higher;
- river fine-phrase sand.
Tile laying technology
- First of all, you will need to prepare a working basis. To begin with, remove from the weeds area, dig the roots of the plants, and align the ground and confuse. Make sure that anywhere there is no holes or bugs. Put in the soil falling off, bumps scatter, then go through the area with a vibrotambob or a wide log.
- To lay the tile, you also need to calculate its required amount. Initially, you represent your site on paper in the form of a scheme, indicating the location of buildings and other objects. Think up the direction of garden paths, apply all the sections that plan to separate the blocking. Transfer the scheme to millimeter paper, mark the sectors and calculate the amount of material you need, taking the area of \u200b\u200bthe treated surface, dimensions and shape of tiles as the initial data. Add 10% to the finished value - it will be a stock for unforeseen circumstances. Do not be afraid that after paving you will have extra material. It can be removed in a dry place for storage and, in which case, use to repair the tracks.
- Do not forget to calculate the amount of sand or cement-sand mixture you need, pegs and ropes for marking areas. Please note that the stakes should be positioned at a distance of 1-1.5 m from each other.
- When laying a paving stones, try to abide by a small slope of the surface in the direction of the sewer plum, the lawn or the garden. If there is a slightly inclined surface, it will not be noticeable, nor noticeably, but the water after precipitation will flock and go into the soil, without blurring the drain layer.
- In accordance with the plan deployed on the territory of the site, make marking using pegs and cord. Within the designated sectors, remove the top layer of the soil so that the recess corresponded to the thickness of the future drainage layer and the tile itself. The blocking can not necessarily lie to the ground with the ground, it can be a few millimeters above. The main thing is that the tile has not been lying into the soil.
- When you remove the layer of the Earth, go through this section of the trimmer, as it should be a grinding ground. Then make a layer of small sifted river sand, instead of which gravel can also be used. The sand layer can be from 5 to 20 cm depending on the density of the earth itself.
- Favoring sand, make it well, using a watering can or hose with a spray nozzle. Then I will confuse the drain layer again.
- If you want to make a path especially hardy and durable, use a cement pillow instead of sand. To do this, connect the river sand with the cement of the M400 or M500 brand in the 1: 3 ratio. Put the resulting mixture into the trench by a layer of 5 cm.
- The paving path of the paving stone starts with creating a border. It performs the role of the paths of the path, gives it a neat and beautiful shape. For the manufacture of a curb, you can use any materials, for example, the same paving, but more than the size. To make a border, dig a separate trench under it, in the same way to confuse it and unlock with a geotextile or polyethylene film. The border is customary to mount on the concrete, so immediately prepare a certain amount of solution, but do not pour it into the entire trench immediately, but let us jay gradually during the work. Details of the fence are pointed as close as possible, avoiding the formation of significant gaps. The upper border level equal to the stretched cord, customizing the elements of a wooden or rubber image. You can add a fencing of strength using a edged board by installing the tiles close to it.
- Very laid paving stones can be no earlier than the day after the installation of the curb. During this time underneath the solution should be as a grab. When this happens, you can start making droshky of pavers.
- If you put the tiles on the sand, pre-moisten it well. Then knock out boards frame size 100x70 cm, put them right next to each other and start to work. Frames are necessary in order to lay the tiles smoothly and without distortions. Especially such constructs useful for those involved in this kind of work for the first time.
- Observing preconceived pattern, if you have one, put part of paving stones as close as possible to each other. If you want to use is not an integral element, and some part of it, you saw off the desired fragment grinder.
- After processing the entire sector, walk on it compactors rubber base which is necessary in order not to damage the tile.
- Then sprinkle your track with small and necessarily sainted sand, so that he filled all the slots between the tiles. Then finish the surface of vibrotambovka again or stick the sand into the slot with a brush with a rough bristle. For such a job, try to choose not just the petty and sophisticated sand, but also to follow, so that there are no weed seeds. If they fall into the sand, then a short time will be sprout, the decorativeness of the track will spoil or they will hurt the tile.
Try to lay a paving station, starting from the most noticeable site, for example, what is right in front of the threshold. All details align in one level using the Cyanka. After every couple of meters, check the smooth laying by the construction level, the height differences should not be more than 5 mm.


