
Polyfoam has long been used in construction for the insulation of buildings. Today, despite the wide range of new materials of this area, it does not lose its position and remains popular to create thermal insulation in any type of premises.
Content
Qualitative characteristics
Such a wide range of polyfoam can be explained by a number of advantages of this material, which remain unchanged.
Advantages
- High heat power (coefficient 0.03-0.04 W./m2.· grad.)
- Ease
- Easy installation
- Low cost
- Durability
- Lack of reaction to microorganisms attacks
- Does not absorb moisture
- It is not deformed and not comes in the process of long-term operation.


Important! All listed advantages are important criteria in the process of selecting the material. Perhaps the insulation of the wooden house with foam is the most practical and convenient solution.
In addition to the above positive characteristics, some drawbacks are also inherent in this material.
List of negative properties
- spray
- isolation of poisonous substances in the process of burning
- exposure to rodents damage.


Conclusions "For" and "against" foam
These nuances are especially important when insulating a private house with foam. But, we note that the susceptibility to burning and the harmful effects of the products of this process will consistently arise only when combustion of the entire design. Rodents attack foam no more than other natural materials. Moreover, they do not destroy it, but simply break through the tunnels in the thickness of the material. To avoid this, it is enough to use special interlayers between the walls and the basement that prevent them from penetration. The advantages are much more and they are significant. 
Application for concrete and brick buildings
An excellent option will be the insulation of a foam of the house, which is based on concrete and reinforced concrete slabs, brick. It is advisable to perform work from the outside, which will not only increase the heat-insulating properties, but will retain the strength and rigidity of the facade design, which cannot be achieved when using other materials, such as mineral wool. 

Use when building a wooden house
Is it possible to insulate a house from a bruse foam?
On the use of foaming when building a building from natural wood, it is quite often possible to hear the categorical "no" due to the vaporization on the surface of the walls. As a result, rotting and premature destruction.
In fact, not everything is so unequivocal. This can be avoided, applying the correct installation technology. 
Registration of frame structures
The simplest solution is the insulation of the frame house with foam. Installation of plates occurs directly in emptiness between frame racks. On top of it, the pair-protective and windproof layer are paired (although the foam and it itself performs these protective functions), and then cubs the selected materials. Thus, it turns out the insulation of a wooden house with foam from the inside of the design.
Important! The foam foam is suitable for the insulation for light frameworks due to a slight load on all its carrier elements. In addition, when insulating the house of a foam price, the price will remain as democratic as when designing a building.

Creating natural ventilation
Natural wood initially has high heated saving performance. But if elevated requirements are presented, and foam is selected as an insulating material, you need to apply the most efficient principle of installation.
Technology
- To do this, in the process of insulation of a wooden house with foam plastic Outside, create a special lattice with a step of 25 cm from a 25 mm thick ridge.

- Material plates directly to it.
- Use dowels-umbrellas as fasteners.

Important! In this case, the adhesive is not used.
- At the end of the installation of the insulation, the surface is covered with a clapboard or other selected material.


conclusions
This method is quite economical and creates the necessary level of ventilation, which prevents the destruction of wood. The disadvantage in the absence of high-quality external sheaving is a decrease in the protective heat-saving property with excessive blowing.
Video
Below is an enclosed video insulation of a wooden house with a foam in a liquid form, which is a novelty in modern construction, but often used quite often. The only nuance is the need for special spraying equipment and a protective suit. Which option will become more acceptable - decide on your own.
How to make a house insulation with a foam with her own hands?
The entire process of creating thermal insulation has a certain sequence of actions. It is quite simple and affordable, does not require special professional skills, which allows you to fulfill all the work yourself. A prerequisite that will ensure the creation of a reliable protective layer - compliance with technical conditions and a clear following instruction.
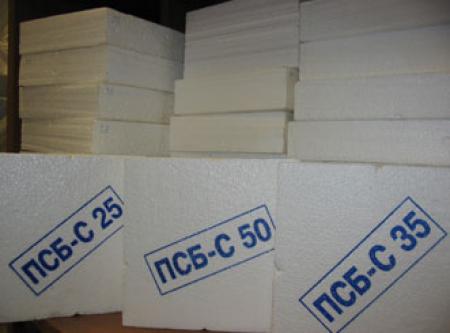
What to choose a foam?
The main distinctive indicators of foam plastic are the density (15, 25, 35, 50) and sheet thickness (from 2 to 15 cm). Selection Make on the basis of the climatic conditions of the building.
The standard thickness of the foam for insulation of the house is 5 cm at a density of 25-50 kg / m3, with excessive decreases of temperature in the northern regions it is advisable to use a 10-centimeter sheet. The most commonly used dimensions of sheets - 1x2m, but, if necessary, you can order the manufacture of individual parameters.
Important! All sizes and quality of this material are governed by the standards of GOST 15588-86.

Instruments
Regardless of whether you are planning an outdoor insulation of the house by foam or internal, prepare all the necessary tools in advance.
List of equipment and materials:
- perforator
- mixer or drill with a special nozzle
- hammer
- construction level
- parnails 80-100 mm, 350-450mm
- tool spatula 200mm with a tooth of 10 mm
- smooth spatula
- emery
- plastic buckets 25-35l
- knife
- roller malaria
- polyfoam leaf
- montament foam
- reinforced glass table 5x5mm
- perforated aluminum corner
- glue for expanded polystyrene
- plaster
- primer
- putty
- dowels-umbrellas.


Foam insulation technology
Sequence processes
- Preparatory work.
- Fastening foam and processing of seams.
- Reinforcement of the insulation layer.
- Creating a leveling layer.


Below is a detailed instruction manual for creating insulation of the house with foam, the photo will help to clearly understand the theoretical statement.
Preparation of walls
The main requirement for the surface of the wall is evenness, the absence of any defects or manifestations of destruction. Therefore, the process of pre-processing of the walls do very carefully.
Important! Preparatory work is often the most laborious, financial and energy consumption. But, it is from the quality of the finishing of the surface depends on the duration of future operation and heat-saving indicators.
Sequencing:
- Remove all the surfaces protruding elements (gutters, ventilation grilles, flowing window structures, lighting devices, air conditioning blocks).
- Remove the remains of plaster, paints, dirt, as well as protrusions, bugs, etc.

- Check the wall on the strength of the clutch.
- Sprouter the surface.

- Use deep penetrating primer compositions to remove large cracks.
- Wait for drying.
- Treat putty for outdoor work.

- Check the level of surface level, the maximum permissible deviation is 10-15 mm.
Important! If, after completed from the surface of the wall, construction dust is tremended or a flask remains when touched on the hands - repeat the primer procedure.
- Check the location of the power grid communications if they pass through the wall to prevent their damage.
- Install the outer window sills. Departure distance Plan with the thickness of the material + a gap of 1 cm + 3-4 cm of the length of the windowsill itself.
- Mount the metal base profile throughout the perimeter at the bottom of the wall.
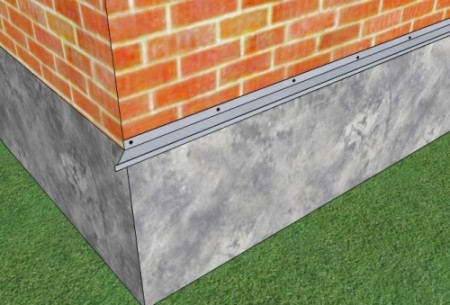
- In order to withstand the horizontal, measure the measurement every 50-70 cm.
- Check the literature of the line with a construction level, since this profile will be support for all insulation plates.
- Fastening with dowels 6x4 mm.

Important! When the house is insulated with a foam from the outside, this profile will be a reliable obstacle from rodents.


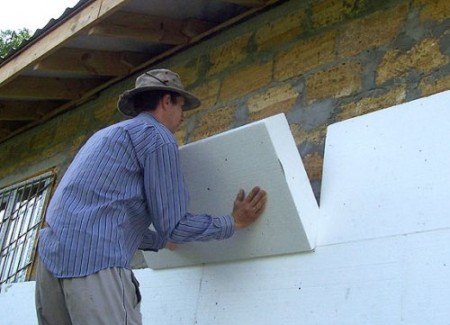
Fastening foam and seam processing
This stage is the easiest of all and, given the light weight of the material, does not require significant energy consumption. Naturally, this fact affects the speed of work.
Procedure:
- Prepare the adhesive solution from the acquired dry mixture in accordance with the instructions.

- Install the slabs in a checker order by pre-treated with the cooked solution.
Important! Treat glue around the perimeter at the ends of the plates and in several places in the middle. It is desirable to apply a solution not on the plate, but to the surface of the wall in the appropriate places. This principle will ensure the reliable adhesion of the foam with the surface of the wall.

- Start the installation from the slopes of the doorways.
- Create the most dense fitting plates.
- Look out 1-2 days until the glue is completely dried.
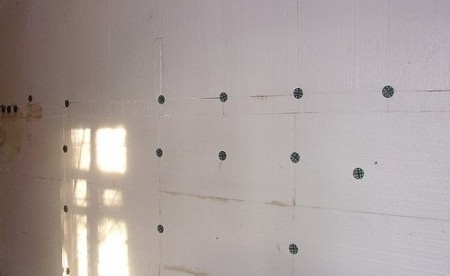
- Drill holes in the wall at the junction of the foam slabs length of 5-7 cm.
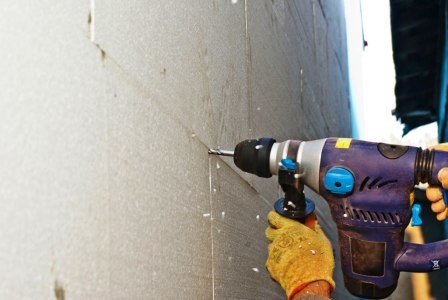
- Perform a second type of fixation with dowels, umbrellas.
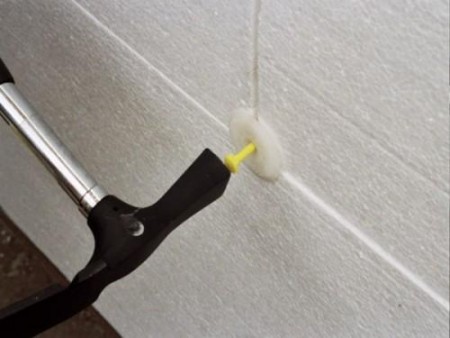
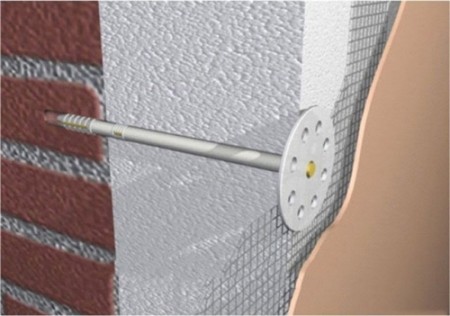
Important! Preferably, the drive fasteners directly into the surface of the slabs and at the junctions. In this case, the fixation will be done at the same time the three elements of the material. One anchor must be placed at the center of the plate.

- Fill in the gaps with foam. This will help avoid "cold bridges" at warming the foam outside the house.
Important! In the formation in some places large gaps - fill them with additional cut strips of foam.


Reinforcement layer of insulation
This process is performed by means of reinforced fiberglass.
For his performance, do the following:
- Prepare a solution of the adhesive.

- Apply the solution to the surface.
- Push grid into solution.
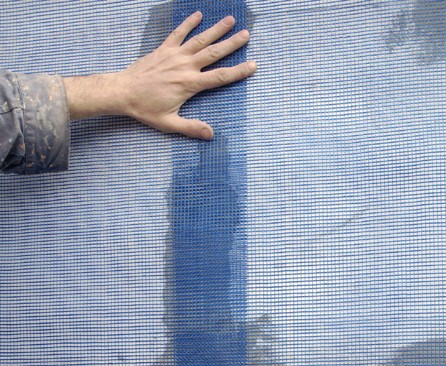
- In the joints mount horizontal grid strips overlap.
Important! Glue for reinforcement hardens very quickly. Have time to level it to dry completely, and adhesion to the foam plate.
- At the corners of the building secure perforated corners that will prevent damage to the foam for any mechanical action.


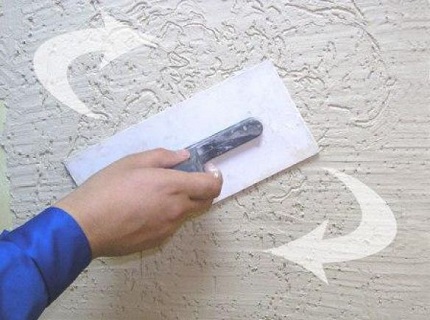
Making leveling layer
After all the work on the insulation fittings perform the finishing touches finishing surface of the walls.
Sequencing:
- Create a plaster solution in accordance with the instruction.
- Apply the first coat of plaster.

- Powertrowel entire surface after a small adhesion to the surface of the solution, but without waiting for complete drying.
- Wait for the solidification of the mixture.
- Apply a second layer of plaster thickness of 3 mm with a spatula smooth.
- Make grout mixture after drying.
Important! Carry out the work in stages, short intervals in time to make the grout surface.
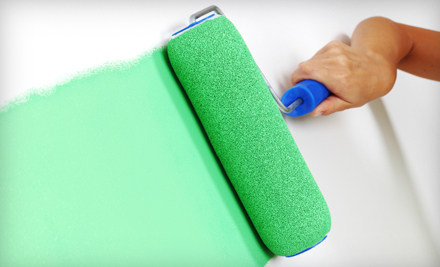
- After final solidification of the mixture, do make the surface of the painting or cladding material selected.


Video
Look below attached video home insulation foam outside.
Creating an inner layer of insulation
The choice of foam
The principle of creating an insulating layer inside is similar to the implementation of such works outside. For insulation of the house with foam from within, it is recommended to use PSB-C-25 and PSB-C-34 brand, as well as extruded XPS brand polystyol.
Sequence of work
- Pre-clean the surface from previous materials.
- Scroll.

- Wait for drying.
- Check the surface evenness with the help level.

- In case of detection of deviations from the norm (maximum 1-1.5 cm) - perform additional stripping and create another primer layer.
- Prepare a special adhesive solution for polystyrene foam.
- Apply it with washers, with a 40 cm gaps, on the plates of foam.
- Install foam plates.
- Perform additional attachments of umbrella dowels after the final pouring of the glue.
- Prepare glue and prepare the reinforcing mesh cloth.
- Apply the solution to the surface of the wall and without waiting for drying, install the grid.
Important! To withstand the nestling of mesh cloths at 10 cm.
- Apply an additional layer of glue 2 mm thick to align the surface.
- Wait for drying.
- Apply layer plaster.
- Perform painting of walls or go wallpaper.


Video
Review the video insulation of the house with foam in order to avoid any ambiguities during the work.


