
When building the garage, the main criteria are simplicity and reliability of the design. Therefore, a thorough approach is required to the question of the roof. But, despite this, the building process does not seem laborious and difficult, which makes it quite affordable for independent execution.
Content
Types of roof
The following types of structures are suitable for creating a roof of the garage:
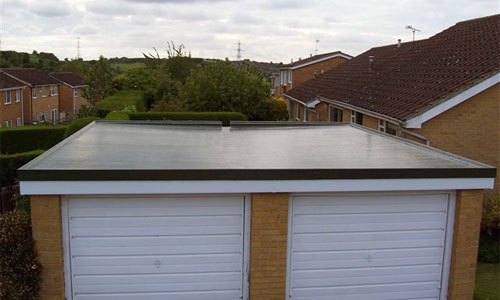
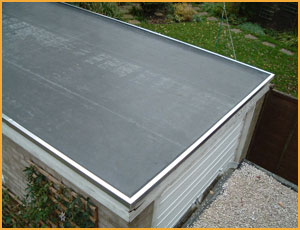
- Flat roof. The easiest way. It is enough to install a reinforced concrete plate or create a dense wooden flooring and covered with rubberoid or glass.
- Single construction. Also no particular difficulty, but will require some preliminary calculations, the choice of material and compliance with the rules of technology.

- Double roof. Most often is designed to create a single style direction with the design of the house or, if necessary, arrange an additional space for the provision.
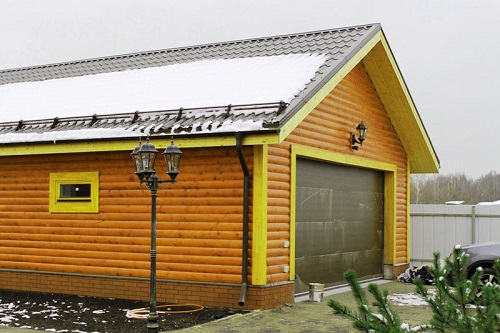


Choosing a type of roof Make yourself based on your preferences, financial capabilities and garage location. Single construction is most popular.
What material is suitable for roof roofs of the garage?
The type of roofing flooring
Most often for decoration of the roof of the garage use:
- Professional flooring (corrugated and folded panels)

- Ruberoid
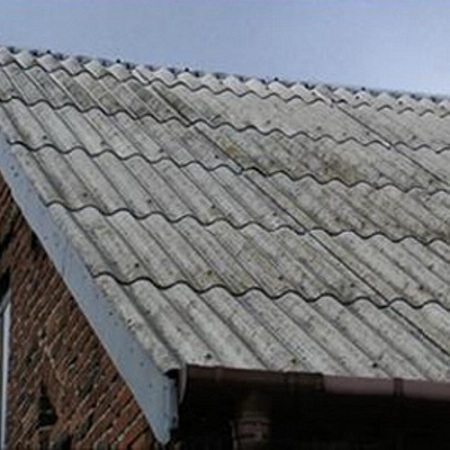
- Slate


Important! Take into account when choosing the amount of snow in your region in the winter. The material must withstand the weight of the snowdrifts.
Note that the roof price of the roof of the garage depends not only on the selected type of roofing flooring, but also on the size of the construction.
How does the angle of inclination affect the choice of material?
Be sure to take into account when the material is selected, the angle of inclination of the roof.
View the parameters of possible application in the table below. 
When planning a single-sided design of the roof wall, the wall of the garage is created with the difference in the height of the corresponding slope. In this case, the front part is usually above the rear wall.
To correctly calculate the wall height difference, use the following formula:
h \u003d b × Tany
h - height difference
b - Garage Width
tany is an indicator of the selected slope angle.
Tools and materials
To create the roof, prepare tools focusing on this list:
- roofing material
- brux for creating Mauerlat 100x100 mm or 120x120 mm (width usually matches the wall thickness)
- brux for rafters and crates (calibration and quantity is determined by the type of material, the size of the roof and technology)
- antiseptic solution for wood processing
- saw
- hacksaw
- screwdriver
- axe
- hammer
- knife
- stapler with brackets
- waterproofing film
- roofing nails
- copper wire
- anchor bolts.
Important! Lumber To create a roof frame, select in accordance with the type of roofing material. 
The technology of arrangement of the roof
Carefully consider the applied roof circuit of the roof of the garage before performing work. This will help more clearly represent the design features.
Single Roof


Double roof


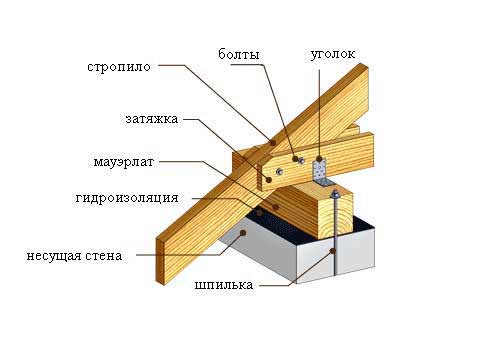
Creating a roof base
The main elements of the frame:
- mauerlat.
- rafyla
- obsek.
Important! Carefully read the instructions and view the accompanying photo of the roof of the roof of the garage, In order to maximize the technology features.
Single Roof
Sequencing:
- Pre-process all sawn solids with a protective solution.
- Wait for drying.
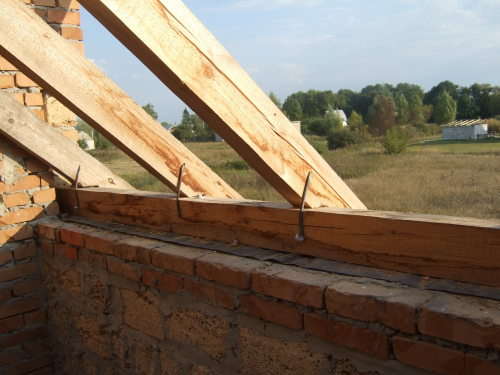
- Install the Mauerlat Beam perimeter.
- Fasten long anchor bolts.
- Align the surface of the beams.
- Next on the beams the location of the slots for the rafter.
Important! The standard step is 60 cm, which may vary with the planned high load from heavy roofing material.
- Perform deforestation in accordance with the set parameters.
- Cover with bitumen mastic or rubberoid in 1 layer.
- Install the bars rafters in the removal, taking into account the removal of the walls of the walls by 30-50 cm.
- Secure the anchor bolts and copper wire or corners.


Important! If the garage length exceeds 4.5m, install additional vertical backups to eliminate the sagging and destruction of the roof under the weight of roofing material and snow. 
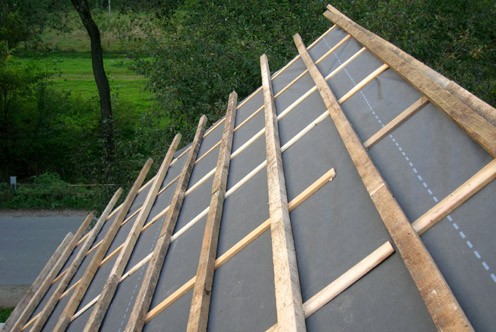
- Out of the rafter, lay the waterproofing film horizontally, observing the totaling of 10-15 cm.
- Do not allow significant sagging and do not pull.
- At the edges, make a gap of 15-20 cm, which are subjected to inside.
- Secure the braces with a stapler.
- Prepare boards for mounting clamps:
- for professional flooring - 50x50 mm, 30x100 mm
- under slate - 75x75 mm (ordinary profile) or 68x120 mm (wavy profile)
- under rolled material - boards with sheets, 100-150 mm wide, thickness - 200 mm.
- Install the labels of the crate on top of the rafter legs horizontally, withsting the width of the step.
Important! The intervals between the shell boards are adjusted by the selected type of roofing flooring.
- Secure roofing nails.
- Check out the level of surface line level to ensure an attractive type of roof.

Double roof
The cost of the roof roof of the garage of this type will exceed the cost of arrangement of a single-way due to the fact that a greater consumption of material will be required.
The sequence of steps is similar to the above proceed. The main difference that is worth noting is the installation of the rafter system.
Calculate the formulas below the length of the rafter and the height of the skate (the point of their compound in the central part).
h \u003d 0.5B / TANY / 2
l \u003d 0.5B / SINY / 2
h - Skate Height
l - Slinge length
b - Garage Width
Y - corner of the skate
Important! To the length of the rafter, add the gap of 30-50 cm for the allowance along the wall line. 
Sequencing:
- Make a tightening workpiece in accordance with the width parameters (beams for connecting two opposite sides of the Maurolat).
- Secure it clearly in the middle perpendicular to the timber, an equal height of the skate.
- Install pairs of rafters starting from extreme.

- To comply with the literature of the line, pull the cord along the line of the skate.
- Secure the anchors and wire.
- To create the necessary stiffness of the entire design, connect rafters with additional strokes below the skate.


Installation of rubberoid on the roof of the garage
The simplest and most affordable way. The roof from this material may well serve until 20 years with a regular update.
Important! For the installation of rubberoid, a solid doome of tightly adjacent boards, preferably tipped, or plywood sheets on top of the standard step of rafted 40 cm from BRUSEV 50x50 mm.
Sequencing:
- Clean the surface from pollution.
- Align the surface in the presence of deformation.
- Lubricate the basis of bitumen mastic.
- Place the first layer in the direction of parallel skate.
- Installing with stripes, withstanding a 15 cm inset.
Important! To create a reliable clutch with the surface, if necessary, use the gas burner. 
- Leave the gaps of the Ruberoid strips along the edges of 15-20 cm.
- Explore the stuffing material under the bottom and fasten with slate nails.
- At the bottom and upper edge, make an additional mounting nail with a step of 30-50 cm.
- Apply evenly on the entire surface of the layer of mastic.
- Route the second layer of rubberoid, observing the direction of the bands perpendicular to the first.
- The edges make a way similar to the mounting of the initial layer.
- Make one more, third, layer of rubberoid for the same technology.
Video
View video roof roofs garage rubberoid. This will help to understand the features of technology.
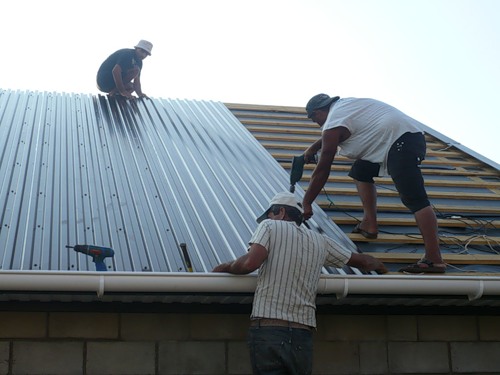
Installation of roofs professional flooring
The roof, decorated with a professional flooring, is different, with properly completed installation, strength and durability of operation (up to 50 years). Preference in the roof of the roof of the garage with your own handwritten NA brand.
Type of crates Select in accordance with the view of the professional sheet to the table below. 
Important! In the process of transporting material, follow the basic rules:
- exclude the infiltration of sheets
- do not expose to mechanical exposure
- the length of the car body should be no less than the length of the sheet
- the maximum speed of movement is 80 km / h.
Sequencing:
- Start the installation of the first sheet from the bottom end.
- Set the first fragment of the material.
- Align on the sink, keeping the indent 3-4 cm.
- Fix with special self-draws (from galvanized steel with neoprene gasket), a diameter of 4.8x38 mm in each second wave bottom.
- Install all subsequent sheets, withstanding a 20 cm toast, keeping its direction.
- Make mounting around the edges in each wave.
- Fasten the profiles of the skate and sinks.


Video
Review the applied video arrangement of the roof of the garage of the garage to the cornet, to clearly make sure possible work on your own.
Roofing from slate
The basis of the material is asbestos-cement plates. It is advantageous to his quite a democratic cost and simplicity of installation. Lifecycle - within 30 years. 
The basis is a rarefied lattice, the step of which does not exceed 70 cm from the bars, the cross section is at least 35 mm.
Installation technology:
- Place slate sheets in a flat row, ranging from Sve.
- Svet of the first row should be 10-15 cm from the end of the rafter.
- Each sheet should be located on 2 lattices of the crate.
- Observe the direction of the allen and its size 20 cm.
- In places of alleged fixtures, drill holes.
Important! Fastenings Perform exclusively in the crest of the wave to prevent the flow.
- Fasten with slate nails with a wide hat.
Important! Do not drive the nails very tightly, leave the gap in 2-3 mm to avoid possible destruction of the material when changing weather conditions.
- Mount the next row with a shift horizontally at 15-20 cm.

- Put the angles of internal spans of flooring to provide a more dense fit of the material.
- The backrest of each subsequent series to the previous one - 12-14 cm.

Conclusion
Arrangement of the roof of the garage is a fairly simple process that requires significantly smaller labor costs than when covering the roof of the house. But, despite the seeming ease, you must comply with the conditions of technology depending on the selected material. Only in this case is the duration of operation, which corresponds to the warranty period.


It is better to take a non-0.4 professional flooring for the roof as if you are referenced, but something from 0.5 or 0.7, for example Solano30, well, or any other than one more. The main thickness of the sheet.