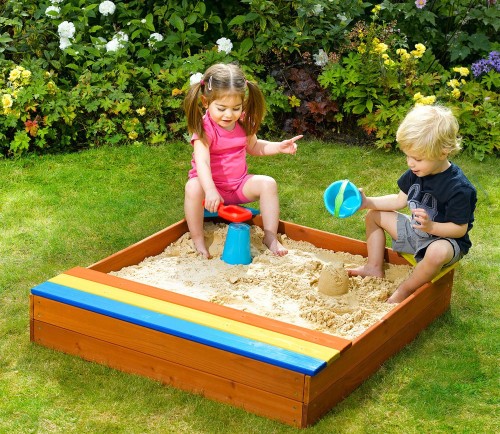
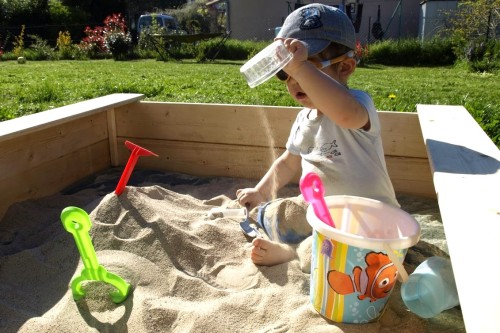
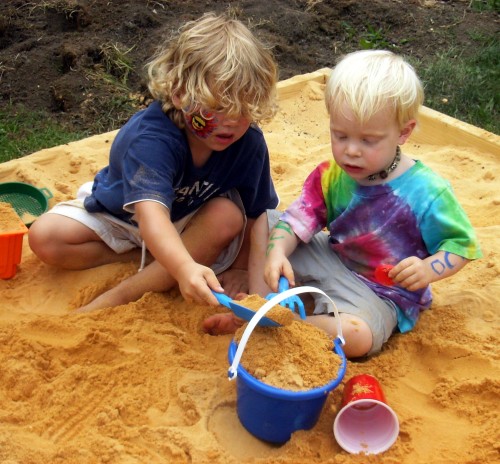
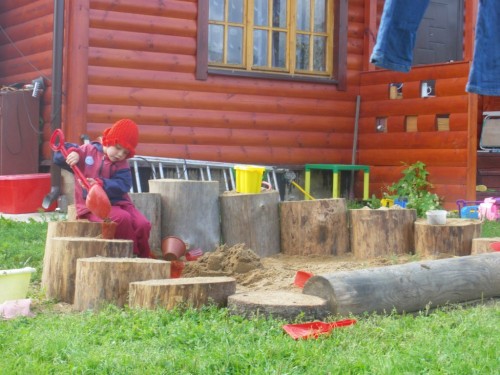
Every summer, parents try to bring their baby away from the city bustle of rest. One of these places is a cottage. But if adults are just enough to sit in the air and enjoy silence, then it's not interesting to the kids. Each child loves to play, move and be all the time something busy, because the games help them develop and know the world. So try to build a small and very simple children's sandbox specifically for giving. Your child will be very interesting to spend time for the construction of locks and turrets while you enjoy the country silence.
Content
As in any case, you first need to see the instructions in which it is stated how to make a sandbox with your own hands, and the photos are often attached to them. They will help to decide on the choice of shape and design of children's structures with sand.
Sandbox on the plot: location rules
Before starting work on the construction of the sandbox, you need to consider where and how it is better to place it. Consider the main aspects to pay attention to.
Comfort
It is necessary to consider the size of the future playing platform in accordance with the number of children to which it is calculated. If it is not spacious enough, then children will be uncomfortable to play with sand and with each other, respectively.
Caution
The construction must be in such a place that is well visible to adults from their holidays. Before it adults should take place without any barriers on the way and as quickly as possible. In the case of which parents must quickly be near the child and help him.
Sun protection
If the sandbox you build for kids will be located on the sun, the presence of a canopy must be mandatory. Otherwise, the child can earn a sun blow, being there for a long time even in a cap. In this case, to play in the sand for some time he will not be able because of bad well-being, and the child can upset.
Hygiene
It is better not to place a design for children's games under a large number of trees. In the sand, not only falling leaves can fall, but also a litter of resting birds on branches.
Sand selection rules for children's sandbox
- In the children's sandboxes are best brought with river or quartz sand. It is in such a mountain breed less than various harmful and unnecessary children's impurities.
- But even it needs to be mandatory to sift to be confident in the absence of unnecessary items.
- This is an ordinary precautionary measure that will protect the child from a meeting with small glass, chopsticks and other barbed and hazardous objects.
Making a children's sandbox with their own hands: Option with lid
To build the simplest sandbox, you will need to make some effort. After all, it is also necessary to try to prevent some unwanted moments. I would not want to see near the sandboxes of cats with dogs and germinating in the sand of weeds. It is best to build such a sandbox in the country with your own hands, which can be closed in case of non-use. It will protect it not only from the above factors, but also protects from rain and wind, which can be in the sand a lot of different garbage.
Set of tools
To build the most ordinary wooden sandbox with a lid, you will need such tools:
- boards - 8 pcs. (length - 1,2m);
- plywood - moisture resistant;
- bar - 1m long;
- agrofiber - 1.5 x 1,2m;
- plane;
- selflessness as needed;
- sandpaper;
- door hinges - 8 pcs.;
- screwdriver;
- dye;
- furniture stapler.
Step-by-step scheme of manufacture
- First of all, you need to prepare the territory. Take the rope and several stakes. Tension it on pegs in accordance with the dimensions of the future sandbox.
- In the resulting felling zone, remove approximately 25 cm of the Earth. This layer of soil is fertile, so it can be used to plant plants and trees here at the site.
- Well process all boards that will be used for construction. For this you need a planer and sandpaper. With their help, it is necessary to remove all the spines and carefully seel the surface of each of the boards. If this is not done, then children can get injuries.
- Prepare a bar. If the boards of the main part of the sandbox are 10 cm width, then you will need 4 bars having a width of 20 cm. For each of the sideboards we will need 2 boards. With the help of the same planer and emery, it is necessary to process the unpacked bars.
- We start collecting design using screws-screws. We establish a timber in each of the corners. Attach it to the bottom layer of boards. Metal materials in no way should stick together, and tightly lay down to the boards, so as not to allow the child to pull them out or cling to the part of the clothes, scratch their fingers.
- Attend the second tier. At the end of this process, the box will be ready. His form attached to the builder. The sandbox does not have to be exactly square, rectangular and other forms are also suitable.
- Write down the size of the manufactured box as you as possible. Then to draw the Faneru, which will perform the role of the lid, will be much easier.
- Depending on the obtained measurement results, proceed to the markup of the plywood sheet. He must share for 4 parts. Two of them will be horizontally located sites, and the rest will serve as supported in the form of becks for benches. On 4 outlined lines cut the Phaneur and we obtain 4 equal pieces of rectangular shape.
- Next, you need to pay slightly loop. They are screwed using self-tapping screws from the outside of the lid. This is done in such a way that at the time of lifting the cover, the planks could cross up.
- Before attaching parts of the lid to the sandbox, you need to paint all parts of the future design. The best option is the use of nitrocracy. It must be applied on the surface of the boards 2 times so that it remains longer in good condition.
- At the bottom of the structure, we place the agrofiber. With the help of a stapler, it must be attached to the satellites of the sandbox. To do this, lift and fold the edges in each of the corners, and the reservoir secure in the middle. Wrapped edges need to be fixed from the outside.
- Now you can attach parts of the lid to the main part of the structure. This is done on the sides with the help of self-tapping screws. Sandbox is ready.
Make a children's sandbox with a lid with their own hands is quite simple, but the children will be delighted and are always busy business. It does not need to be checked daily for traces of animals and garbage. On the night, the sandbox just needs to be covered, and during the day when the child wants to build locks, remove the lid. Special care does not require such a design.
In addition, such a structure can be slightly improved and attach the handles to the upper surface. Each of the 4 rectangles can bend twice and turn into a shop on which the kids will be able to relax a little. The agrofibre on the day it misses moisture well, so the rain will not spoil anything.
Children's sandbox: Improvement methods
You can also make a children's sandbox with your own hands more complex design.
- The backs are made from the board instead of plywood, and the door hinges are replaced with those that are commonly used for mounting wickets.
- Designs with such backs will be more reliable. They are designed for a couple of babies and even withstand adults. But the cost of such a sandbox will be slightly higher, as the boards will need a lot more than to build the previous version.
- Improve the sandbox in other ways. Here in the course of fantasy should join. You can pay attention to stability, strengthening the structure in some original way. You can use wooden legs for greater support. They need to wear into the ground deep enough to ensure that the design will not be collapsed at an inappropriate moment.
- You can make double seats on the lid. For this, the upper part should be divided into 3 departments. Two of them will be seats, and the third will turn into a back.
Sandbox for the smallest
- If the child is completely small, approximately 3 - 4 years old, then it is necessary to take care of the effects of the hot sun during the games. The kids at this age are often fond of monotonous occupation and do not notice how quickly there is time.
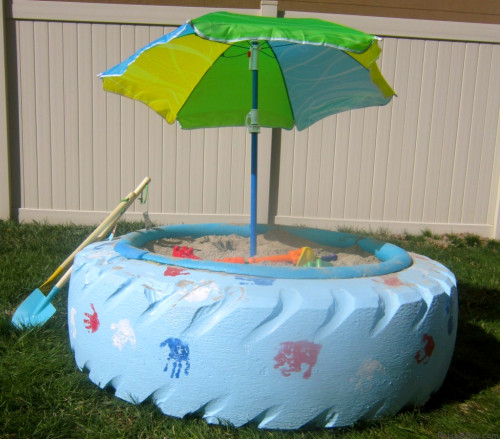
- So that your child does not get a sunnd, you can build a sandbox with a canopy in the form of a mushroom. Of course, the roof can have another kind, everything here depends on the fantasy of the parents.
- To build the construction of this type, there will be special support racks, on which the roof will be located. They can be installed in different places, for example, in the corners of the sandy itself or in its middle - no matter. The main thing is that the sandbox had a beautiful appearance and liked the kids. You can even create a fare in the form of a boat or a children's sandbox in the form of a house. Unusual designs will attract kids to play inside.
- Canopy can be made from different materials. It can be not only boards, but also plastic, reed, even straw and different types of fabrics. Frames made of metal, wood and other materials can be support for the roof.
- Racks can be a different amount. Their set depends on the type of frame. Maybe 1, 2, 3 or 4 - the main base for their installation is the form of the sandbox itself.
- Birders can do not too high. For small children, there are enough restrictions in the height of up to 35 cm. The child must calmly and freely leave the sandbox independently.
- All over the perimeter, on each edge of the side, you can attach a wide board for which it is convenient to fold toys or just sit.
- The most interesting designs are obtained when the sandbox structure itself is not manufactured from the usual plywood, but from something else. You can use slabs made of logs, painted in different bright colors.
- Canopy can be issued in the form of fungus, umbrella or chamomile, beautifully colored with bright colors. You can draw eyes and a smile, thereby creating a pleasant face and a positive mood in a child.
- The logs can be the most different height. Best of all, if they alternate and have enough area to fit the child in a standing position. On them, children can jump and play and thus play.
- If there are several separate sections in the sandbox, then the kids will be more interesting to play in it. Because for children of small age enough miniature structures, then later from the same log structures you can easily make floral flower beds. Nearby for a matured child can be installed another sandbox, larger size.
- The most common option of homemade sandboxes is a construction with a canopy in the form of all the same fungus, since it does not imply large cash costs, and it's easy enough to make it.
- For a semicircular roof, it is necessary to prevent logs of any shape to a diameter of about 10 cm or more. The length of the support should be no less than 3 m. In this size, the fact that it will need to be inserted into the ground about 1 meter to depth. If you take a smaller length, then the steady and reliable support will not work.
- Now cover the pillar with a special antiseptic so that the array does not deteriorate too quickly. To make a children's canopy mushroom for sandbox, you need to prepare the required amount of wooden triangles. They must be attached to the log serving a support for the entire carport. To work carefully, fix better from the inside.
- On top of the wood, impose Phaneur and only then apply paint. In this process, the kid can also participate, selecting drawings and colors.
- Similarly, other types of canopies are manufactured.
A little creative for sandboxes
- In addition to all the considered global ideas for the design of children's sandbox with their own hands, you can think over smaller details. We are talking about such things as the steering wheel, if the sandbox has a ship's kind. You can put small figures of the type of gnomes. But all the minor elements of the decor also need careful processing. It is necessary to ensure complete safety of the child.
- Over the design of the sandbox, too, you need to work a little. Just paint it in bright colors is not enough. The child will be more interesting to play in a more functionally organized place. For example, you can draw various drawings from your favorite fairy tales. Different flowers, apples, candy, cartoon characters and other things that like your chad.
- If the child is no longer quite small, then you can take it as the main assistant. Give him the opportunity to participate in such an interesting process as coloring. This is very interested in the baby, and then he will be very nice to play the sandbox, which he independently decorated.
Of course, the children's sandbox can be purchased in the store at a fairly different prices, but personally manufactured children's facilities are much more reliable and like children more.


