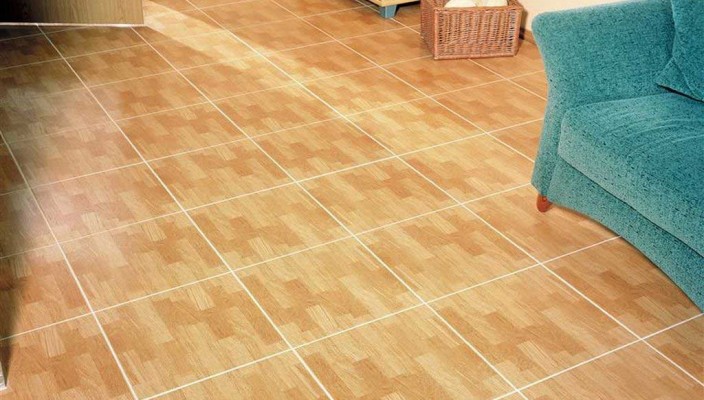
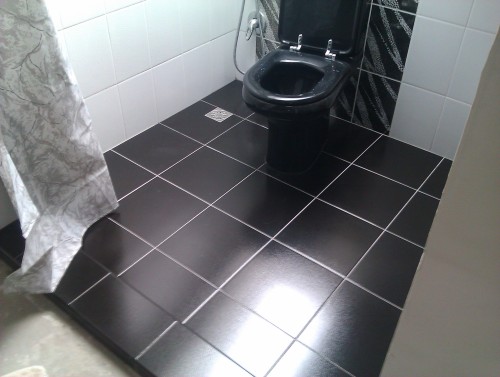
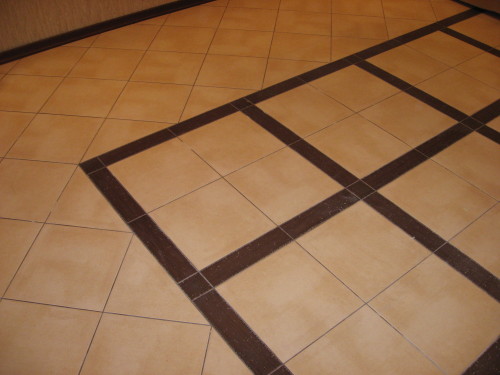
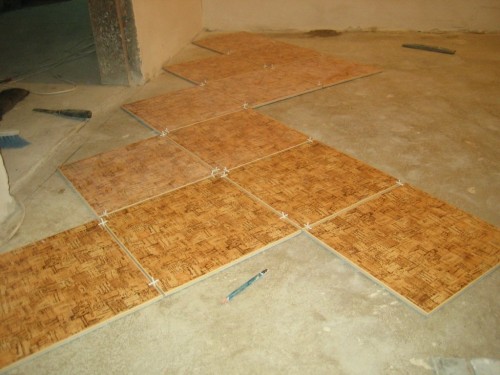
Interestingly, many people who plan to produce tile laying on the floor, often turn to the services of specialists. This, in turn, means large financial spending that can be easily avoided. The thing is that tile laying is very simple. It is enough to know the technology, as well as some subtleties that will not allow for serious errors in this process.
Content
However, it should be borne in mind that before placing the tile, you need to analyze a lot of information before laying, as any error, even the most insignificant, may be incredibly serious.
In addition, much depends directly from the tile itself. It can have certain features, properties and even the form.
In this material we will try to disassemble the basic parts associated with laying the tiles, and also analyze all the subtleties of the process. Taking advantage of our advice, you can fully draw a quality process of installation of tiles, and also confident that the created surface will serve at least a dozen years.
Main features of the styling of tile
At the very beginning it is necessary to keep in mind that this process is actually highly responsible. Often the tile that is placed on the floor is quite fragile, so all work is carried out very carefully. Many people are not needed for this process, and at the same time you need to have enough free space so that the construction process goes as smoothly as possible.
In addition, it should be remembered that it is necessary to prepare it directly to the main process. It is not only about the required amount of material, but also on tools and some construction resources. It is best to make a list of the necessary tools and materials in advance, to acquire everything you need, and then then repair.
Required tools
As for the choice of tools and devices, in this case it all depends on the scale of the work carried out, as well as on the specifics of the process. Such details need to be specified directly from specialists or in consultants in the construction supermarket (store). In the event that you yourself are not completely confident in choosing tools, it is better not to risk and consult.
Often, the following tools are used in the process:
- trowel;
- toothed spatula;
- building levels (small and large);
- master OK;
- rubber spatula;
- rubber hammer;
- capacity for the preparation of the solution.
It should also be borne in mind that in some cases additional devices will be required. In particular, we are talking about plating, which will allow separating one tile into several parts. It can be a mechanical device, and electric. It also does not hurt having a nipper, pliers, sandpaper, feet.
Some other tools, for example, Bulgarian, can somewhat simplify the tile cutting process if we have large building scales. Thus, if you have at least a small workshop, it will allow you to get rid of many problems.
Purchase of material
Of course, the purchase of tiles is an incredibly important process, since the hosts are often mistaken, acquiring too much material, and then it turns out that the necessary tile has already ended in the warehouse.
Accordingly, if it is possible, it is better to purchase a tile with a margin. It is impossible to exclude that in the process of laying some of the tiles will crack or it will be thinner than others. In addition, you need to decide in advance with how much tile will need to trim. Accordingly, it is possible to pre-mark the room for simplification, which will make it possible to determine the amount of necessary material as accurately as possible. But even with this approach, the tile should be about the reserve.
As for the selection of tiles, it all depends on the owners directly from the tastes. If you plan to create something original in terms of design, you should contact specialists who will not only choose a tile, but also work on a common appearance of the room. Of course, such services will cost quite expensive.
It should also be said that with proper surface preparation, a much less solution is required, and the process itself becomes faster. It is about the preparation of the surface we will later talk.
Tile laying process
Preparation of the surface
As mentioned, many important points of the styling process are dependent on the preparation of the surface. In this case, the fact that we will need to remove all irregularities on the surface presented are very important. If unevenness remains, they will not only stand out on a common surface, but also will negatively affect the quality of the coating. We can talk about the fact that the surface will begin to crack, and further follow more serious problems.
It is also necessary to remember that large irregularities cannot be hidden with a large amount of solution, since the surface being created may gradually begin to deform, or problems with the quality of tile fastening.
Accordingly, you need to form a high-quality screed, which will be highly durable and excellent horizontality. If the work is carried out in the bathroom or toilet, you should pre-create a waterproofing layer. In today's conditions, this is a necessary measure.
Experts recommend installation of tiles directly on the concrete base. If there is a need to replace the coating, then its complete disassembly is made, after which the cement screed should be created for alignment.
In the event that there is already a tile on the surface, it needs to be removed and resolved again. Of course, even in such conditions, the floor has some irregularities that need to get rid of at any cost.
Also before laying the tile you need to dismantle the plinths and threshings. Obviously, it is necessary to spend high-quality cleaning in advance so that there is no dust in the room. In addition, it will not be superfluous.
Room marking
It should be borne in mind that the placement of the room includes not only the determination of the amount of the required material, but also the features of its location. For example, if we purchased the tiles of different colors, you need to do everything possible so that the created combination was a pleasant eye. You can simply take a sheet of paper and create a similar markup with a pencil, but already on an appropriate scale.
On the Internet you can find a huge number of locations of the tile, so there should be no special problems in this matter. The only thing to remember is that all possible details associated with the choice of the location of the tile, you need to simplify. In addition, you can use the classic laying options, which will allow you to withstand the most familiar material for many.
It should also be remembered that there are three traditional tiled schemes:
- seam in seam;
- missor;
- diagonally.
Of course, the first option is the easiest, as it is possible to determine the location of the tile material without much difficulty. Installation of tiles diagonally is also a simple option, however it is necessary to keep in mind that here we will most likely need to cut a lot of tiles to "enter" it on the scale of the room. When laying the tile, the rotor should keep in mind the fact that it is necessary to control the distance between the tiles. Accordingly, if a small displacement occurs, it will immediately rush into the eyes. However, it often does not occur with this, since the laying begins with a number of close to the wall, and the next row originates with the circumcised half of the unit of the material.
Laying tiles
- After preparation and markup, proceed directly to laying the tile. It is worth noting the fact that it is pre-cooking tile glue, which must correspond to one or another tiled products.
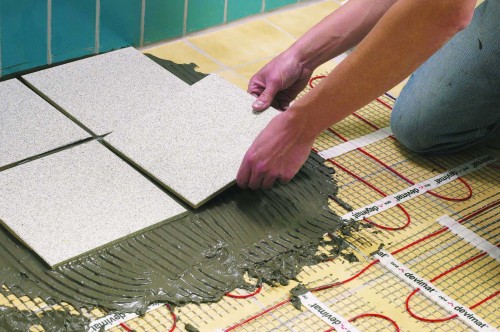
- The glue is applied to the tile with a toothed spatula. The layer must approximately correspond to the size of the teeth. When applied, the spatula is completely optional to pressed on the tile glue. If everything is carried out in accordance with such simple tips, you can be sure that the adhesion will be simply excellent.
- It is worth paying attention to the fact that after laying, remove the tile from the surface is unlikely to succeed. Accordingly, you need to take care in advance that the material is as accurately located on the surface. After installation, it will only move a little tile if there is such a need.
- Also need to take a small shrinkage tile. To deepen the material, it is necessary to use a rubber hammer. Of course, it is not necessary to beat hard on the tile, since it takes quite a bit of power for shrinkage.
- Between the tiles can be placed cross, but this is only if you need to ensure an equal gap between the tiles. If we put the material to the floor, then there is no need for such gaps, and it can not look very successful.
- Pressing the tile to the floor should be taken carefully that the tile glue does not speak. It is from this information that needs to be repelled when laying a material.
- Apply glue to the surface of the novice follows only one tile per approach. If there is a considerable experience in this case, you can slightly increase the area of \u200b\u200bapplying the solution. In addition, you immediately need to install cross, if necessary.
- When laying the material, the horizontality should be immediately checked with the help level. You can spend this procedure after the shrinkage of the material. It cannot be allowed to have at least small deviations from the horizontality, since it is on this basis that there are problems with the durability of the tiled surface.
- As you know, laying the tile should be produced by rows. It should also be remembered that if you decide to take a break in the process, you should remove the entire solution, which remained after laying the material. If this is not done, then the frozen solution will create some inconvenience when laying the following rows.
Laying pieces tile
As already mentioned, almost never happens so that during the stacking tiles did not have to cut the material on the part. There are always sites in which the whole tile does not fit. In such conditions, it is necessary to arm the tools that we have said earlier and cut the tiles to the required number of parts.
- It should be chopped immediately all the necessary volume of material so that in the future it was not necessary to be distracted by other actions beyond stacking.
- It is necessary to cut the tile with a grinder only in a separate room (workshop), since too much dust and construction garbage can adversely affect the building process. If there is a need for a cutting tile at an angle, you should use a manual stovetur or an electric machine.
Fugation of sews
Immediately after the tile glue is collapsed, you can safely extract crosses that serve to create a fixed gap between tiles. Accordingly, when we have already finished with this, you can begin the process of fugging (filling the seams by grouting). You can find a wide variety of grouts. It may be products based on cement, silicone or epoxy compounds.
Before starting the process of fugging, you need to clean the floor surface, as well as remove all the contaminants from the gaps between the tiles. For this purpose vacuum cleaner.
If a silicone-based grout, you need to take a paint tile as a paint tile, so that then I didn't have to spend a lot of strength on the surface stripping.
It is necessary to apply the grout with the help of a rubber spatula, and the seam across. It is necessary to slightly press the mixture into the gap so that it fill in the entire volume of the space between the tiles. It is possible to remove the excess material using an ordinary cloth, but it is necessary to do it immediately after applying the grout.

