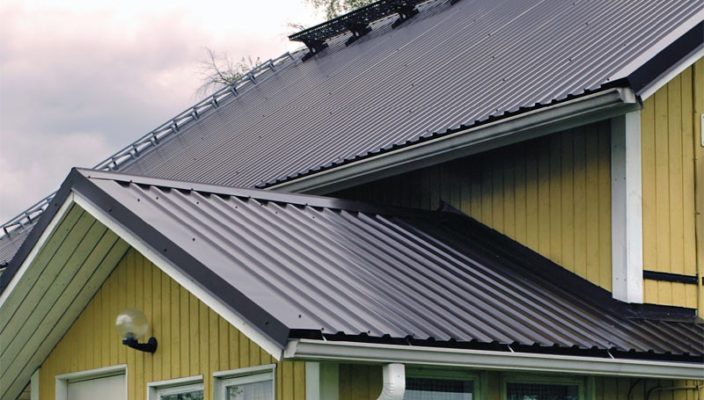
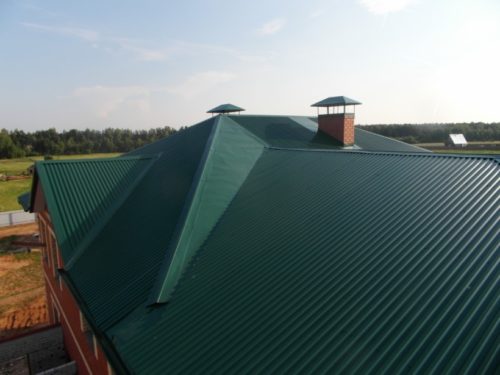
Installation of professional flooring is one of the most optimal solutions in the arrangement of the roof of a private house. The profiled material can be used on any types of roofs, including attachments of attic or terraces.
Content
- Characteristics of the roof professional flooring
- Varieties of the roof professional flooring
- Criteria for choosing a roof professional flooring
- Krepim brawling on the roof. Preparatory stage
- Krepim brawling on the roof. Mounting work
- Krepim brawling on the roof. Features of the arrangement of the cornice, skate and pipes
Characteristics of the roof professional flooring
Professor is a leaf roofing material. With its production, the cold rolled method is used, followed by applying a special zinc or polymer anti-corrosion coating.
The main advantages of the professional flooring:
- high strength;
- relatively low weight;
- sufficient stability of external loads (due to the presence of rigidity);
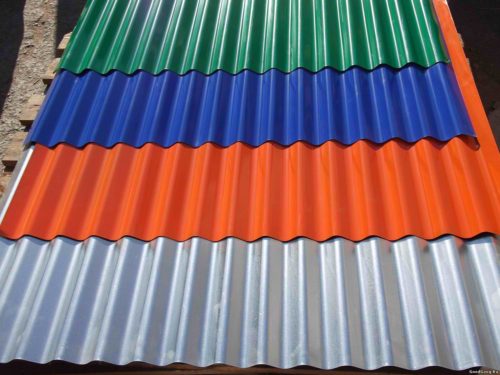
- diverse color gamut;
- simplicity of installation work;
- acceptable price;
- solid operational period;
- attractive appearance;
- the ability to create a roof of any configuration.
Roofing material may have different thickness (from 0.4 to 1.2 mm). The coating with a minimum value is suitable for walls only. For the roof it is better to choose a professional flooring with a maximum thickness.
Varieties of the roof professional flooring
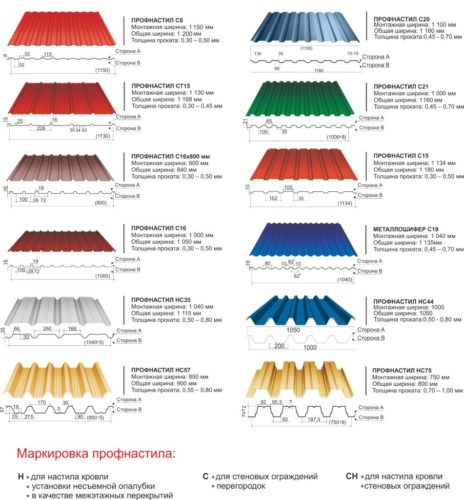
There are two main types of roof corrugated. They are marked with the letters "H" and "NS". The first products have:
- high bearing ability;
- the biggest thickness;
- maximum height of corrugations;
- additional grooves (improve material stability to loads).
Sheets with labeling "NS" are universal material. Used for various types of buildings. The thickness and height of the corrugations of this professional flooring is less than that of the products of the brand "H".
Also roofing material is classified depending on the type of coating:
- from zinc (cheapest, but fragile);
- from aluminum with silicon (longest material, but still quickly wear out);
- from Polyester with Teflon;
- from polyvinyl chloride with additives;
- from polyvinylintend farming and acrylic.
The last two options possess the best technical characteristics.
Criteria for choosing a roof professional flooring
The main task in arranging the roof is the creation of an optimal bearing capacity and proper load distribution. In winter, the professional flooring should withstand the maximum load from a large number of snow.
Ensuring the high support capacity of the material is achieved by the presence of large waves with a special configuration. To increase the rigidity in the longitudinal direction, many manufacturers "equip" professioned with additional rigidity ribs.
When purchasing roofing, close attention is paid to the packaging. High-quality packaging developed by the manufacturer protects the material from damage as a result of small mechanical loads. In addition, it does not allow the movement of sheets during the transportation of professional knots.
The sheets themselves are measured by a tape measure for compliance with the size specified on the package. Moreover, the dimensions of each sheet must be the same.
As for the color of the professional flooring, it is chosen according to the surrounding landscape and buildings. For example, if there are a large number of trees, you do not need to purchase a roofing coating of green. It is also not recommended to use a color gamut that is unknown to a certain architectural style of buildings.
Two classic schemes when choosing a color of the roof of the roof:
- red - for masonry;
- orange (white) - for a wooden house.
The angle of falling sunlight should be taken into account, because with the removal of the roof color can change.
Do not save on the purchase of profiled sheets. After all, their cost is almost 85% dependent on the initial raw materials. It should also be noted that the price of the material is influenced by 3 main factors:
- Thickness of professional flooring. Dear material has a greater thickness. It has been proven that an increase in the thickness of the coating by 0.1 mm prolongs the operational period of the roof.
- Anticorrosive properties. Cheap products are distinguished by the improper content of zinc or polymer coating.
- Company manufacturer. Naturally, branded products due to high quality costs more expensive.
Krepim brawling on the roof. Preparatory stage
At the initial stage, the construction system is design. Due to the low weight of the professional flooring, it is not necessary to create an enhanced design.
Blowing roof
Immediately determines the angle of the roof of the roof. This indicator has a direct impact on how profiled sheets will be laid. The nestling of roofing material must be:
- 20-25 cm with a bias less than 15º;
- 15-20 cm - 15-30º;
- 12-15 cm - over 30º.
If there is a slope less than 12º, additional sealing of vertical and horizontal joints is carried out by silicone sealant. Moreover, the vertical sheets are laid in two waves.
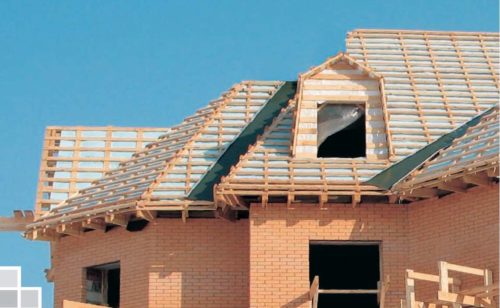
When arranging the rafter system, pay attention to the lamination between the rafters. If the step of their installation is up to 1 m, the timber (boards) of the cross section 10 * 3 cm is suitable for the frame at a distance between the rafters above 1 m, the thicker wood is selected. For high-quality fixation of the professional flooring, the bars of the crates are located at a distance of 25-30 cm from each other in places of installation of the end, the crate makes solid.
Fastening and tool for cutting
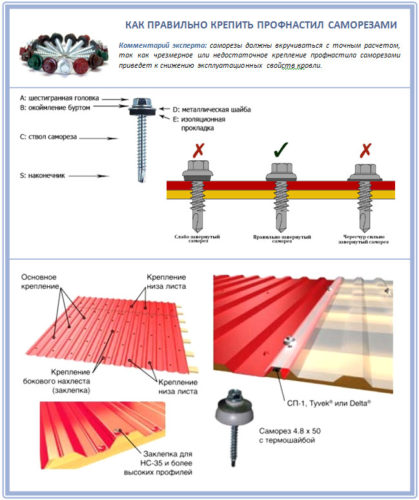
The technology of laying professional flooring provides for the use of special fasteners. These include self-tapping screws, for the manufacture of which galvanically galvanized steel and stabilizers are applied. Due to the presence of stabilizers, the material becomes resistant to the negative effects of ultraviolet rays. Hats such screws are covered with protective powder paint.
The obligatory element of each self-press is the neoprene rubber laying. The purpose of the protective gasket is to ensure the tightness of the places of fasteners. As a result, moisture does not fall into the wood crate, and the extreme part of the sheet hole is not corrosion.
Fastener for professional flooring is the special compactor from foamed polyethylene or polyurethane foam. It is placed between roofing material and crate, pre-applying glides on both sides of the strip. It is advisable to take advantage of the compactors with perforation, thanks to which there is ventilation of space under the straw.
Laying seals does not allow the occurrence of large gaps between sheets and a rafter design. Increased insects and sparrows penetrate this space, wet and cold air flows fall. And this will lead to premature wear of roofing cake.
It is worth noting that the professional flooring refers to materials that are not too resistant to the effects of high temperature. For this reason, its cut must be performed by the "cold" method without the use of a welding machine or a grinder. For this procedure, it is better to use scissors for metal or hacksaw with small cloths. The cutting portion of the proflift is processed by anti-corrosion primer.
Krepim brawling on the roof. Mounting work
This process consists of such main stages:
- laying of waterproofing material;
- creating a crate;
- fastening profiled sheets.
Waterproofing roofing
Moisture-resistant material is placed on rafters with an overlap to 15 cm in a horizontal plane. This process begins directly near the coating of the roof. For fixing the waterproofing material, brackets are used. It should not be strongly dragging, the sacking should be at 2 cm.
Under waterproofing, you can attach the insulation. But for efficient ventilation between materials, it is necessary to create a small gap. For reliable fixation on the hydrobarrier, the raka is a width of 3-5 cm.
Creating a crate
When the framework of the frame under the professional flooring is better to use the sections of 5 * 5 cm. The minimum distance between adjacent bars is 25 cm. Above the crate is mounted the board to which end strips will be mounted.
If you have a roof, the suspension occurs on the creation of the board at the framework of the framework. This is done on both sides. The suspension itself is made of galvanized steel, which is stacked with an adhesive 20-25 cm.
If the suspension is created on the gentle roof, then the sealing mastic applies at the joints. The preliminary fixation of the lower plank is carried out by several self-stakes, and the final - when installing professional flooring.
All wooden roof elements are processed by an antiseptic and flame retardant.
Installation of professional flooring
Laying the roofing material begins at the bottom of the roof. If a scope roof is facing, then the sheets are mounted first in the right end. When creating a tent roof, the professional flooring is attached on both sides, and the process begins at the upper point of the design.
The instruction on the installation of professional flooring provides for such actions:
- fixation of the cornice bar;
- inserting the seal;
- laying the first sheet with a piping of up to 4 cm for sv and with a temporary fastening by one self-tapping screw at the skate;
- installation of the second sheet in a similar way and alignment on SBEO;
- screwing the self-tapping screws on the ridge of the adjacent sheets (so they are connected) in a step of 40-50 cm;
- after installing and aligning 3-4 sheets, they are finally fixed (self-samples screwed down at the bottom of the waves through each second wave);
- laying the next row of profiled sheets with the corresponding adhesive in the vertical and horizontal plane.
One of the sides of the proflift has a groove designed for water drain. When laying roofing material, the groove should be bottom. It should be remembered that the alignment of the sheets is made not at the place of their compound, but on the sink of the roof.
When making installation work, they are moved by sheets that are fully fixed. And the legs put in the grooves where the professional flooring is supported by the beam. It is recommended to shore shoes that has a soft sole. So you can avoid the appearance of scratches on the roof.
Krepim brawling on the roof. Features of the arrangement of the cornice, skate and pipes
It should be noted that when creating a drainage, all its elements are attached to the installation of professional flooring. There is a fastening of the chute and the bar of the eaves.
In a place where the cover is mounted, additional boards are styled to the crate on both sides of the skate. The horse "is equipped with" by two ventilation gaps and is attached through a wave in a step of 03-0.4 m in the top of the sheet. The fattest elements of the skate in length is 15-20 cm. From the end part of the horse is closed with plugs.
The end boards located in the side of the roof are trimmed with wind straps with an adhesive up to 10 cm. Self-tapping screws are screwed in 0.5 m. Naturally, it is done after laying profiled sheets.
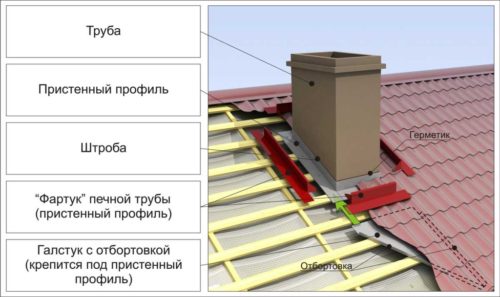
Special attention is paid to places in contact with pipes with pipes. To prevent moisture from entering the roof, they need to carefully close. In this area there is a solid doome. So it will be easier to fix the apron to the progress of the pipe.
Facing the apron can be carried out in a small stroke, pre-made at the bottom of the pipe. The junction seat is sealed. The seal and professional flooring is mounted on top of the joint.
Video about the roof professional flooring:

