Life in an apartment or house in our latitudes without a heating system is difficult to even imagine. In some regions, the first frosts are installed since the beginning of the autumn, and the winter is rather harsh. If earlier the main heating device was a furnace that worked mainly on solid fuel (peat, coal, coke, firewood), then modern homes have a large selection of heating systems, which are installed both individually and in the complex.
Content
- Types of radiators
- Requirement for installing heating radiator
- Types of wiring when installing heating radiators
- What is needed to install heating radiators
- Connecting heating batteries with your own hands
- Disassembly and assembly of radiators of heating with their own hands
- Installation of heating radiators with their own hands: video
Most heating systems that have one heat source (boiler) are designed to use the coolant. The main coolant in such systems is water. If water gets thermal energy in the heat exchanger of the boiler, then in order to give it to the room, it needs special devices - radiators. The efficiency of the heating system, and, consequently, the cost of heating as a whole depends on the correct selection of the latter. On how to choose and mount the radiator heating with your own hands, let's tell further.
Types of radiators

A few decades ago there was no alternative to cast-iron radiators, then at the moment there are a large number of models made from various materials. This defines their properties and features of use in heating systems. Modern radiators are:
- Cast iron radiators. Mold from cast iron and consist of several sections. These radiators are considered "eternal". They are not affected by pressure drops in systems and quality of the coolant. That is why they are mainly used in apartments with centralized heating. The disadvantage of such radiators is their weight and inertia. A heavy device requires a powerful and reliable attachment, and for installation of 12-15 sections it will take a force of 2-3 people. Also, such radiators are very long heated and slowly cooled, which makes the work of the boilers of individual heating ineffective. That is why it makes no sense to use them for autonomous heating.

- Aluminum radiators. They have a light weight, quickly heated and cooled. However, these devices are very susceptible to the influence of the quality of the coolant and pressure drops. Aluminum radiators are not installed in centralized heating systems.
- Bimetallic radiators. Consist of two parts. For the coolant wire, a system of pipelines made of steel are used. A shell of aluminum is dressed on the tube core from steel. These radiators combine reliability and unpretentiousness of steel with ease and excellent aluminum heat transfer, which allows them to be used for both centralized and autonomous heating.
Requirement for installing heating radiator
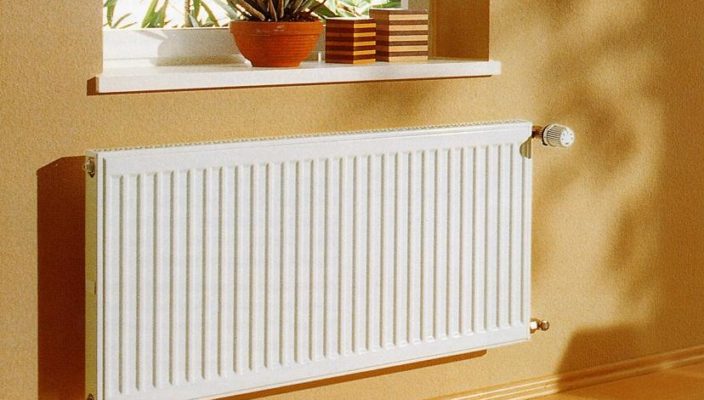
If the heating device in the room will be one, then it is usually installed under the window to achieve the best convection indicators. In the case of one window and several radiators, the second can be located in the opposite corner.
Usually the radiator is installed under the window in such a way that its central axis coincides with the central axis of the window opening. This is more aesthetic requirement than practical. If the radiator needs to be shifted, it is better not to do it for a long distance with one of the sides. It will not look quite interesting.
When choosing a location of the radiator, one should be guided by some rules:
- From the surface of the floor, the radiator should be located at an altitude of at least 100 mm.
- From the lower plane of the window sill to the radiator should be a distance of at least 70 mm.
- The distance between the rear surface of the radiator and the wall plane behind the device should be at least 50 mm.
- The wall surface behind the radiator is better separated by reflective material. This will allow infrared radiation to reflect it and warm internally, not the wall. As a coating, a sheet of thick foil or other material with a reflective surface can be installed.
- Installing the radiator must be made by level. Compliance with horizontals and verticals is a prerequisite for successful installation of the instrument.
- When installing and connecting the radiator to the system, an angle of inclination of the pipeline is required. The slope of the heating battery in a private house should be at least 0.005 meters for each layout meter. If the length of the pipelines is 10 meters, the slope must be at least 50 mm. Otherwise, the radiator can shift.
Types of wiring when installing heating radiators

There are several types of radiators connecting in the heating system at home:
- Single-mounted system. It assumes the presence of only one contour. In this case, radiators are connected sequentially. Simple words, the output of one radiator is connected to the input of another. The positive parties of such a connection is its simplicity, saving materials and cost of work. However, such a connection has a significant disadvantage. The latter in the chain radiator will be the most cold. Heat in this case is unevenly distributed, which makes it very difficult to efficiently use equipment. In addition, when connecting each of the radiators, you must use bypass. It is set to be able to remove and maintain the radiator without turning off the entire system.
- Dual-circuit system. Provides 2 contours: feeding and reversal to which radiators are connected in parallel. The radiator input is connected to the feed, and the output to the reverse contour. Thus, the coolant is distributed more evenly, which provides the same temperature in different rooms. Of course, the installation of this system will cost more, but when it is used, you can more effectively exploit the boiler.
- Multi-mounted wiring. Used in large houses in which heat-contained adjustment is necessary. These systems use heat collectors. They allow you to connect a large number of contours, each of which can be adjusted separately. Thanks to this system, you can put radiators in the same room, and to another mount the "warm floor" system, and at the same time adjust the supply of heat to them separately.
What is needed to install heating radiators

The following materials will be required to install and connect the radiator:
- Suspended brackets. They should be at least two. They are necessary in order to securely hold the radiator canopy.
- Shut-off valve. Cut-off cranes. We are needed in order to turn off the radiator for repair or prevention. Crane Maevsky. It is needed in order to bring air from the system if necessary. Usually installed in radiators in the central heating system.
- Pipes.
- Threads.
- Sealer. As the latter, it is possible to use a conventional pass, which to impregnate with oil paint or solidol, or rubber plumbing tape. Some specialists use silicone sealant, but he eventually can give to flow. The most optimal option is the package.
From the tools you will need:
- Perforator for drilling holes for brackets.
- Set of wrenches and pipe keys.
- Level, roulette, pencil.
Connecting heating batteries with your own hands

Procedure for work:
- First of all, it is necessary to make the markup of heating radiators and the position of the brackets on the wall. As a rule, they are placed at the top and bottom. If you hang the radiator only to the upper brackets, it will be difficult to align vertically.
- After the marking is applied in the field of fastening brackets are drilled hole. The diameter of the holes should fit the diameter of the dowel on the bracket. The plug is inserted into the hole, and already it is screwed hook itself. Recent screwed not to the end. Once the radiator is installed, its position can be adjusted by screwing or unscrewing bracket.
- When the brackets are installed, the radiator is hung on them, after which its position is adjusted. As soon as the radiator is installed and aligned with the level, you can shoot it and package. With both ends of the radiator, 2 plugs (upper and lower) are installed. In those holes to which the feed or return will be connected, you must unscrew the plugs.
- Couplings are screwed in the working holes. Before screwing down the coupling, the seal is wound on its thread. Important: The seal is wound only clockwise, that is, along the thread.
- After that, shut-off cranes are connected to the couplings. Some are not tagged, and the valve, due to which you can adjust the flow of the coolant to a specific radiator. Next, if required, the bypass is equipped.
- The radiator connection is no problem. The coupling of the pipe is screwed to the clutches already installed.

Disassembly and assembly of radiators of heating with their own hands
Before installing the cast-iron radiator, it must be disassembled and conducting a revision. To disassemble the battery on the section there is a special radiator key. The sections are attached to each other with nipples. To disconnect the sections, you need to unscrew the nipple. It is done by two keys, as you need to unscrew uniformly to prevent the section skew.
After the sections are checked, they are collected in reverse order. It is necessary to pay attention to the fact that in different sections of the radiator there may be different threads (left and right). If a leak appears during operation, the radiator will need to be removed and disassembled again to eliminate the cause of the leaks.


