
Despite the fact that the current market of roofing materials provides a sufficiently wide range of new ways to arrange the roof, interest in asbestos-cement seifer is by no means decrease. He is primarily in demand due to its strength and low cost. But, besides these advantages, there are still a number of advantages of this material.
Content
- What are the advantages of using slate?
- Is it possible to equip the roof by slate yourself?
- What do you need to know when arranging the roof with your own hands?
- Sequence of roof overlapping stages by slate
- What are the types of slate
- How to choose a slate?
- How to calculate the number of slate for the roof?
- What tools are needed to arrange a slate roof?
- Preparation of sawn timber
- Creating a crate under roofing flooring
- Slate Preparation for Installation
- Mounting slate
- Service cost
- Conclusion
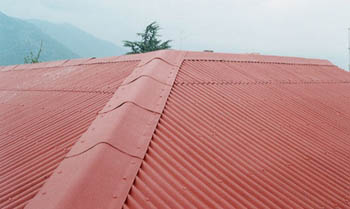
What are the advantages of using slate?

Among the most important positive qualitative characteristics of the slate are the following:
- Long service life
- Ease of material, which eliminates the additional load on the roofing frame
- Resistance to temperature drops
- Frost resistance
- Does not support burning
- Speed \u200b\u200band simplicity of the installation process.

Is it possible to equip the roof by slate yourself?
The installation process itself does not differ in difficulty, so you can easily overlap the roof with a slate with your own hands. To do this, it will be necessary to pre-explore the basic principles of installation and in accuracy to follow the terms of the instruction.

What do you need to know when arranging the roof with your own hands?
Perform all work so that the independent decoration of the roof with slate really has become financially economical. To do this, carefully examine all the information below, and special attention is paid not only directly to the installation process itself, but also preparatory processes. 
Sequence of roof overlapping stages by slate
The whole process of creating a roof consists of the following steps:
- Select the type of material.
- Calculation of the number of slate.
- Preparing tools.
- Preparation of sawn timber.
- Creating a proper roof frame.
- Preparation of slate.
- Installation of roofing flooring.
Important! Each process has its meaning to the degree of strength and duration of operation, so do not miss any work amount and follow the sequence of actions.

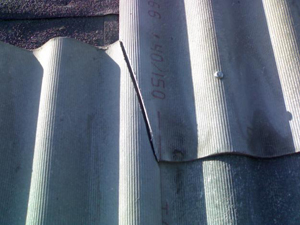
What are the types of slate
There are two main varieties of asbestos-cement slate sheet:
- flat

- wavy.


For the decoration of the roof more often use the wavy profile material.
How to choose a slate?
When choosing, consider such criteria:
- number of waves (from 5 to 8)
- wave height (28-135 mm)
- wave step (115-250 mm)
- sheet thickness (5.5-10 mm)
- asbestos-cement sheet width (686-1220 mm)
- length of a slate leaf (1200-3300 mm)
- material weight (9-98 kg).


Important! All material parameters are regulated by the provisions of GOST 30340-95, but some companies also use their TU in the production process. Because of this, the variety of slate marks is quite large.

Note that the type of design also depends on the type of material, and the cost of overlapping the roof with slate.
How to calculate the number of slate for the roof?

Pre-calculate the required number of slate according to the following scheme.
Counting a series of material vertically roofs:
- Measure the length of the roof from the skate to the eaves, given the departure of the slate sweep at 30-50 cm.
Important! With direct discharge of water, the size of the sweep is up to 50 cm, when the drainage gutter is cleaned, 20-25 cm is enough.
- Divide the length of the material sheet.
- Add 13% to the resulting sum.
Counting the number of sheets in one row:
- Measure the length of the building or check the parameters with the house plan.
- The result is divided by the width of the sheet.
- Add 10% to the amount received.
Counting the total number of sheets:
- Multiply the values \u200b\u200bobtained in the first two actions.
- Perform a similar sequence of actions to calculate the material for the rest of the roof parts, if it is not single.


Important! To improve the roof of a private house, 8-wave slate with such parameters are most often used:
- length - 1750 mm
- width - 1130 mm
- weight - 26.1 kg
- thickness - 5,8 mm
- Wave step - 150 mm
- the wave height is 40 mm.
Such dimensions allow you to significantly save, these are recommendations that are proven in practice. Make a final choice on your own, based on a specific type of design.

What tools are needed to arrange a slate roof?
To create a roof from slate, prepare the following tools:
- Drill
- Bulgarian
- Screwdriver
- Hammer
- Slate galvanized nails
- Measuring tool
- Saw
- Roofing nails and selflessness
- Screwdriver
- Knife
- Stapler with brackets
- Anti-condensate film
- Antiseptic solid for lumber
- Lining for mounting even bars of crates
- Brux for the crate: 68x120 mm for a wavy 75x75 mm profile for a straight profile
- 60x60 mm boards for crate of sophisticated roof places.
Important! When choosing lumber, pay attention to the quality of wood. Take the bars and boards not lower than the second grade with a good dry level without deformation of the form.

Preparation of sawn timber
Pre-process all bars and boards to create an antiseptic mortar clamp to prevent rotting, deformation and insect attacks. Be proceed to perform work on the arrangement of the foundation under roofing flooring only after drying.
Creating a crate under roofing flooring
Type of crate Choose depending on the type of the selected material profile:
- for the wavy slate, the standard declared technology in a step of 70-80 cm
- for a flat slate, create a slightly sprinkled design in a step of 40-50 cm.
Make the calculation of the distance of the gaps, based on the main principle of the slate installation - the support of one sheet is distributed into three boards. 
Important! When creating a solid crate for overlapping the roof with slate, the price of the entire process increases, but the strength characteristics increase. This method can be used to create flooring from sheets of flat type.
Installation Follow the following technology:
- Install the anti-condensate film along the horizontal line.
- Stripes superimpose the penetration with a distance of 15-20 cm.
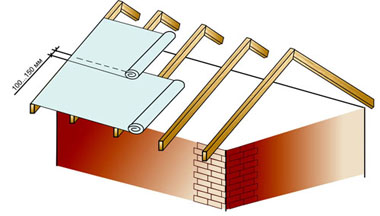
- Secure the braces using a building stapler for this.
- Install the first laminating lamp, aligning it along the cornice line.
Important! For this purpose, it is better to purchase a chalkboard slightly more (15-20 mm) than for other structural elements.
- Make a preliminary markup of the shade of the crate on the extreme rafters to withstand the accuracy of the parameters.
- Mount the rest of the crate boards, withsting equal gaps.

- Observe the main principle - even bars must be 30 mm above odd.
Important! In order to complete this condition, select Lumber of the appropriate sizes, sort separately both types before performing work. The second method - in places of installation of even bars, attach special lining of the desired size.

- Install the solid flooring of the boards around the pipes, auditory windows.
- Make all fastening with roofing nails and self-drawing.
Important! When creating a roof of a roof from a flat slate, after performing all the design of the framework, apply on top of the markup-grid with dimensions of 23.5x22.5 cm.


Slate Preparation for Installation
Preparatory work is mainly related to the process of transportation and cutting while compliance with safety.
Principles of transportation
- Do not expose sheets with a strong mechanical effect.
- Exclude direct atmospheric sediments.
- Save the protective film on the surface to the immediate installation process.
Important! You can bypass this condition in the case when you decide to process slate before installing a special acrylic paint.
- Store and move sheets in a horizontal position.

Drawing material and safety
- The main condition of the slate trim is to save the parameters in which the asbestos-cement sheet does not lose its strength characteristics. This indicator is the length of the part, the indicator of which should not be less than 60 cm.
- The second nuance is cutting cuts. Immediately after cutting, treat all edges of sawing acrylic protective paint.
- Given the fact that asbestos particles are harmful to the human body, in the process of cutting material, use a protective respiratory mask.
Video cutouts slate
Mounting slate
Methods of laying
Select technology based on the roof configuration:
- Laying sheets with displacement - for a long span with a small distance from the cornice to the skate
- Cutting transverse angles - for a wide slope with a small length.
Important! Before performing work, read the roof overlapping scheme with slate.

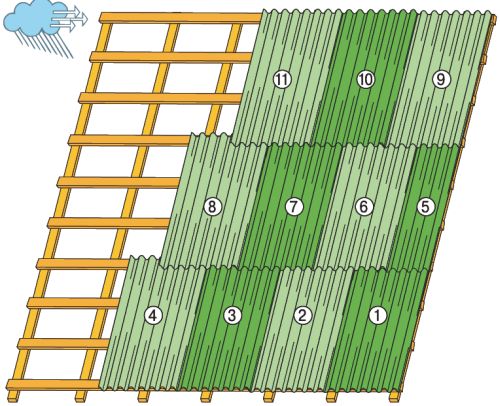
Installation of sheets with displacement
To perform this work, make pre-cutting, taking into account the following condition: Each even row should begin and end with half a sheet (incision in length).
Important! There are other methods, for example, to cut 1-2 waves, but the above-mentioned method is most convenient and practical. In addition, this approach will reduce material consumption.
Installation technology:
- Tension the cord along the sink line to withstand a flat line of location of the material.
- Drill holes in the places of future mounts (if you chose 8-wavelate slate, then this is the 2nd and 6th wave).

- The distance of the fasteners in length is 100 mm.
Important! The diameter of the holes is 2-3 mm more than the diameter of nails.
- Set the first slate sheet, ranging from the end of the sink.
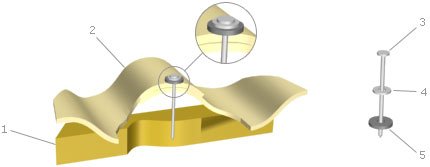
- Fasten with slate nails, driven them is not very tight, but the sheet should not move.
Important! Under the Hats nails, put the washers made of rubber or plastic to eliminate the flow.
- Mount the first row by checking each subsequent sheet into one wave.
Important! Observe the selection direction in one direction.
- Start the next row from half the sheet.
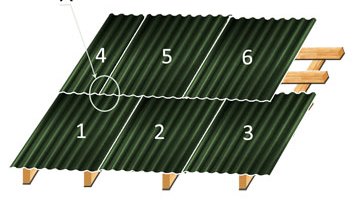
- Mount the brass for the first row.
- The size of the influx of one row to another vertical - 15-20 cm.
Important! The direction of the allen should coincide with the most frequent direction of the wind.


Installation of sheets with cropped corners
The entire sequence of actions is similar to the technology described above. The difference is only the principle of layouts of sheets.

Method of laying sheets:
- Cut the diagonal corners of the sheet.
Important! Only one corner is cut on extreme sheets, which will go inside the flooring.
- The size of the cutting part of the corners determine the size of the alleged adhesion.
- All sections are filled with water-dispersion acrylic paint.
- Follow the installation of sheets in the order, similar to the above described.
- Leave the gap between the cropped sides of the angles in 2-3 mm.

Video overlapping roof slate
Browse the video attached below to more clearly submit this method of installation.
Arrangement of complex seats
Among the general recommendations for the design of complex seats, we note the following:
- For decoration of the skate and ends, use special metal profiles or cut out of the waves yourself.
- The mount is performed on the bars of the crates strictly vertically on both sides of the skating plank.
- Around the chimney, the ventilation holes first install a tightly adjacent apron of galvanized iron.
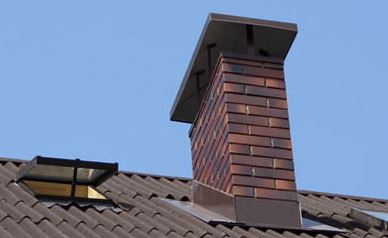
- On top of it, install slate sheets.
- All gaps are treated with cement or mastic.


Service cost
Rates for the roof overlapping with slate, preliminary preparation and transportation of the material are sufficiently different from some companies. The average cost of the installation process itself is 150-300 rubles / m2, when performing work, including the creation of a rafter system - 700-800 rubles / m2.
Conclusion
The entire process of arranging the roof of slate labor-intensive, but not complicated. The main thing is to accurately follow the instructions in order to create a durable and reliable roof coating.


