For the storage of agricultural products grown in the country site, a basement needed. To build it, you will need to consider a number of factors. Now we will tell about how to make a cellar at home.
Content
Preparatory stage
Before you take a member of the cellar under the house, the site should be examined for the level of groundwater occurrence. Well, when there is a hydrological map of the site under the house. But usually it is not. Then the survey of the site is carried out independently.
It is done in the spring, when the level of groundwater occurs reaches its maximum. If there is a well close to the house, then you should simply measure the distance to the water in it. In the absence of a well, it is necessary to dig a lump by a brown.
The optimal level of groundwater occurrence is more than 5 m. If the groundwater is closer to the surface, it will have to further engage in the cellar waterproofing. In this regard, when calculating the size of the basement (height, width, length), it is necessary to provide additional space for the device of the waterproofing layer.
Digger Kotlovana
The construction of the cellar under the house begins with the digging of the pit. This process is carried out manually using shovels, pickles and buckets.
The device of the pit under the cellar consists of the following steps:
- opening of the floor in one of the rooms (if the cellar is constructed in the caught house);
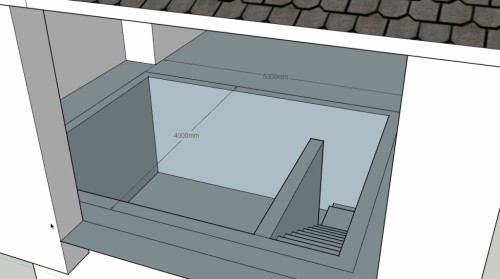
- digging the required size;
- cleaning its base;
- filling the bottom of a rubble or brick battle (100 kg / 1 m² or more);
- alignment and rubbing of a covered layer;
- pouring base with bitumen, with which the capillary particles are eliminated in crushed it (5-6 kg / 1 m²).
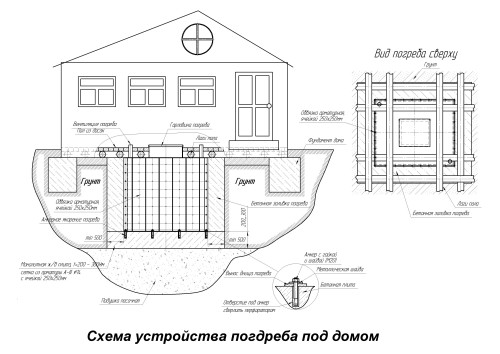
When groundwater occurs at a level of up to 5 m, the blocking of the pit was made by another 0.7-0.8 m, followed by a filling of sand with gravel. It should also be taken into account that the digging of the pit should be carried out at a distance of at least 1 m from the belt foundation. Otherwise, there is a possibility of sending and deformation of the walls of the house.
Walling
For the construction of the walls of the cellar under the house sometimes use ceramic blocks or bricks. But due to the fact that the implementation of the external waterproofing of such a masonry will cause sufficient difficulties, the device of monolithic reinforced concrete walls will be the best option. The thickness of the walls should be 0.3-0.4 m.
The process of the construction of the walls includes:
- installation of reinforcement frame;
- vertical formwork device;
- concreting space between the wall of the pit and formwork;
- waterproofing work.
Armature carcass
To create a frame for the walls of the cellar in a private house, use the corrugated reinforcement, which has a cross section of 12-14 mm, a corner or trimming of profile pipes. For the high-quality structure of the reinforcement crates enjoy annealed wire.
The use of welded joints is inappropriate, because as a result of temperature drops, the monolithic design will be taken to crack.
Formwork and concreting
To build vertical formwork, you can take advantage of any infirred materials:
- unedged board;
- plywood;
- OSP.
If the material is missing, then during the concreting process, the formwork can be rearranged.
For the manufacture of concrete solution, cement M200 brand is used and higher. It is best to take advantage of the cement M400, 1 part of which is mixed with 3 hours. Sand and 3 hours. Minor gravel. The fill of concrete in the formwork is carried out in layers. The thickness of the flooded layer is 20-25 cm. In the process of concreting, each layer is connected.
The construction of the walls is performed before the ceiling beams. After the solution is frozen the solution, the inner waterproofing is carried out and plastering the new reinforced concrete wall with sand-cement mortar. The thickness of the plastering layer is 2-3 cm.
Waterproofing cellar
Waterproofing works are carried out with both outdoor and the inside of the walls. For external waterproofing, you can use the usual clay. It produces in the process of concreting wall. With the device of the clay "lock", all free space is filled with clay. Moreover, its laying occurs in several layers with a thorough seal of each layer.
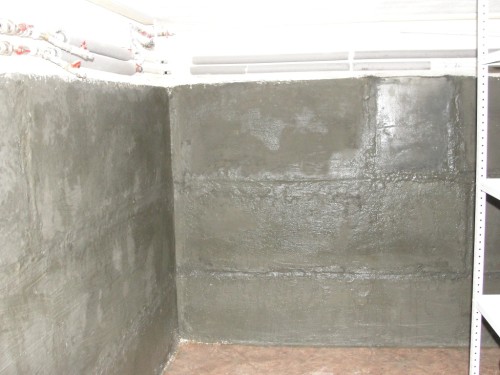
The internal waterproofing of the cellar walls, which is carried out after the construction of the walls, can be carried out with the help of rubberoid sheets. Their styling occurs on a layer of bituminous mastic. A good alternative bitumen will be penetrating waterproofing material (Penetron, Calmatron).
Floor floor
In such a process, how to build a cellar in the house, an important factor is to create a reliable basis. The traditional solution for the basement is the fill of the concrete floor.
It is clear that you can leave the earthly base. But such a floor has a number of flaws:
- Anaerobic bacteria contained in the soil contribute to the allocation of methane and other gases.
- The cellar can "visit" and rodents (mice, rats).
- Spoile vegetables and fruits can insects and worms.
Floor concreting technology in the cellar involves the following work:
- level alignment;
- formation of a sand pillow with a layer of 12-15 cm;
- sand seal (best way to fill water);
- a dense polyethylene film (it will protect from groundwater and delay cement milk);
- laying the reinforcement grid with a thickness of 5-6 mm and the size of the cells of 10-15 cm;
- the grid should be located in the middle of the concrete layer;
- concreting surface;
- fill the finish tie after 2-3 days.
Warming overlap
Despite the fact that the floor is the floor of residential heated room, thermal insulation works are necessarily carried out. This is due to the fact that for normal storage of agricultural products, the temperature inside the basement should be within + 1 ° C to + 12 ° C.
Naturally, it disappears with the heating of the basement due to the receipt of heat from the residential rooms. This is explained as follows:
- The temperature in the cellar should not be the same as in the residential rooms. Otherwise, vegetables and fruits will quickly deteriate.
- In winter, residential premises should not lose heat.
- From the basement to the house there may be unpleasant odors.
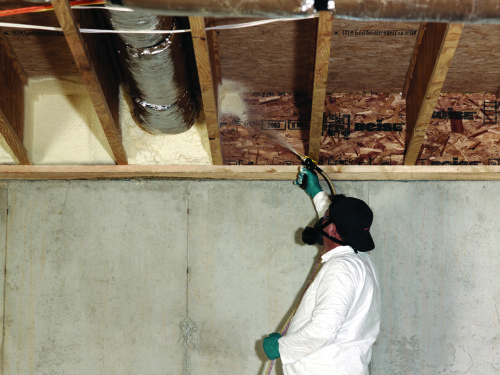
In the presence of a wooden overlap, its insulation is carried out in this way:
- beams are shedding board;
- the mounting of the boards is made using self-tapping screws or nails, driven in different direction at an angle of 45º;
- according to the made shield, laying a vapor barrier film designed to protect the insulation from moisture ingress;
- inter binding space is filled with thermal insulating material;
- the insulation is covered with waterproofing material;
- when using rolled waterproofing, the band is stacked, and the joints are sampled by scotch.
Ventilation system
During the operation of the cellar, the problem will inevitably arise, which consists in the appearance of excessive humidity. The causes of this phenomenon can be completely different:
- rainwater and groundwater;
- temperature oscillations;
- evaporation of moisture from vegetables.
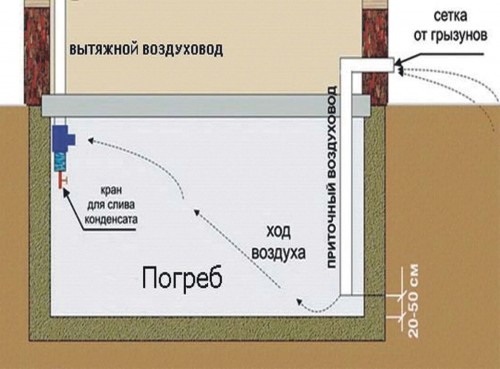
To minimize the negative impact of a wet environment, ventilation is made in the cellar. In fact, it represents two holes through which two pipes are outlined: the supply and exhaust.
For the device of the ventilation system in the cellar, you can use plastic pipes and fittings designed for sewage. The specific size of the pipes directly depends on the volume of the cellar and is:
- 50 mm for room of up to 10 m³;
- 110 mm - up to 25 m³;
- 150 mm - up to 75 m³.
Pipes are located on opposite walls: exhaust - under the ceiling, supply - at a distance of 0.3-0.4 m from the floor. Both pipes are displayed out. And on the street they can be placed both at the same level and at different heights. Experts generally recommend the exhaust pipe to lay the roof of the roof of the house.
To the basement did not penetrate rodents and insects, the supply pipe should be closed with a grid. The exhaust pipe is equipped with a deflector (umbrella), which enhances the thrust and protects the ventilation system of the cellar from the fallout of snow or water during the fallout of precipitation. With high humidity, the exhaust pipe is recommended to equip the fan.
Mounting hatch and stairs
If a large cellar is created, do the door to enter it. During the construction of a small cellar, it will be enough to make a hatch and securely fix the stairs. For the manufacture of the cellar cover in the house, sheet steel is used, which has a thickness of 2-3 mm.
The dimensions of the lid depend on the build of the owner of the house. Usually the minimum width and length of the hatch is 80 cm. In order to thermal insulation, the cover is trimmed with foam and attached to the wall (or overlapping) with the help of door loops.
For descent to the basement, we need a staircase. It can be both portable and stationary. The material of the ladder can also be different. Usually mounted metal or wooden staircase.
Several Councils for the arrangement and care of the cellar
During the construction of the cellar, special attention is paid to the proper gasket of electricity. Due to high humidity, the most serious requirements are imposed on electrical wiring and accessories.
These include:
- only a downstream transformer is used (with a decrease in voltage up to 12 V);
- laying the electrical cable is carried out in a corrugated metal tube;
- used sealed lamps with waterproof beams;
- installation of the switch is made outside the cellar.
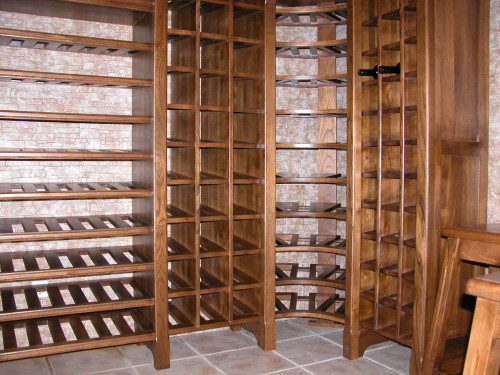
Shelves will need to store the preservation. Do not fix them to the walls, as this can lead to a disruption of the tightness of the room. It is best to build racks made of metal or wood. Shelves are placed along the walls.
Care for the cellar is as follows:
- When the fungus appears, a thorough examination and repair of the room is made: the ceiling is additionally insulated, the walls are waterproof or the ventilation system is upgraded.
- It is possible to reduce the enhanced humidity using 2-3 buckets with haired lime, which are placed in the basement.
- If there is too dry air, the cellar is entered with sand box, which is regularly moistened.
- It is possible to eliminate condensate by carrying out the ceiling insulation using a forest moss or clay. These insulation absorb moisture, and over a short period of time dried.
- To destroy fungus, mold and insects, disinfection of the room is carried out. In the summer, the cellar is thoroughly dried and processed with a lime solution with copper cune. You can use chlorine lime, which is poured into the container and left in the basement. The room is sealed, and after 2 days it is well ventilated.
Video on how to build a cellar with your own hands:

