Cottage - a place where you can mentally relax from the city bustle, to distract from problems, hoarse in the garden and enjoy the fresh air away from the "concrete jungle". Currently, you can hardly find a family that has no car and therefore, having arrived at the cottage, there is a problem of its safety. If the village site is visited only in the summer and for a while, then it is possible to limit the erection of a canopy where the car will be stored. But, if the cottage often ride in autumn and winter time, it is worth thinking about the building of the garage.
Content
- Where to build a garage with your own hands on the country
- Building a garage with your own hands. Procedure for the construction of the garage
- Construction of the foundation of the garage in the country area
- Laying the walls of the garage with their own hands
- Installation of the roof of the garage with your own hands
- Decoration of the garage inside with your own hands
- Garage do it yourself: photo
- Garage do it yourself: video
For the cottage you should not build a big garage. If one car is in the family, then the size of 3.5 x 5.5 m is quite enough to store cars of class E or even a small SUV. If the car is large, then the dimensions of the garage are selected for it. Construction of shelter for cars is not too complicated. For this room there are no such serious requirements as for residential buildings. Very often beginner builders get skills in the construction of garages or sheds. That is why it is quite possible to make all the work. About how to make a garage with your own hands - let's tell me further.
Where to build a garage with your own hands on the country

The construction site of the garage in the country depends on the size and configuration of the site:
- If its size is small, then more practical place it on the same line with the fence. In this case, the garage will not take a large area of \u200b\u200bthe site, and will become part of its fence, which will save funds on the collection of fence. Another advantage of this location of the garage in the country area is a convenient departure to the road. However, in this case, the car will not be able to drive into the courtyard.
- If the area of \u200b\u200bthe site allows, the garage can be placed in depth. Thus, the car can be put in the yard to wash or serve it.
- When planning the construction of the garage, it is necessary to take into account the location of communications or the plan for their placement. Otherwise, when problems with plumbing or power cable, the problem will be solved problematic.
Building a garage with your own hands. Procedure for the construction of the garage

The construction work should start with the preparation of the material and the drawings of the garage with their own hands. A detailed plan will help determine the required amount of materials. The optimal garage size for the cottage is 6 x 4 x 2.5 meters. Knowing the size of slag blocks or foam blocks, you can accurately calculate their quantity. It is also necessary to calculate the size of the gate and the amount of metal on their manufacture. The roof design stands and the need to install ventilation in the garage with their own hands. In the absence of an extra area, you can make an attic floor, placing a workshop on it or a storage place of the inventory.
After the material is harvested, you can begin to start work, the order of which is as follows:
- Construction of the foundation.
- Walling.
- Installation of the roof.
- Warming of the garage with your own hands (if necessary).
- Interior decoration.
Construction of the foundation of the garage in the country area

For the construction of garages in summer cottages, two types of foundations are used:
- Monolithic foundation. This type of basis is more stable on movable soils, however, its construction is characterized by high labor intensity and cost. That is why monolithic foundations for garages are rarely used.
- Ribbon foundations. This type of basis is excellent for bunching soils with a small depth of freezing, as well as deep groundwater. The construction of such a foundation is cheaper, and at the same time it is distinguished by reliability.

The order of installation work is as follows:
- The construction of a ribbon foundation starts from the markup of the site. To do this, use metal and wooden stakes and a kapron shoe. When marking a place to dig a trench, it is necessary to monitor the correctness of the corners. They must be strictly 90 °. The width of the trench depends on the width of the foundation. The gap between the formwork and the walls of the trench should be at least 300 mm, and the width of the foundation tape is 20-30 mm more than the width of the blocks.
- When the trench device, it is necessary to ensure that its bottom and walls are as smooth.
- After the trench is dug, the sand layer and gravel layer is stacked. The first is the gravel with a layer of 15 cm, then the sand, the same thickness. After sinking each of the layers, it must be carefully tumped.
- The next step is installed formwork. Make it from thin boards or sheets of chipboard and OSB. When installing the formwork, it is necessary to monitor the verticality of its walls and the correctness of the corners. From how qualitatively the foundation will be flooded, its durability and life depends. In order for the walls of the formwork in the process of the fill of the concrete, they are unluckled, the struts are installed.
- The reinforcing belt is installed inside the formwork. For its device, steel reinforcement with a diameter of 8-10 mm or the appropriate round hire is used. The installation of horizontal reinforcement rods is made as follows - there must be a distance of no more than 150 mm between each of the rods of the belt. Only so concrete in the foundation will be stronger. The distance between the edge of the formwork and the nearest rod should not be less than 30 mm. Otherwise, moisture can fall on the rod of reinforcement, causing it corrosion.
- Bind together a bar knitting wire. Do it manually with pliers or special hooks. For a single job, buy special fixtures for linking reinforcement.
- After the reinforcing belt is ready, you can start the concrete. It is made from the mixture of cement M400 and sand in proportion 1: 3. For the kneading concrete, it is better to use electrical concrete mixer. Manually do it quite problematic. Alternatively, you can buy a ready-made concrete in a concrete mixer. True, in this case, you will have to work pretty quickly until he dies. This option is suitable only if there are several people on the fill of the foundation.
- Pulling concrete is needed by layers of 500 mm, with mandatory vibration treatment. The vibrator will remove the remnants of air from concrete, which will make it stronger.
After completing the work on the fill, the laying on the foundation can be started after 3-4 days depending on the weather. If there is very hot weather on the street, concrete must be saved so that it does not crack. He will only acquire final strength after 24 days. After removal of formwork, the surface of the foundation walls is treated with a resin or other waterproofing material. The slots between the walls of the foundation and trench are filled with sand. The upper part of the foundation is then aligned using a solution solution.
Laying the walls of the garage with their own hands

The most optimal option for laying walls is a slagoblock or foam block. These materials have sufficient strength, normal thermal insulation and due to their size fit pretty quickly.
The laying of the walls of the garage is carried out in the following sequence:
- Before starting work on the construction of walls, rubberoid or hydroizol is placed on the surface of the foundation. He will protect the masonry from moisture.
- Put the slag bind to cement mortar. The sand content in it can be increased to 4 parts. The first thing is laid out the angles. They are laid out 3-4 rows with a mandatory effect (the center of the block of the upper block accounts for the shake of the lower two). The vertical of the corners is checked with a level and plumb.
- Once the corners are laid, it is necessary to tighten the laces between them, to be a guide for stacking rows of blocks. At work is absolutely necessary to check the position of each block. After placing several rows, set the box entrance gate. This metal structure is made of parts that are welded together by means of steel strip. The thickness of the structure must be equal to the thickness of the block and the height to be a multiple of their height. In this case, no problems with laying doorways. For half block integer cut using a diamond grinder wheel. After a few rows of stacked, stacked back corners and the process is repeated.
- Before laying the last row of blocks mounted joist. With a width of 4 meters and a garage setting step beams 0.6 meters minimum cross-sectional beam to be 100 x 200 mm.
- The first and last blocks stacked on beam front and rear walls. They are fixed to the walls by means of anchor bolts. When installing the joists must ensure their inclination towards the rear or side wall for draining water during precipitation. The gaps between the bars are laid blocks.
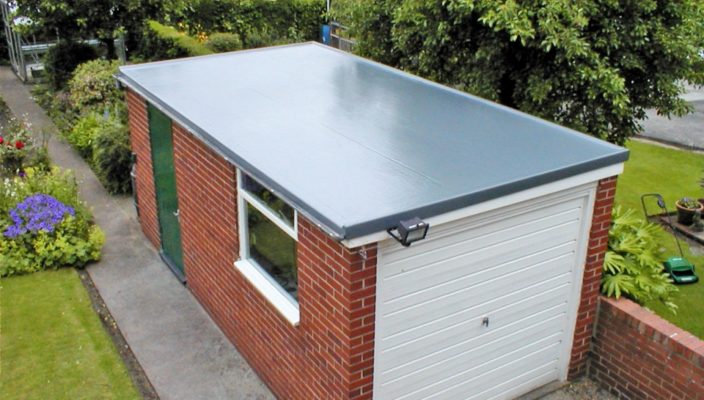
Installation of the roof of the garage with his hands

The optimal material for the roof of the garage at the cottage is the eight-wave roofing slate. It is easy to install, is relatively inexpensive. However, when laying should be very careful not to damage - it is quite fragile.
Let's see how to install a roof:
- At the beginning of roofing installed on the surface of the beams stuffed crate from the board.
- Then, the surface layer of batten stuffed waterproofing. In most cases, the role of the latter plays a polyethylene film. Stuffed it with overlapping strips.
- When the waterproofing is laid, you can start laying slate. This should be done with the lowest point. The sheets are stacked with overlapping strips.
- When the slope of the roof 20 ° overlap of the top row to the bottom should be at least 250 mm. Otherwise, moisture can fall under the slate. Slate is fastened with special nails under hats which should install the rubber washers.
Finishing inside the garage with his hands
Domestic work in the garage reduced filing the ceiling, plaster walls and laying floor screeds. For filing the ceiling is best to use plastic. He easily installed, inexpensive and unpretentious in operation. A more expensive option - wall paneling. Plaster spend cement-lime mortar or ready-mixes. The latter option would be more expensive.
The screed is flooded in the following order:
- Sweep base from gravel.
- Installing the reinforcing grid.
- Pour a rough base.
- Installation of lighthouses.
- Pouring of the first floor.
Garage do it yourself: photo


