Textured plaster is one of the types of materials for decoration. It is used for external and inner cladding. Walking is widely used due to simplicity of applying, resistance to different types of negative effects and external attractiveness.
Content
Variety of plaster and coatings

Plaster by type
- This material is separated by 2 types:
- factory;
- decorative.
- When using textured plaster, the pattern occurs due to relief and decorative - the game of color tones. During the application of the first type of material, the relief is formed due to the content in the finishing part of some additives, and not a mechanical method.
Stuccoing in structure
Depending on the binder element, the plaster is divided into the following stamps.
- Mineral. It has the kind of dry powder, which is based on mineral materials. This plaster is diluted with water and used for surface treatment.
- Silicone. The basis of silicone resin is based on the processing of dispersion surfaces. A feature is a high level of vapor permeability, mud and durability. Apply when painting facades and restoration of buildings.
- Acrylic. The basis is the acrylic resin. It is used for finishing various types of surfaces. For plastering, it does not need special training before use, the material dries quickly and additional staining in this case is optional. Such a surface is durable.
- Silicate. Made based on liquid glass. The sale has the form of a ready-to-use composition. Expensive enough, the color variety is extremely limited. Used in the restoration of different types of buildings and color of facades of houses.
Features of textured plaster

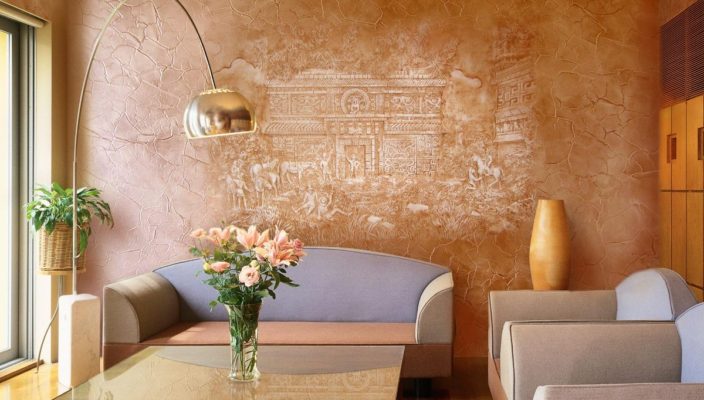
The plaster of a textured type is a composition with a view of a white inhomogeneous mass. It contains granules associated with a special substance. With the help of this material it is possible to create a rough, different in the degree of grain, cladding.
Thanks to such plaster, you can create embossed volumes, imitation of wood and stone surfaces on the walls. The material has a wide color choice, which is one of the most significant reasons for the success of the solution of most tasks in the design of the room.
Advantages of textured type plaster
This type of finishing material:
- lasting;
- durable;
- simply applied;
- it has aesthetic appearance (some additives may contain in plaster, they help to form unusual coatings);
- resistant to temperature drops;
- plastic;
- has a wide color variety;
- does not require special care;
- can be applied to different types of surfaces (wood, concrete);
- cheap;
- allows you to create environmentally friendly surfaces;
- imitates other materials;
- resistant to ignition;
- creates a sound insulation layer;
- retains the shape during wall deformation;
- does not absorb smells, does not smell.
Disadvantages of plaster textured type
Plaster has a few minuses:
- Low moisture resistance. In the rooms with high humidity, the plaster does not hold for a long time.
- The complexity of the process of application and removal. When working with this material, you need to strictly follow the instructions. This case is paid a lot of time. It is enough to remove the plaster from the surfaces and align them after the procedure.
- Difficulties may arise due to the choice of the type of cladding, which still absorbs moisture.
Texture plaster: application on applying

Surface treatment with plaster takes a lot of time. While working on drawing material, it is necessary to use correctly selected components. In order for everything to look beautiful, it will not be superfluous to be a special formation, but quite enough skills on the walls of the cement mortar, careful study of the instructions and the presence of free time.
Tools for applying textured plaster
For proper blending, the following tools use:
- roller;
- steel Kelma;
- spatula angular;
- grater;
- level;
- set of spatulas;
- plumb;
- rule;
- smooth.
Application of textured plaster
The process of applying material for finishing occurs according to the following sequence.
Step 1: Preparation
- Facing should be applied on a flat, smooth surface. For this, preliminary primer works are carried out, and old wallpapers are removed from the walls. It is better to choose deep penetrating primer. After it is applied, the wall should be well succeeded.
- When using certain types of textured plaster, the surface may not be subjected to alignment, but unevenness still should not be too large.
- Before applying cladding it is better to treat the surface of acrylic primer. The base of the wall is better to make stronger with the extra primer layer of composition.
- In rooms with a high level of humidity, pre-treatment of walls against fungus against the occurrence of fungus should be carried out. They will increase the level of moisture resistance, and the strength of the surface itself.
- If necessary in putty, it must be carried out in 2 - 3 layers. Each of them should dry about a day. It is better not to make the last layer of plaster or alabastrov, since such compositions do not help absorb the next layer, and this complicates further actions to decorate the wall.
- Before plastering, you can pre-paint.
Stage 2: Basic
- Plaster can be applied in several layers. Per 1 sq.m. It will take about 2 kg of material. For a multilayer coating, this amount increases accordingly.
- Standard color of textured plaster is white. However, it can be easily changed with the help of dyes. We will need special compositions, and they are selected in accordance with the room, for example, with a high level of humidity it is important to use moisture-resistant dye, etc.
- Application of cladding on the walls should be made with a small number of plastering, performing a uniform distribution by Kelma with a spatula. After that, the tool is deposited to the surface, and the composition is applied at an angle of 30 ° C.
- No need to immediately take on a large piece of the wall. It is better to start with a small area and try out the composition. Otherwise, the facing mass will dry quickly, and the end result may not be happy.
- Possible completion of all work in a short period of time. This is determined by the composition of the composition and its ability to take many forms.
Stage 3: Application of textured plaster with your own hands
- With independent plastering, you need to know about several features of this work. Before the primer, the surfaces are sprayed. It is needed for a normal clutch with materials of layers of facing. For this, a special liquid solution is manufactured. It will fill the remaining irregularities and will keep other layers of plaster.
- After applying the primer layer, coverage is made. She smoothes the surface of the applied primer. For her, the same solution is divorced as for the spray, but in front of the putty, it is sifted through a sieve. After applying, the surface is processed with a smoother, and then used grater for additional grinding.
- Grout is performed counterclockwise with circular motions. The solution must be labeled in all the depressions. Press the grater with the same force is not recommended. On the protrusions, the putty layer can be increased, and on the depressions - to reduce.
- After performing the grout type, its traces are cleaned with rectilinear movements. The grater before the start of this stage is necessarily purified from the solution.
- The main layer of plaster is then applied.
- Spatula apply to smoothing protruding parts and sharp corners.
- Prepared facing masses dry slowly, so you do not need to rush and distribute the material evenly. The drawing is formed very well, if you pay enough attention to him.
- After completing the work with the plaster and give it the necessary texture you need to add a protective layer. To do this, primer is first made, and then colorful layers are applied.
- The relief is distinguished by paint, but it is optional.
- The entire surface is painted with a layer of dark color using a roller. Subsequent pumps are located on the protruding details of the invoice. In order for the design to be as contrast as possible, each subsequent color layer should be the brighter of the previous applied tone.
- When using color plaster or inappropriateness in staining, the surface subsequently must be protected by a layer of colorless varnish.
- Adding fillers to solutions contributes to the application of various drawings. To create a "Coroed" type surfaces, plaster with polymer granules and granite crumbs are used in the composition. This type of facing is applied to the entire surface of the ironing. After a while you need to treat the surface of the grater. With it, furrows are made. This type of shuttering is carried out both horizontally and vertically. You can draw it around the circle and get the original pattern.
- The use of soft granules with paint will allow you to paint the plaster in several colors. Granules are crushed at the same time.
- Liquid cladding solutions will create the effects of sublishes, and dense - high ornament.
- From the depth of the figure, the speed and the amount of dust collected on it are depends.
Methods for applying textured plaster

Stucco are applied by several methods. In this case, apply:
- roller;
- brush;
- putty knife;
- shoulder blades;
- grater;
- sponge;
- kelmu;
- master OK.
Methods:
- pulling: the process is carried out from the bottom up, the grater or celma is used;
- spraying: Used to apply plaster on the geometric surfaces of complex type and on the slopes, you will need a special apparatus that must be done continuously;
- simple applying roller, spatula, trowel.
Using a spatula on the wall, you can create patterns of different types. In this situation, do not do without the author's fantasy. Stamps with ornaments will help with plastering surfaces and creating a pattern. You need to constantly clean the tool and sculpt into the water. In addition to such a tool, sheets of rubber always go. They are used for plastering bottlenecks.
Textured plaster: roller application
- Vallets are:
- perforated;
- spongy;
- relief.
- Structural plasters are applied only by perforated tools. Decorative coatings are applied by foam rollers.
- The coating of rollers is different. It helps to carry out the plaster of an interesting texture.
- Roller for applying composition for shuttering is the best tool.
RULES RULES RULES
- The whole process is performed according to the following principle:
- pour the composition in the cute;
- mocking roller into it;
- apply a mixture on the surface of the walls.
- When using this method of plastering, movements are carried out strictly in one direction. The mixture is applied immediately to the entire surface. This will help avoid problems with allen and too visible borders of the compound of the material.
- After completion of the work with a relief roller, an additional effect is given. First, the lines are accepted, and then - along the surface, the nesting should be at least 50% of the bandwidth.
- The roller will allow you to immediately create the desired ornament. A special tool will be required with the finished marking of the pattern on it. In this case, the costs of plaster are reduced, and the work itself works much less time.
Application of textured plaster: Cost

- The price of the composition for cladding depends on the materials used. The exact cost of all work can be treated after performing the desired measurements and the work of calculations. Depending on the number of layers applied, the price will respectively increase.
- When using the services of specialists will be charged additional payment for the time of work and the elements of the architecture on which they are conducted.
- It is more profitable to work independently. It will not be necessary to additionally pay for the services of plaster, and there is also the possibility of manifestation of their fantasy and implement all the ideas.
Methods for applying textured plaster: video
On the Internet, there are many different videos that allow you to clearly see the correct sequence and finish plaster walls. It also describes the selection of tools and materials.
Application textured plaster with your hands in the video shown in detail, as well as touched upon most of the important details. It is best to view the video after reading the text instructions. The video will help consolidate the already read the information because all items will be more apparent.


