Sometimes, over time, plaster in the house can produce cracks, form holes and peel the subsequent finish. In this case, it is necessary to repair plaster. About how it happens and how to do it, it will be discussed in our article.
Content
What plaster choose
If the main binder in the mixture is cement, then after applying it will give a small shrinkage, and will also react to the change of temperature and humidity. Lime-grade-cement formulations retain the vapor permeability of the structure. Lime makes a solution with plastic, while cement transmits a layer of plaster Increased frost and moisture resistance. The filler, that is, the sand, is designed to smooth out the negative points associated with such features of cement. Sometimes instead of sand apply chopped limestone. In a high-quality dry mixture, sand should have different fractions, which allows you to evenly distribute the load and form a more dense coating structure, avoiding cracks in it.
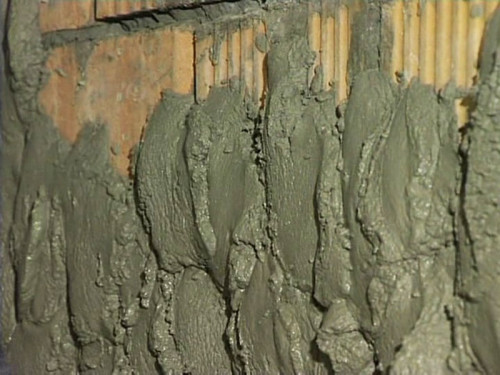
The plaster is applied in two receptions: spray (up to 0.5 mm) and soil (about 1.5 mm). The first layer is casually attacked on the base of the wall and serves to improve adhesion with the second layer.
A significant minus of cement plaster is its slow drying: for further decorations will have to wait up to two weeks, depending on the environment and temperature, as well as the layer thickness.
Gypsum-based mixtures contain sandy filler of small fractions and dry out in a matter of hours. Gypsum has excellent adhesion with many surfaces, and is also a heat insulating substance due to its low thermal conductivity.
In rooms with air humidity, more than 60% is not recommended for gypsum plaster.
Popular material has become popular, thanks to its economy and convenience. The problem of rapid mixing of the mixture is solved using modified additives that allow you to have more time in stock.
Gypsum It is recommended to apply immediately on the thickness of the layer, while the cement is imposed in two or three receptions. There should be no less than a day between the application of each of the layers.
When choosing a mixture, be sure to pay attention to such indicators: assignment, composition, consumption per 1 m².
For the purpose of plaster there:
- for internal or outdoor work;
- for applying for brick, concrete, aerated concrete;
- for alignment of walls under the tint or wallpaper;
- for single-layer plastering;
- for dry premises.
IMPORTANT: Before plastering, the plane should be well mixed with water or coating deep penetration with a painting brush or roller. It should be remembered that porous surfaces, such as silicate brick, foam concrete, are actively pulled out water from the solution, and therefore you need to give the wall as moisture should be saturated. For concrete, the primer "Conconokontakt" is perfect.
Footprints from mold can be neutralized with a chlorine-containing agent, such as "white" and radiating with copper vitrios.
Repair of plaster facade gypsum solution
The sooner you do, the easier it will be. In order for as long as possible to extend the life of the facade plaster, you need to external coating appropriate care. However, even in this case nothing is forever.
Why do the plaster crept on?
- if the roof flowing occurs;
- when the facade does not have a holistic protective paint layer;
- it is possible that too much clay was used in the preparation of material or poorly compatible binder components were applied;
- violated proportions of mixing components;
- sand could be underestimated and containing devastating impurities: wood, coal, chlorine, oil and others;
- violated the technology of the installation of drains, which is why the plaster is often subjected to water intake;
- bad ventilation and waterproofing of walls, as a result of which condensate accumulates, mold appears and moss;
- before starting work, the facade was poorly prepared, poorly purified from the construction cement or other materials.
To estimate the condition of the coating, you should explore all the visible defects and slightly catch up with the hammer of the old walls: where the plaster is kept tightly, the sound will be deaf, and in problem places - a humid, "concubine". Thus, the work plan is drawn up: sometimes local repairs are not enough, and it is necessary to completely change the coating. Depending on the upcoming procedures, the plaster is knocked down where it is necessary, with the help of a hatch or hammer.
In the process of applying plaster, there may be a problem in the inconsistency of its color in the original. Even with the identical shade, in fact it can be somewhat darker, as the previous one has already been burning apart. If the difference is really noticeable, in color you can add a little bit, or not at all focus on this attention, since with time, under the action of the sun's rays, the boundary comes with.
Tools that will be needed:
- hammer, hatcher, trowel;
- painting brush, roller;
- maclithic brush or flusted brush;
- falcon, covered with felt or felt;
- spatulas are wide and medium;
- construction rule.
Local repair process:
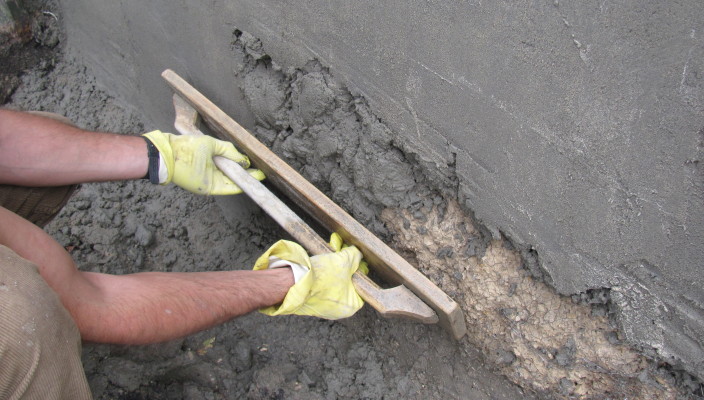
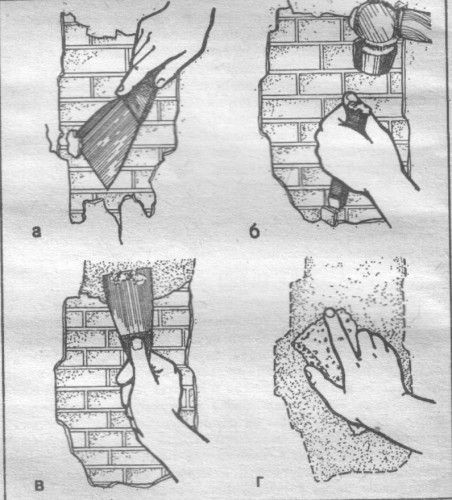
- In those places where the plaster with a climbing responded with a characteristic sound, it is removed up to the base of the wall over the entire area of \u200b\u200bthe problem space, capturing a couple of centimeters of entire areas around the perimeter.
- The resulting recess is thoroughly cleaned with a brush from dust.
- The working surface is sprayed with warm water.
- A limestone is prepared with the addition of gypsum in a ratio of 6: 1. To breed the plaster mixture with water follows the immediate start of the restoration.
- This solution splashes movements cover the entire problem zone.
- Next apply soil, that is, the second layer. It is applied so that its edges a little covered the old material. The layer thickness should be slightly greater, so that after drying it, it was possible to open or give the desired texture.
- The finishing final layer smoothes felt, finally comparing it with the old plaster.
- The joint place is treated with a brush moistened in water.
- If the angle of the building is restored, then it is done like this: first one side is separated, then, after drying, a planker is applied to it with a protrusion from behind the angle to the width of the new layer, and is similar to the other side.
Delete cracks are somewhat simpler, they should be scolded, slightly expanding, then moistened with water and fill with a solution. At the end of the work, the seams are watched by felt.
Tip: To remove stains from smoke or fire, which spoil the exterior of the building, the plaster is enough to wash first with ordinary water, and then process with a special fluid. To get it mixing lime with milk or soap and apply two-three layers, waiting for drying each of them.
Perhaps the most important facade repair is the elimination of the reasons that led you to this. Find the source of moisture ingress or the occurrence of mold and eliminate it. It also happens that the material simply served or was applied to non-compliance with technology. If every few months you observe new cracks, then here, then, of course, it is more expedient to resort to the overhaul of the facade.
Repair of plaster walls
The process of repairing internal plaster is not particularly different from the facade, with the exception of the need to make the wall of a special texture. Sequencing:
- The wall is cleaned from the old, tightly shutting wallpaper, it is possible using a special washing. It is applied with a flushed brush or a scraper and after a weatheted interval, wallpapers are removed by a spatula.
- First there are "coves" stucco zones.
- A blank is performed first in a small area, then its area is consistently expanded with the help of light shocks, or hammer in different directions until there is no tightly holding plaster. You can also remove the old finish with a richly dying with water, and after an hour and a half, removing the layers with a spatula.
- Small clefts and cracks close up with a gypsum ground, pouring his cross-cross-time at an angle of 45 °.
- The working surface should be dry, purified from dust, dirt and dilapidated plaster.
- The base under gypsum requires a mandatory primer in one layer. Its selection depends on the type of material: for smooth surfaces, such as concrete, it is important to improve adhesion, and for hygroscopic - to reduce the absorption of water from plaster.
- Preparing gypsum mixture: a thin stream of dry gypsum pour into water, stirring continuously. For no more than three minutes the composition is kneaded with a drill with the mixing nozzle and, if there are no additives, the mixture should be to develop a maximum of 6 minutes. If after 6 - 10 minutes, the mass still remains, to use it more unsuitable, as it will flake and peel.
- Solution was applied in a single layer and align it with the rack-rule. When the mixture solidifies partially, it smoothes a large spatula.
- When it comes to the ceiling, the thickness of the layer on it should not be more than 15 mm. On the walls it may reach 25 mm.
- The room temperature drying time of plaster must be between +5 and + 25 ° C. To avoid drying out and cracking, on the first day to avoid drafts and direct sunlight. You can then moderate to ventilate the room to excess moisture naturally left the plaster.
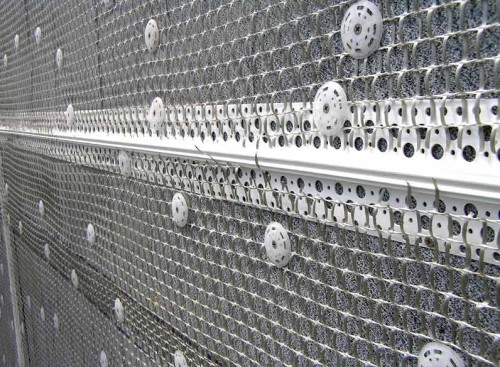
Tip: If a finish layer is applied exceeds 30 mm, the work necessary to incorporate metal reinforcement or fiberglass mesh. When it comes to the cast, the grid is placed on the base of the wall, and in the case of cement - sewn between layers.
Venetian plaster repair
Sometimes decorative coating walls gives a crack, for example, as a result of shrinkage of the house. The complexity and feasibility of the repair process is evaluated on site. If the pattern complicated multilayer mixture used for Venetian stucco, such restoration is to perform the hard as the material. On genuine Venetian, you can restore the small flaws, replacing them with inserts of plaster. That is to say, carefully removed the damaged areas around the cracks and tiny grains of dust, and then into the recess overlaps the solution. After completion of restoration, it is desirable to polish the wall finishing wax to reinforce and hide small defects.
To repair include Venetian stucco coating boring and replaced when the entire top layer is removed and applied to another texture or color.
If this repair plaster "marble" or with another texture, then the task is quite doable.
The most common damage to such coatings are scratched and chipped, usually on the outside corners; household contamination, stains; leakage, the most unpleasant defect, since it requires a thorough intervention in the finish.
The correction of the deficiencies of the decorative plaster involves the same actions as the restoration of the usual, but in addition, after drying, the coating is sliced \u200b\u200band covered with a layer of finishing finish. A solution can be used as a soil from one piece of PVA and five parts of water. If you do a job neatly, trying to imitate the texture as best as possible, then there will be no trace from the problem space.
Some species of decorative plasters have a multi-colored granules, which, when applied, form unique color combinations. If you are dealing with the repair of such a finish, then you need to prepare for the fact that it is almost impossible to reap in the desired tone.
The durability and strength of the plaster largely depends on the proper preparation of the base of the walls, which ensures the solid grip of the material with the base.

