It so far it turns out that in almost all apartments and houses of the walls are far from the smoke. This situation oppresses the owners, because you always want to have perfect accommodation, which would be distinguished by a high level of comfort. Accordingly, if the inner walls of the house have some irregularities - it often creates considerable problems.
Content
Unfortunately, the only way out of this situation is to repair. This is directly about finishing the walls. And in this matter the most important thing is to get a decent result, since, unfortunately, there are many cases when even with diligent alignment, the result of work turned out to be completely unsatisfactory.
Experts who have tremendous experience in finishing work noted that the process of wall plastering has many nuances, with the ignorance of which there is a huge probability of failure. Of course, a lot may depend on the specifics of the space, as well as from the material, however, it is often that a person has carefully studied finishing technology, no special problems happen.
If you do everything clearly according to technology, then even too twisted walls can be highly aligned, while spending relatively not so many plaster. Of course, for this you need to have a certain experience, but even newcomers are able to show the high class of their work, just to analyze the situation.
In this article we will look at the main details related to the process of plastering walls at home. As we have already spoken, when studying technology, such events can easily deal with people without sufficient experience.
Features of the process of plaster walls
At the very beginning I would like to say that the process of plastering walls is quite long, and in some cases difficult. Therefore, newcomers that do not have no idea about this process may not cope with the tasks. The best solution will be the finishing process along with the assistant. You can make the finish without much difficulties, as one person will do something, and the second is to analyze the process, and if necessary, inform about possible problems or mistakes.
Definitely will not be superfluous and consultations from specialists. When there is absolutely no experience in construction and repair activities, the owners usually have numerous questions that, of course, can concern the most diverse parts of the process of plastering walls. Special counselors or specialists who often can be found at the sales points of building materials will take into account all the very details that may need to be repaired by people. Accordingly, if there are not quite understandable details in the process, you should immediately seek help from specialists. Perhaps in certain situations will have to pay some money for consultation, but ultimately be confident in the qualitative result of the work.
Dry stucco
The main topic of this article is the so-called wet plaster of the inner walls of the house. However, it makes sense to say a few words about the dry plaster, which has been very popular among builders and repairmen for a long time.
The main representative of dry plasters is plasterboard. This is a material that allows you to align almost all surfaces, even the most damaged and deformed. It is worth paying attention to the fact that the material itself represents layers of cardboard and gypsum test with some components.
Thus, plasterboard can be mounted on the wall without any problems, and all irregularities will be highly hidden. Many people attract the fact that for mounting the material does not need a lot of experience. Moreover, there is enough time and forces on the installation of drywall, and compared with the wet plaster is a significant advantage, ignore which is absolutely impossible.
Many people absolutely do not like the fact that plasterboard sheets have far from the highest strength, as well as the absence of resistance to moisture. Fortunately, today all these details are taken into account. Thus, on sale you can find moisture-resistant hikington, and the sheets of increased thickness will allow the material not to be damaged at different situations.
As for the use of Gisokarton, it is worth noting that everything starts with the creation of a frame (sometimes special glue is involved), then the drywall sheets themselves are attached to the self-tapping screw. In the end, we obtain a perfectly smooth surface, which is practically independent of the state of the main walls (large strains, deepening, cracks, etc.). Next, when the surface is ready, the surface can be carried out. Already after putting on the surface, you can glue the wallpaper, or, for example, create a layer of decorative plaster. By and large, there are no restrictions in this case, since the smooth surface implies the use of many materials and various solutions.
Of course, there is a material and disadvantages, and above all, they relate to low resistance to moisture. The situation is in such a way that even the most moisture-resistant plasterboard is subject to this negative impact, and in some situations the surface can be significantly deformed.
Basic plaster requirements
Many owners who are going to stucify the walls consider various standards that allow you to simply submit exactly how it should pass and what result will be at the very end. Accordingly, there is a state standard SNIP III-21-73, with which some analysis can be carried out and make certain conclusions.
- First of all, it is most important to know about the surface being created. Experts note that vertical deviations should be not more than 3 mm per 1 m surface. Accordingly, it is about 15 mm for the entire height of the room. Often we are talking about smooth irregularities, which, of course, will always be available. However, if possible, these same differences should be smoothed as much as possible, which will allow to get a really good surface. If the irregularities are sharp, then such a surface will look ridiculous. It should be made every effort to get rid of such problems.
- In the event that the hosts that are repaired are guided by SNiP, then the requirements for the quality of the surface must be sufficiently strict. This situation means that only 2 mm deviations per 1 m surface are allowed by vertical. If we talk directly, then there is simply no need to use standards, since there is nothing too responsible or important in such repair events. Even exceeding the deviations specified in the first paragraph should not be brought into the eye. Of course, if the deviations are minimal, it adds confidence that the work was carried out qualitatively - to conscience.
- In the event that high-quality plaster is used, then the requirements for creating the surface are particularly serious. We are talking about 1 mM deviations per 1 m surface. However, as we have already spoken earlier, there is simply no need for such strict matches.
Plaster for beacons
In the event that the same wall that needs to be aligned has significant irregularities, it makes sense to pay attention to the plaster on the beacons. These the most lighthouses are in question are peculiar limiters that allow the wall as high quality as much as possible, and at the same time to forget about the most irregularities that were previously. It is known that in this way you can make a surface with a 1 mm tolerance per square meter.
Price issue
The situation is in such a way that, without exception, the hosts wish to carry out the necessary repair work at a fairly low price. It is obvious that the plaster of the walls is the cheapest pleasure, and often the owners make a decision to carry out all work.
There are a lot of workers who will hold the entire scope of work. At the same time, the guys request considerable money. Often, price tags start from 400 rubles per 1 square meter. If the room is small, then you can still go to such victims, but in large rooms such services are extremely expensive. It should be borne in mind that at the same time you need to spend money on materials and tools, so with a limited budget you should think about it before carrying out the plaster of the walls yourself, or trust it all specialists.
With the help of simple calculations, it becomes clear how many tools can be saved if you carry out the repair of the walls yourself, and not trust it all by specialists.
Selecting a mixture for plaster walls
To date, mixtures based on plaster and cement are the most common. Below are the possibilities of plaster mixtures:
- Such mixtures can have a layer of up to 5 cm, and at the same time there will be no crack formations on the surface.
- Gypsum mixtures are not subject to shrinkage than cement-based materials that cannot boast.
- High plasticity of gypsum is the most important advantage that allows you to mostly carry out all the repair activities.
- It is extremely important to keep in mind that gypsum mixtures have high adhesion, as well as a rather modest weight.
- Plastering walls based on plaster material can be carried out without reinforcement. The surface will still be reliable for long years.
- Sound and thermal insulation are the most important characteristics of the gypsum material, and in some cases the owners are only for the sake of data characteristics and acquire this product.
Using beacons profiles
As we have already spoken, lighthouses are used to limit the level in the process of plaster. This product is a narrow metal profiles that have perforated holes.
Ultimately, it will be possible to turn out that by spending on them the rule, we will get rid of the residues of the mixture. Accordingly, the surface will be smooth. As for the rule, this is a tool that looks like a long rail of aluminum. This device allows you to qualitatively align the solution, whether it is plaster or a floor screed.
It should be borne in mind that instead of metal beacons you can use the same gypsum solution. It is applied to the surface of a narrow line and with a certain step. The situation is in such a way that in this case no metal elements do not need to use, which also have a certain price. Moreover, with such a situation there is also a considerable economy of gypsum material.
Tools for wall plaster
You need to be prepared for the fact that the following tools and devices will be needed in the process:
- lighthouses (6 mm);
- perforator;
- self-tapping screw;
- dowels;
- circassum screwdriver;
- building level;
- hammer;
- plumb;
- rule (2 m long and 2.5 m);
- bucket;
- acrylic primer;
- stood steel;
- roulette;
- brush or roller.
It should be borne in mind that this list often does not constitute special problems for the owners, since most of these tools are already present. You also need to be prepared for the fact that some other tools and materials can be useful. Well, if the construction store is near. Otherwise, the process of plastering can delay a little.
The process of plastering walls
Before starting this responsible event, you need to make sure that all materials and components are in stock. It makes sense to make an appropriate list by which you can analyze all components of the finishing process. You also need to keep in mind that in some cases the process can be somewhat simplified. For example, instead of a regular level, you can use laser. Unfortunately, not everyone has access to such devices.
Specificity of wall markup, primer and lighthouse location
- For starters, surface analysis is carried out. It is worth using a building bubble level, with which you can install those devices that can be on the wall. All irregularities, even the smallest, it is advisable to note with the help of a marker.
- Create marking for lighthouses - extremely simple. It should be borne in mind that we have a fixed size for the rule, and the step must be somewhat less than the width of this device. On the Internet you can find many markup options, however, you should not forget about the dimensions and features of a particular space.
- Specialists advise to create a step of about 160 cm.
- It is necessary to decide on places for holes that will serve as the basis for fasteners of beacons.
- Grinding walls is also an extremely important event. The need to use primer is that with such a situation, the clutch of materials is significantly increased, while dust is removed and the absorption of moisture decreases. Specialists advise paying the most attention to the walls created on the basis of brick and aerated concrete. For smooth surfaces, it is advisable to use Betonacton. If the wall surface consists of absorbent and porous material, it makes sense to use the primer of deep penetration.
- Already after the wall dried, you can continue the markup. All the necessary screws should be screwed, and then adjust the required level. The bottom line is that every lighthouse can be located at a certain level, and with the help of self-samples it can be corrected a little. Accordingly, the construction level will help to adjust everything for a single level.
- It will also be necessary to check whether the lighthouses will not write down after installation. For this case, a diagonal cord is often used, which is stretched along the hats of self-tapping screws. Lined a piece of lighthouse and is checked so that it felt well under the cord. Next stretches the cord on the second diagonal.
Montage of Mayakov
- First of all, you need to prepare a plaster mix. Often, it is poured into a bucket of some water, and then falls asleep the mixture. All this is mixed using a perforator or spatula. Ultimately, the density of the solution should be such that all this resembles cottage cheese. In general, the material should not fall from the spatula. Check it extremely simple.
- The plaster is applied along the vertical lines. The mixture should be written for hats of self-tapping screws. You need to press the lighthouse into the mixture, while using the rule.
- It is necessary to make sure that the lighthouse is installed correctly, and if necessary, it is necessary to adjust its position. Immediately after the mixture was applied, you can pull out the screws from the wall. The rule needs to be cleaned from the mixture before it dries. Such an event is held with each individual beacon.
The process is not easy enough, so to clarify any aspects of technology it is worth contacting specialists or consultants. It should be borne in mind that even a small detail of the process can significantly affect the success of the work.
Apply plaster
- First, approximately 1/3 of the bucket of water is filled. A solution is added there, which is mixed using a mixer.
- Is to determine the thickness of the plaster layer. The point is that the thicker the layer, the mixture must be thicker.
- Immediately before the plaster can be slightly moisten the walls, this is especially important in the event that the surface absorbs moisture.
- Experts often throw stuff on the wall. Members mixture was applied as often and then aligned on its surface. Specific differences between these two options is not, so you can choose any. Are aligned. The plaster should be tight, and it does not go beyond the lighthouse.
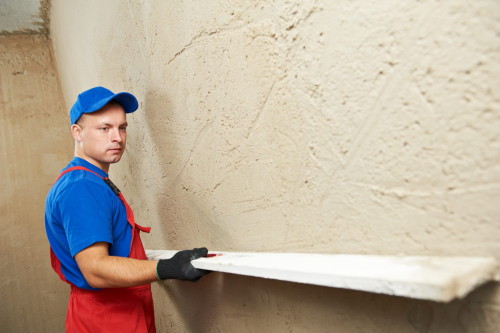
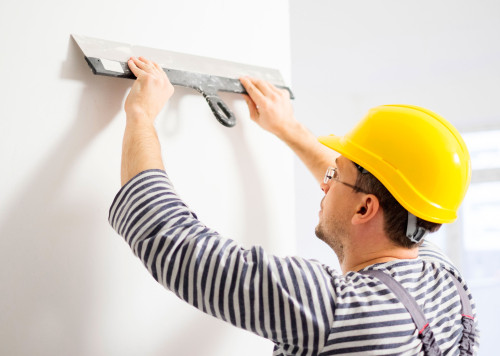
- With the help of the rules of the leveling material. It is necessary to remove excess material, even if the balance - this is an extremely thin layer.
- Some places may be formed voids and bubbles, they should be immediately removed, until the mixture has not yet frozen.
- Rule you need to walk at least a few times in order to maximize the surface was smooth.
At the end of the removed metal lighthouses, otherwise they rust directly into the wall. For this case you need to dig a beacon edge of a screwdriver and pull out the metal element. Seams need repaired. In the end, you need to spend only a grout plaster.
Grout plaster
As we have said, the last stage of work is the grouting plaster. It is worth paying attention to the fact that the process is advantageously carried out before the solution has dried on the wall. This will get the most attractive surface.
- Immediately before grouting is necessary to moisten a small section of the wall (often 1 square meter).
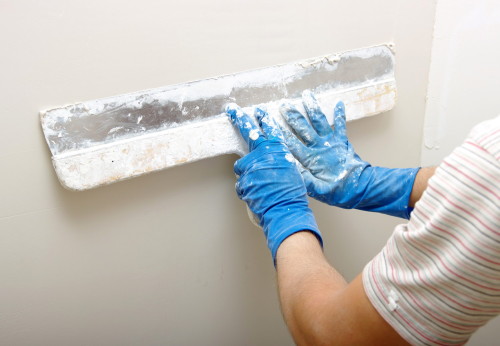
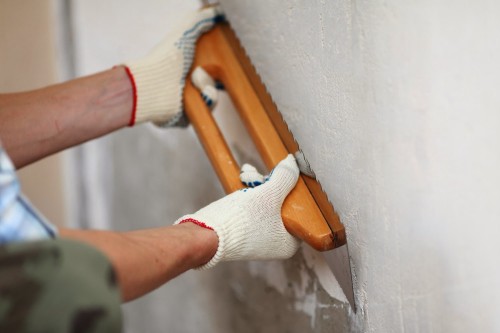
- The solution is applied to liquid consistency trowel, then there is a uniform spreading across the surface. It is extremely important to remove all the excess material, the need for some not at all. Ultimately, the surface should be as flat and as smooth as possible.
- Similar actions are carried out for each square meter. It is necessary to carry out the process with maximum quality, since any irregularities that were missed, be sure to make themselves felt. Experts recommend to carry out this process without interruption, since the material will dry quickly. Accordingly, the breaks should be limited need for kneading solution.
It is worth saying that the process itself is relatively simple. It should be borne in mind that, according to the description, the process may seem quite difficult to many, but after the first such event, the hand will be drawn, and then repair processes will be easier and faster. As we said, it is advisable to attract assistants to the process that will help to help in difficult moments.


