In any room, the floor plays an important role - not only a comfortable movement depends on its state, but also the service life of the floor covering. So, if the surface is uneven, with cracks, strumies and potholes, no about which convenience and durability can not be speech. To fix it, resort to one of the floor leveling technologies, and in this article we will tell you in detail about each of them.
Content
Concrete Screed For Floor Alignment
As is known, the repair begins with the arrangement of the floor, and therefore in most cases are proceeding with alignment. There are several ways to do this, and the choice of one of them depends on what state is the color surface, which finishing finishing material you plan to lay, which operating loads will be subjected to the floor. Cement screed is the most popular way of aligning the concrete floor. It creates a smooth and durable surface suitable for subsequent laying of laminate, tiles, parquet, linoleum and other floor coverings that require perfectly levels. In addition, the concrete screed allows you to create small slopes of the plane if necessary, gives additional heat and waterproofing of the room.

Classical "Wet" screed
Until recently, there was only one technology alignment technology with concrete, but today the screed can be wet, semi-dry and dry. The wet is called a classic method at which a standard cement-sandy solution is used. It is the most time consuming compared to others, requires more time, but creates the most durable coating capable of withstanding any loads.
Stages of creating a wet concrete tie:
- Preparation of the surface - the draft floor you need to clean from dust, dirt and different stains (clean it, if necessary). If there are protrusions or bugs, they must be rushing and fired with the floor. Deep depressions or potholes need to pour cement mortar and wait for its complete drying before it starts to form a screed layer.
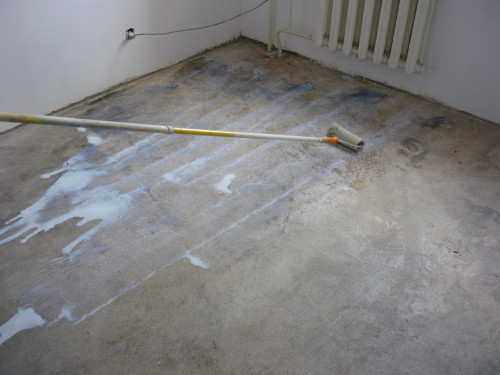
- When the draft floor was purified and relatively aligned, treat it with a primer in concrete to increase the adhesion, to kill dust and strengthen the surface itself. If you align the floor indoors with high levels of humidity (bathroom, kitchen, bath, basement, etc.), the primer must be deep penetration. There are special waterproofing formulations that penetrate the structure of concrete by 10-20 cm and crystallized inside, filling themselves all the smallest pores through which moisture can penetrate.
- In any case, additional waterproofing the screed will not hurt. To do this, after drying the primer to the floor, it is possible to launch cutteroil cuttings on each other and on the walls by 10-15 cm. You can also use loose waterproofing from bitumen mastic if reinforced protection is needed.
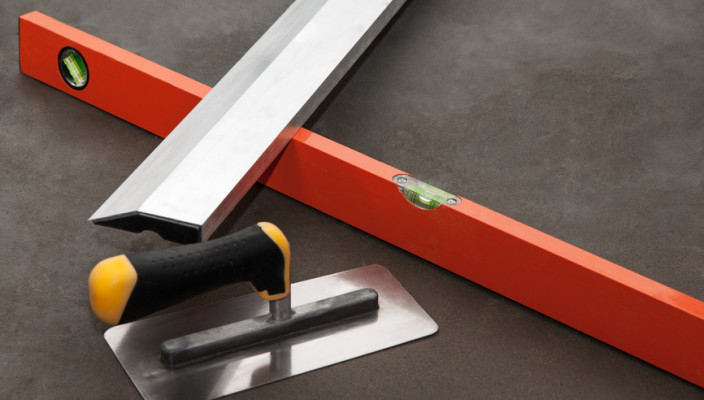
- After that, you can proceed to measurements to determine the degree of irregularities of the floor and understand which areas should be higher, and which are below. To work, you will need a construction level (aqueous or laser), a roulette or a long line. Immediately mark the "zero" level throughout the perimeter - it must be 1-1.5 m from the floor. First arbitrarily deliver this label, say, near the door opening, and then transfer to the level throughout the perimeter. As a result, all these marks should be on the same level relative to the horizon, but not the floor level. Connect their straight line and get a "zero" level, which will serve as a main reference point for finding the surface horizontal.
- To determine the differences, measure the distance from the zero mark to the floor line and compare these indicators throughout the perimeter of the room. The surface of the concrete screed must coincide with the highest point of the floor, filling themselves all lower sections. The more measurements around the perimeter, the more precisely it will determine the differences. The difference between the lowest and highest point of the floor will mean the drop in the level. If you make a cement mixture with the addition of plasticizers (polymer cement), the minimum thickness should be at least 3 cm. Otherwise, the frozen solution will not be able to withstand weight and mechanical loads and simply cracks. There are single-level and two-tier ties. The first poured one layer to bring the floor throughout the room on one horizontal level. Two-level screeds are needed in cases where they align the floor in two different rooms and plan to lay different finish coatings, excellent in thickness and texture. So that on the threshold of horizontal floors of different rooms, it is necessary to accurately calculate the level and the size of the drops separately, after which it is compared the data and perform the screed.
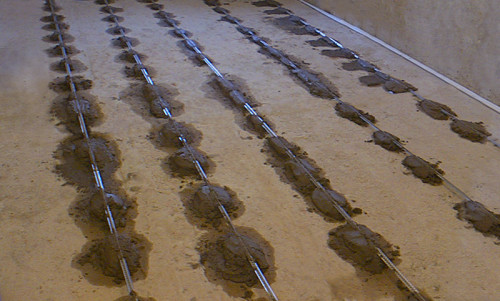
- After detecting drops in terms of level, it is necessary to install beacons - guides that will help withdraw the surface for one level. As lighthouses, a metallic perforated corner profile is most often used. Alabaster solution is used for fixation. The distance between the beacons can be 40-80 cm, so their amount is determined by the size of the room. First, set the side lighthouses at a distance of 40-50 cm from the walls so that their upper edges are in the same plane with the highest point of the floor (to what level you will pour concrete). If you correctly put profiles at the walls, put the intermediate will not work.
- Wait for the alebaster mortar drying and proceed to the reinforcement of the screed. For small residential rooms, this stage can be skipped, because there is a weak load on the floor. Reinforcement increases gender strength and screed durability. To do this, use a special grid, stretching it on the surface without a strong stretch. The network needs to be pouring a thin layer of liquid cement mortar to fix and prevent the occurrence of air emptiness.
- For insulation, the tie is used clayzit - clay pieces foamed under high temperature and pressure. Experts recommend using a differential clay, since it creates a more dense layer. For high-quality warming, it will be necessary to pour 15-25 cm, which will affect the height of the room, so this method is not suitable for low ceiling rooms. Pour it on the floor, sink and fill with liquid cement mortar to fix.
- Only after drying the cement solution you can start cooking concrete to fill the screed. To do this, mix the sand with the grade cement is not below the M400 in the 3: 1 ratio. To improve operational characteristics, plasticizers and fillers can be added to this basic solution. They increase hydrophobicity, allow you to work at low temperatures, contribute to the speedy frosting of the screed, etc. It is necessary to pour a solution between the beacons quickly, so at this stage it is more convenient to operate together - one puts the solution, the other sends a fresh batch.
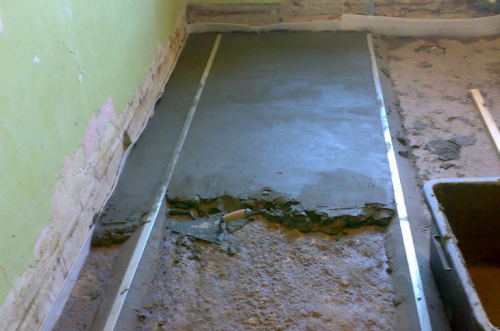
- So, put a part of the solution between the beacons from the opposite side of the door, so that you moved to the exit along the way and did not drive yourself into the "trap". Lay out the solution, put a long construction rule on the lighthouses and hand out for themselves to remove the excess concrete and form a smooth surface. Promotion in this way to exit. When the entire floor is covered with concrete, remove the beacons and gently fill the grooves with the same concrete solution.
- Leave the screed to dry for 3 days, sprinkling it with water in the morning and in the evening. So you will prevent too fast evaporation of moisture, which will lead to the cracking of concrete. After the specified time, cover the surface with polyethylene and leav for another 5-7 days so that the upper layer assembled. If necessary, continue to clean the floor once a day (if it turned out dry hot weather, for example).
- The final drying of the screed occurs in 25-30 days from the moment of filling, so you need to gain patience and do not start the finish finish. In this, in fact, the main lack of classical technology is - not everyone can afford such a long wait, because it is impossible to use the room during this period.
- After that, you can pour the adjusting layer of liquid cement or polymer mixture to get a more even and smooth coating.


Video on the alignment of the floor will help you better understand the whole process:
Semi-dry tie
As we said, it initially existed only one way of alignment of Paul Concrete is wet. But over time, the technology has undergone some changes. The main disadvantage was the main disadvantage - too long to dry the screed. The cause of long drying is the presence of a large amount of fluid in the "wet" solution, and therefore it is logical to assume that if you cut this amount, it means that less. So, in fact, a semi-dry technology appeared. Another plus semi-dry screed is no need to make the finishing alignment of bulk floors. The surface of the already immediately gets quite smooth.

Step-by-step instructions for alignment semi-dry concrete tie:
- The most important condition for the formation of high-quality and durable coating is the removal of an old screed, even if it seems to you that it is kept normally. The dismantling of the concrete layer will be quite noisy and time consuming, therefore, warn the neighbors about the forced temporary discomfort and arm with a jackhammer.
- After removing the previous screed, the surface must be discussed and projected. If necessary, put additional waterproofing, as described above. To do this, you can use not only rubberoid or mastic, but even the usual constructional polyethylene film with a thickness of 200 microns.
- Perform measurements, reveal the value of drops in height and determine the required amount of solution, based on the thickness of the screed. On average, 100 m² with a drop for each millimeter will require 0.16 m³ of concrete.
- Place the thermal insulation material over the film. To do this, it is possible to use clayzit, but the plague materials are best proven: polystyrene foam, stone wool. More information can be found in the article " Warming the floor under the tie with your own hands».
- Reinforcement for semi-dry screed do not need. If it is necessary to increase the floor, add a polypropylene fiber solid to a solution of 15 microns. It will not only increase the strength characteristics of the screed, but also will not allow it to crack during drying.
- How to put lighthouses for floor alignment is described in the previous instruction. For a better understanding of the process, we offer to watch a learning video:
- The recipe for a semi-dry screed is almost the same as for the classic one - mix part of the cement with three sand parts, if necessary, add fibrovolok. The difference consists only in the amount of water to pour all the dry components. As a result, you should get quite thick, if not loose solution so that when compressing it in a fist, only a small amount of moisture is released. The mixture should not stick to the tool, but at the same time the consistency should be homogeneous so that the rods are not formed during rubbing.
- Begin to distribute the solution along the perimeter of the room, presses the edges of the waterproofing film or rubberoid protruding from under the insulation. After that, fill in turn segments between the beacons, moving towards the exit. Stretch the solution by the rule so that it is in a closer with a zero mark.
- Make a wiping solution with a wide grouting circular motion. After that, cover the floor with construction polyethylene and leave one day so that it is back.
- Remove the beacons and fill the hollow with a solution. Leave the screed to dry another day, after which it can be walking on it. It is recommended to start the finish finish not earlier than 4 days after the fill of the screed. It is permissible to create a correction layer from a liquid cement solution or polymer mixture.
There is also a dry band screed, but the concrete in its arrangement does not participate. All information on this topic is set out in articles. "Leveling floor plywood with their own hands" and "Floor alignment with its own hands".
Self-leveling mixes
For those who do not want to wait a month or even a week, while a concrete screed dry, quick-drying mixtures were invented. The alignment of the floor by self-leveling mixture takes much less time and forces - you can start the finish finish after a few hours after the fill. At the same time, by strength, durability and other characteristics, such a screed is not inferior to the classic concrete. Moreover, some compounds are even stronger with a smaller screed thickness, while they have decorative properties - some do not even need finish finish.

In rapid filming mixtures to level the floor mass of benefits: they are durable, wear-resistant, easy to use. And if for concrete coating the thickness should be at least 3 cm, for the level floor, just 5 mm is sufficient. For this reason, they are ideal for premises with low ceilings. Unfortunately, it did not cost without flaws. The most obvious of these is the need for careful preparation of the foundation before alignment - it should not be chips, cracks, dust and dirt. Also, it is also impossible not to note the high cost of materials, which in most cases makes the economical owners sacrifice their time, preferring a classic wet tie or dry floor alignment.
Types of mixes
Depending on the composition and purpose, several types of dry mixtures are distinguished for floor alignment. A decisive role in the selection plays the dryness of the room in which the repair is made, as well as the characteristics of the finish coating, if such is in general. So, for example, the alignment of the floor under laminate and under the carpet should be produced by different mixtures.

Consider the characteristics of the compositions in more detail:
- Cement - the cheapest view of self-leveling mixtures. A very thin layer is given, so often cement formulations are used as a primer. It serves such a floor at all not long - about 3 years. Of the advantages, you can designate high adhesion and almost missing shrinkage. To apply, absolutely any basis will be used. Depending on the additives in the absorption of moisture may differ. True, such screeds will dry longer than the other species - the final frost occurs after 3 weeks. Also, they cannot be used as a decorative coating.
- Gypsum - gypsum bulk floors can only be used in dry rooms. They provide additional thermal insulation, so they are often used with the arrangement of the "warm floor". Anhydride (gypsum) mixes almost do not give shrinkage, quickly dry and absolutely safe for the health of people, animals and the environment. The main requirement is to apply to a completely dry basis.
- Epoxy - quick-drying mixtures that give a perfectly smooth and smooth surface. It is not recommended to make such floors in the kitchen or in the bathroom, because when moisture gets, they become very slippery. Also, the epoxy gender is sensitive to abrasion, so it is also better not to use it for the hallway. It will look good in the living room or bedroom.
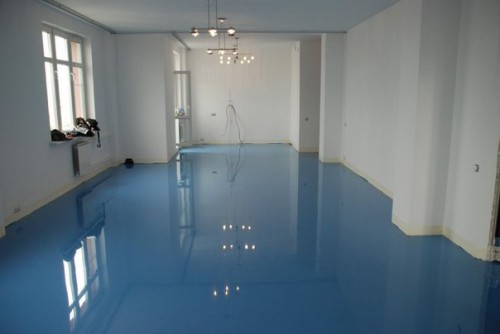
- Polymer - compositions of polymer mixtures can be very different: with polyurethane, epoxy resin, methyl methyl acrylate and other components. Depending on this, operational characteristics will be different, but all polymer compositions have general advantages. So, they create an incredibly durable surface that can withstand large weight and shock loads. For this reason, polymer floors can be found on many warehouses and industrial premises. Resistance to temperature and humidity differences allows you to use such mixtures for filling the lavety balconies, loggias, basements, etc. This line of materials has practically no shortcomings, except for the high cost and demandingness to dry the rough surface.

Technology Pouring
The recipe for the preparation of the self-leveling mixture is indicated on the package and may differ for each composition, but the principle is the same everywhere - dry ingredients must be dissolved in water to homogeneous consistency. It is very important to work as quickly as possible, since the solution is frozen for 20-30 minutes, after which it loses its original qualities. Drying speed depends not only on the composition, but also on air temperature - it is possible to work with mixtures from + 10c to + 30s.

Floor leveling technology in bulk mixtures is very simple:
- Prepare the surface by clearing it from dust and stains.
- Apply two layers of adhesive primer. To align the wooden floor, use the appropriate primer. Also before the fill, cover the floor with an insulating material, for example, a construction film with a thickness of 100-200 μm.
- Prepare the solution by sticking to the instructions on the package. For mixing, use a building mixer (drill with a nozzle).
- When aligning the wooden floor under laminate or parquet, pour the mixture on the base layer with a thickness of 5-20 mm, for concrete or other materials, the minimum thickness is 2-3 mm.
- Purchase by an unpleasant floor with a needle roller to drive air bubbles, then leave the mixture to completely dry.
Useful advice: It is better to leave fresh floors to dry for a couple of days, not allowing them to dry. Protect them from direct sunlight, close the windows so that the drafts are not formed, turn off the batteries and other thermal devices.
The described instruction is applicable to small rooms that can be pouring one part of the solution. For spacious rooms, it is recommended to fill in segments that can be made from a metal profile for lighthouses. If the room area exceeds 20 m², within 3 days after the fill, be sure to make deformation seams. Otherwise, the monolithic base may not withstand the load during operation. Bulk floors can be used as a finishing coating after alignment of the wooden floor plywood.
In conclusion, we suggest familiarizing yourself with the video instruction for working with self-leveling mixtures:


