Fresh root roots and greens grown in their own greenhouse - the perfect food option in the winter on the table. That is why, if you have a small land plot, the thermos greenhouse should be built on it.
Content
Winter greenhouse thermos
The main advantages of such a design is to preserve and significant heat savings. Applying it, it is cleaned by the need for unnecessary hassle associated with municipal payments. At the same time, if it is properly built and equip a greenhouse-thermos, then it can be grown in it to grow different cultures, right up to citrus.
Greenhouse thermos design
The main secret of such a greenhouse lies in the fact that at the depth of two meters, the soil almost always has the same temperature. At the same time, if its oscillations are present, they are completely insignificant and directly depend on being near groundwater.
It is intended to build a greenhouse thermos, it should be remembered that the standard radiators warm the land is almost impossible, but with the help of the technology of "warm floor" - easily. It also needs to be observed that such heating does not overheat the land. For this design, the design is equipped with a regular irrigation system.
As for the skipping of light, this design will not contribute to its loss, but on the contrary, will even increase.
Advantages of polycarbonate thermos greenhouse installed on the foundation:
- increased thermal insulation;
- such a structure can be used for growing various kinds of crops;
- thanks to the used building material - polycarbonate - you can grow light and thermal-loving cultures all year;
- this type of greenhouse has a good ability to skip light and provides excellent conditions for obtaining a quality harvest;
- the basis of this design, its framework and coating are distinguished by increased resistance to temperature differences and adverse weather conditions;
- the greenhouse has a reliable design and a long service life.
How to make a greenhouse thermos of thermoblocks
The stages of construction of the thermos greenhouse include the following works:
1. Greenhouse thermos drawings.
Initially, the plan should be made and decide on its location. Experts recommend putting a greenhouse in length from west to east on a normally illuminated and open plot. The rest of it should be insulated with foam. It will be fine if this design from the North-West and the North side will protect the fence or some buildings.
In length, the greenhouse can be done any, but the width should not be above five meters.
Recommendations:
- the shape of the greenhouse can be any;
- the greater the scope of the structure, the worse the thermos effect is saved.
2. ROOM KOTELOVA.
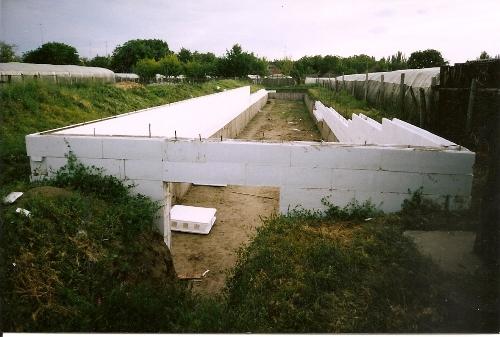
Since most of our greenhouse will be located in the ground, it is necessary to dug no less than 2 m deep into the depth. The latter should be made as smooth as possible, as the foundation will be poured into it and concrete blocks will be set.
3. Erecting walls.
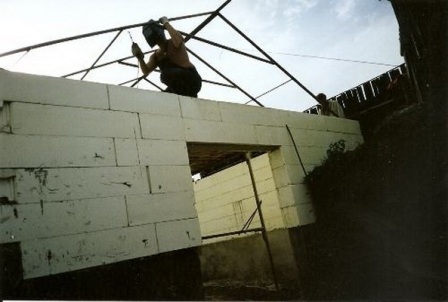
The best building materials for the construction of walls of our greenhouse are thermoblocks. They are usually installed on a concrete base and fixed on a metal frame. And in order for the design to hold inside the heat, the inside of the walls is fixed with thermal insulating film.
In addition, many believe that inside the structure you need to still install heat accumulators that can be made from ordinary barrels with water or bottles. Due to the created greenhouse effect, the latter will actively heat up and slowly cool.
Another heating option is the technology of "warm floors", which lies in the installation of the electric cabinage under the soil. However, in this case, they must be needed to disappoint something, for example, a grid and a decide.
Also, some agronomists resort to growing crops in boxes and pots, because the soil in them is significantly warmer.
4. Roofing thermos greenhouses.
Universal coating for our greenhouse is polycarbonate, which can be used by a solid piece. The main advantage of its advantage is that sheets can have a length of up to 12 m, and it is resistant to mechanical exposure.
If you are trimming a greenhouse-thermos polycarbonate on both sides, then its thermal insulation will be exactly the same as in a plastic three-layer glass.
Progress:
- initially, all the elements of the rafter should be prepared by treating them impregnation;
- it should be connected to the floor of the tree;
- the jumper between them is fixed in such a way that at the end of the lower part there are about 5 cm;
- next, we collect support;
- we remove the jumper from the rafter, and instead we put the skiing bar;
- under the ski bar Install the front supports 88 cm in height;
- extreme rafters fix to bruster with nails of 20 cm;
- then between the rafters mounted the ski bar and jumpers to the front support.
When the roof is ready, it can be painted, and then proceed to polycarbonate flooring. The latter is made from the inside, and then outside. Fixed sheets are recommended for wood screws in pre-drilled holes.
At the end of work, a corner is placed on the roof along a bar of iron with a gasket from the insulation.
Recommendations:
- before the roof is not fixed to the angular supports, the polycarbonate sheets are not screwed to the ends of the design;
- all sheets of sheets should be punctured with a transparent scotch;
- only after the above, the roof is placed on the greenhouse;
- fix it with brackets and nails.
5. Interior decoration.
In this design, the main thing is tightness. That is why all the seams should be melted with plaster or mounting foam.
Then we carry out the heating, automatic watering and electricity.
Greenhouse thermos Video review:


