When repaired in the bathroom, it is often necessary to replace the old mixer to the new one. It is simple enough to install it. Many plumbing jokes say that the installation of the mixer is a very exciting process.
Content
Installing the mixer will differ and depend on whether it is necessary to install it on the angular new bath or replace the old mixer to the new one.
What a crane to choose?
Before you go to the plumbing shop and purchase a mixer, you need to figure it out in its models.
Mixers are divided into two types:
- Sneakeable.
- With two valves.
The supply and disconnection of water in one-line models is carried out by turning or lifting the lever. It is quite comfortable and saves consumer time.
Two-ventilated models have a crane and two handles in a set - one handle will carry out the flow of cold water, the second is the flow of hot water. To get the desired water temperature, you need to turn both handles. Twin mixers consume water economically.
There are two types: complete with rubber gaskets or a ceramic disk.
Characteristics of high-quality mixer:
- Take the mixer in hand. Heavy? So high-quality, because the lightweight mixer is made of fine metal, so it can quickly fail.
- Find out what exactly the mixer is made from which material. Modern devices are made of silumin or brass. The first have low weight and, accordingly, the cost. Silicon mixers belong to the "budget" category of goods, do not have good strength, and therefore are not reliable. At least such a mixer and is in demand from buyers, but only because of the low cost.
- Brass mixers are massive and, accordingly, expensive. Because of the high viscosity of the alloy, the presser nut or pipe with any deformation will never burst. And the deformation of the pipe can occur even when installing and operating the crane.
- Examine the technical characteristics of the mixer. An important point when installing a mixer in the bathroom - take into account its size. The faucet model you like can not approach the bath. In addition, the model of the mixer must correspond to the place, because, for example, the wall model is not suitable for the installation of the mixer on board the bath, or vice versa.
- Pay attention to the fittings of the mixer: the length of the hose for the shower and the nose, and is it also there is a kit for mounting the watering can with the wall.
Dismantling of an old mixer
After selecting the model, you can install the mixer. But before you need to dismantle the old crane. This will require an adjustable key.
How to remove the mixer:
- Discharge water intake on a cold and hot tube.
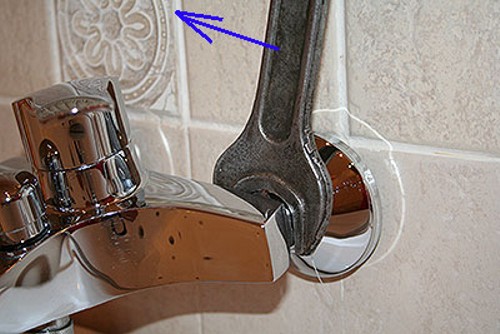
- It is necessary to lower the water remaining in the pipes and unscrew the mixer with the key. It is necessary to do it very carefully, so as not to damage the carving of the stationary fitting in the wall (the place of connection with the plumbing). If you lose this moment, you have to break the wall to replace the fitting.
- Next, you should carefully clear the thread from the winding and old paint.
Assembling a new mixer
Typically, the mixer is sold in a disassembled form with all the necessary details, so it needs to be assembled independently.
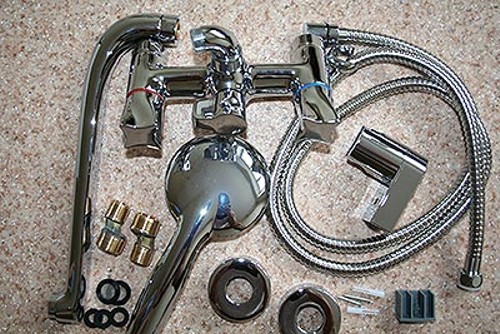
Open the box and check whether all components are in place. The standard mixer kit includes:
- "Heart" - the main unit;
- gander;
- shower Heads;
- shower hose;
- eccentric (several pieces);
- plafones are decorative;
- gaskets.
Please note if each detail is packaged into a plastic or tissue bag - in front of you a high-quality mixer. Also check each nut and eccentric for thread.
Explore the instructions of the assembly and installation of the mixer in the bathroom, it will help you prevent errors.
When assembling, do not apply tremendous effort, all connections should not be tightly fastened. If you find that the incoming eccentrics are short, or vice versa, long - you can purchase fasteners of the desired size in the plumbing store.
There is no fundamental difference when installing the mixer, so the mixer is collected completely along with the shower hose or not - it does not matter.
Installations of the mixer in the bathroom
To mount the mixer, you will need such tools and materials:
- gas key;
- adjustable key;
- passatia;
- tape for winding or natural palaper;
- silicone sealant or pasta.
Consider the standard method of fastening the mixer on the wall:
- it is necessary to wind up the eccentric tape. Pay attention to the fastening element: on the one hand it is wide, on the other - narrow. You need to wind the winding on the thread with a narrow side. Make sure that the winding "sat" tightly and did not scroll through the thread. Over the winding, apply a paste or silicone sealant;
- screw the eccentric to fittings on the water pipe to the wall. Eccentrics allow you to independently adjust the distance between the mixer and trumpets. But according to standards, the distance should not exceed 150 millimeters. If there is a different distance between fittings, it can be easily eliminated by twisting eccentric and then performing a check with a construction level;
- next, an eccentric should be attached and make sure that he "went" on the thread. Now it can be spinning first from hand, and then with a wrench. Look, it is exactly the mixer. There should be no blocks, respectively, nuts should be easily screwed.
- when installing the mixer on an acrylic bath, be careful because, if you come on the bottom of the bath, it can be deformed;
- now you can fasten decorative cranes;
- pose the mixer, first screwing the nut manually, and then tighten the adjustable key. Spin alternately, then the left side to prevent skew.
Installing the mixer on the angular bath
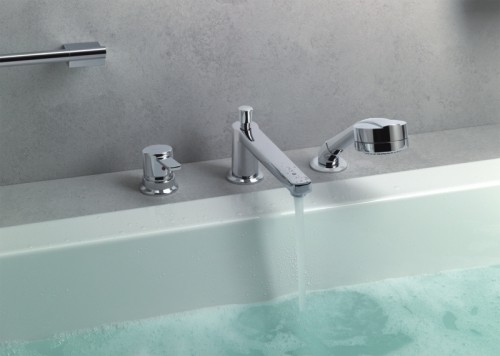
Install the mixer directly to the bath itself - such a service has become popular quite recently. Mixing mixer is installed on board the corner bath. It allows you to provide a practically silent set of water in the bath.
The constructive solution of the mortise mixer provides for the absence of a shower hose. On the one hand, it is beautiful, since the unsightly hose is hidden under the bathroom. If necessary, it is enough to pull the watering can to use the hose. Of the flaws, it is noted that such a masking becomes a destructive for the flexible hose, and it breaks faster.
How to install a built-in mixer:
- From the tools you will need an adjustable wrench, a screwdriver and an electric door with nozzles.
- First you need to prepare a hole in the bathroom. Marking and drill with a drill hole. When choosing a hole, you need to consider the following: it should be available for connecting the mixer to the pipes, as well as to repair it or replace the mixer.
- The pre-assembled mixer is then mounted into the hole and connect to the pipes. For connecting, flexible hoses are used, just remember to still install rubber gaskets under the hose pucks (usually they are supplied).
- The only difference in the installation of embedded mixers is that the tap is mounted on a special gasket (it is included).
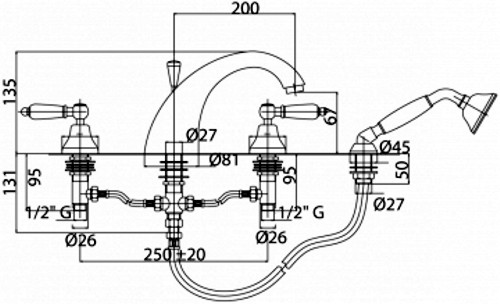
This drawing will allow you to independently cut the mixer in the acrylic bath:
Swimming the mixer in the bathroom, see photo:
What should be the height of the mixer above the bathroom
Installation of the mixer in the bathroom should be carried out according to the set size. According to the mixer height above the bathroom is twenty centimeters. But in some cases it is possible to place it at another distance.
If you install a separate shower faucet, then it should be located at an altitude of one hundred and twenty centimeters from the pallet.
Frequent errors:
- If the pipes are laid before the bath will be installed, then it is not necessary to take into account its height during calculations, because when installing often under the bathing supports (their height is from eight to ten centimeters). If not to provide such a slope, then in the bathroom Drain of water will be difficult.
- If you measure the height of the Bath Burning level, but install it above ten centimeters, then as a result it will be at the height of ten centimeters from the bath level.
- Consider and consider this time if it is planned to use the mixer at the same time on the sink and bath, then the scholars should be located above the sink (with its height you should also decide in advance).
How to install a mixer in the bathroom, watch the video:


