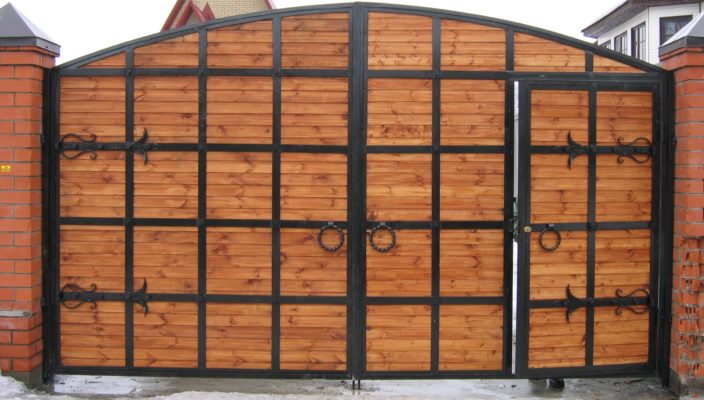
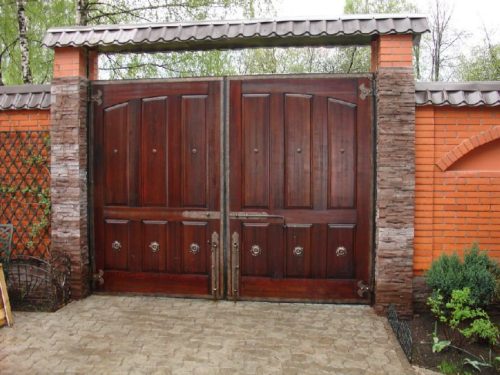
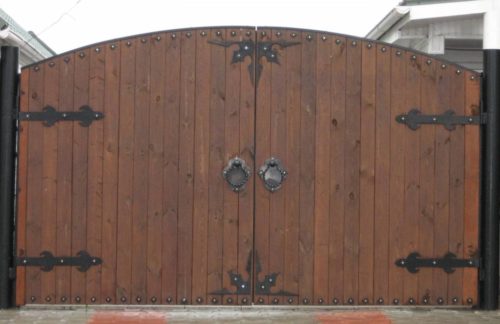
Beautiful wooden gates are one of the best solutions at the design of a country site. This is largely explained by the excellent characteristics of wood.
Content
- We make a wooden gate with your own hands. Product specifications
- We make a wooden gate with your own hands. Preparatory stage
- We make a wooden gate with your own hands. Installing columns
- We make a wooden gate with your own hands. Installation of gate sash
- Manufacture of wooden wicket
- Installation of valves and fastenings on wooden gates
- Design of wooden gate design
We make a wooden gate with your own hands. Product specifications
For the manufacture of the gate, it is not necessary to use valuable rocks of wood. A larch is quite suitable, which is characterized by good moisture resistance and resistance to rotting.
The benefits of wooden gates include:
- low weight;
- environmental friendliness;
- low cost;
- ease of care;
- the possibility of processing;
- low cost.
The disadvantages of the wooden gate are:
- short operational period;
- insufficient mechanical strength;
- the probability of fire.
An increase in the life and improvement of fire safety is achieved using special impregnations, which occurs with an interval of 4-5 years.
We make a wooden gate with your own hands. Preparatory stage
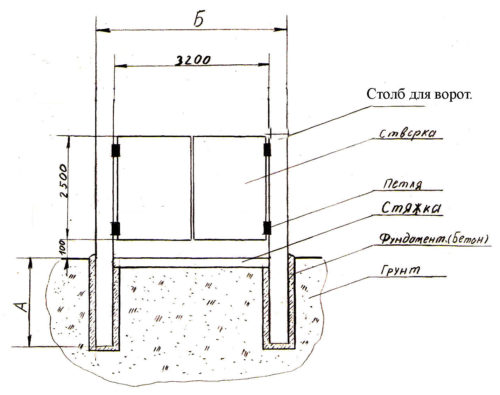
At the preliminary stage, measurements are carefully carried out on the site. The dimensions of the future design (height and length) are determined, the distance between the support elements and the location of the wicket. Drawings are drawn by wooden gate indicating all sizes.
As for the reference elements, it is better to use metal, brick or concrete pillars. If it is decided to set the columns from the tree, they are pre-treated with an antiseptic. The underground part of the support is soaked with a resin or bitumen mastic.
Near the future gate should prepare a plot:
- large stones are cleaned;
- closer to the House of Land;
- aligns soil;
- places places where supports will be mounted.
We make a wooden gate with your own hands. Installing columns
For high-quality pillars, a number of requirements should be observed:
- powmakes are made to a depth of more than 1 m;
- the distance between the supports exceeds the length of the gate sash;
- the bottom of each pit is covered with sand, which is trambed with water;
- concrete pouring in pits is carried out with an assistant, which must hold the pillars at a certain level;
- flashing of the sash is carried out after the complete setting of concrete;
- the top of the poles is recommended to connect the overall horizontal beam.
The installation of the columns suggests:
- digging a yam brown;
- backing in the pit of sand with a layer of 5 cm with a subsequent tamping water;
- sand cover with rubble thick 5 cm;
- processing the lower part of the supports by an antiseptic or soldering lamp (if a pillar of metal);
- installation of columns in a single plane (both horizontally and vertically);
- gradual filling of the free space of rubble with concrete.
The correct fixation of the pillars is verified using a plumb and construction level. The upper points of the neighboring supports must match. For this, the cord is stretched between them.
We make a wooden gate with your own hands. Installation of gate sash
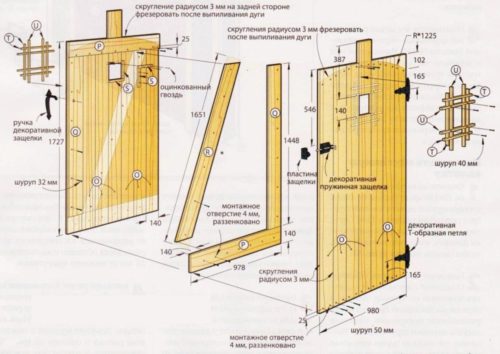
The most common option for the plating wooden gate is the stakenik. This method involves making a gate frame. For this, the timber (4-5 cm) or metal is used. Typically, the frame design includes 3 horizontal, 2 vertical and 2 transverse stripes.
The best material for plating wooden gates - boards of pine. They differ in the maximum resistance to the external events. This wood has an excellent price-quality indicator.
The algorithm for creating a carcass-stakenik is as follows:
- the boards at the same distance are stacked on the frame;
- with the help of screws, their connection is made with the frame;
- the compounds are cleaned with sandpaper, processed with moisture-proof impregnation and painted.
In the manufacture of your own hands, the wooden gate rectangle frame can be made of metal. Immediately before the trimming of the sash, all the corners and distance diagonally are checked again.
Installation of sash can be carried out in two ways:
- hang on the loop on the supports;
- place on the supports of the loops, fixed on the sash.
Manufacture of wooden wicket
Now about how to make a wooden wicket with your own hands. At the initial stage, its foundation is collected. Created a frame that is trimmed by the rails. Deck is the creation of rigid elements that will not allow strain and saving wicket.
In the smooth section lay out and placed a timber. After cutting off the workpiece of the required size (its length must correspond to the length of the gate) the entire frame is checked on the accuracy of the placement. All frame elements are fixed by the rails. Bescasers and "discovering" sites are eliminated by the plane.
The wicket can be lattice or solid. For the manufacture of the lattice design, it is necessary to cut each rail. Cuts are made as smooth as possible. For the assembly of all elements, special wood self-assembly use.
To make solid wicket trim, boards and rails are stacked on the frame. Decree lines are determined and marked. Necessary cuts are made. When creating a semicircular gauge, a circular is used.
Installation of valves and fastenings on wooden gates
Installation of valves and fasteners - the final stage of manufacturing swing wooden gates. The mounting of the canopies is carried out directly on the frame. Immediately after the installation of the valves and gate checked the correctness of their opening and closing.
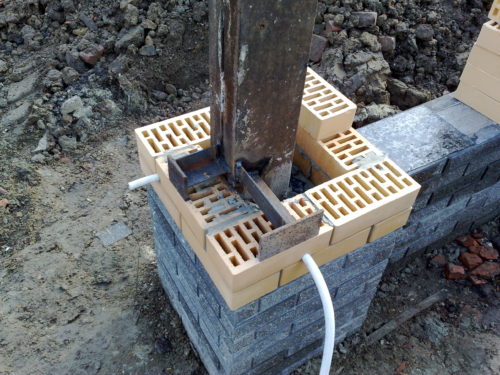
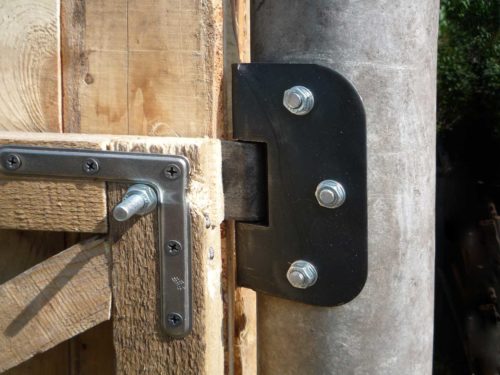
Factory stainless steel fittings - the most viable option to fix doors and gates. For fixing the posts to the gate of bricks are laid two loops (the outer portion of support) in step brickwork. Waybill same side of the loop is connected to the horizontal crossbar with bolts.
To attach the gate (wicket) to the metal or concrete pillars, use hooks, clamps and nuts.
An ordinary bar can perform for a wooden gate, which will start in a pre-made eye on one of the columns. In the place where the flaps are connected, two brackets are mounted. From the inside, the gate can be covered with a castle.
If there is a need to install the lock on the gate, then the hinge is mounted near the knob. You can use a rod intended for the clamp. The only nuance - the castle's handle should cover the knitting knob.
The catch can be equipped with fastener, with which one gate sash will be closed. For this, the fasteners are connected to the frame (if available) or drive a pipe with a retainer (in the absence of a frame).
Design of wooden gate design
To improve the aesthetic properties, the gate and the gate is covered with varnish. It is better to use a polyurethane material material (for example, a yacht varnish). 2-3 lacquer layers are applied to the wooden surface.
Also decorate the gate from the tree can be using:
- forged metal elements;
- threads;
- staining with drawing or different colors.
Video reviews of wooden gates:

