Sometimes to perform high-quality finishing works, sufficiently multiple fixtures. The ordinary roller is suitable not only for applying a primer and adhesive mixture, but also help paint the walls and ceiling. To quickly cope with the tasks assigned and save paint consumption, let's find out how to properly paint the roller.
Content
Roller is the necessary tool for performing paintwork. It allows not only to save materials, but also cope with the work faster, and also paint the large area. Working with a roller, you can independently control the thickness of the layer of paint and uniformity of the coating. But before starting work, you need to familiarize yourself with the views of this important attribute and choose the appropriate option.
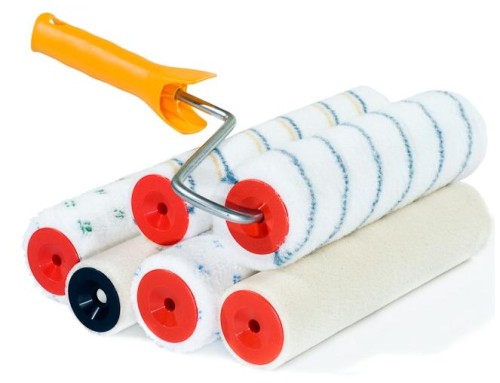
Types of rollers
What roller is better to paint plastered walls, what roller is suitable for applying paint on the wallpaper and how to paint the ceiling? In fact, the newcomer is not easy to understand this issue. The store presents a wide range of rollers to perform finishing works of different sizes and made from various materials. To make an idea, you need to know which roller for what works is more suitable.
Types of rollers:
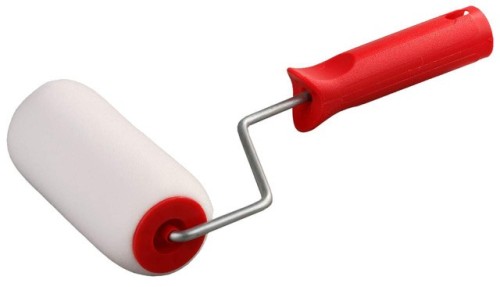
- The foam roller is a universal tool with which you can paint any surface. This roller is suitable for working with adhesive and water-based paints, as well as to work with varnish. It is undesirable to work with paint on an oil basis and a water-emulsion, since aggressive components included in the paint will quickly destroy the coating and the foam rubber is spoiled.
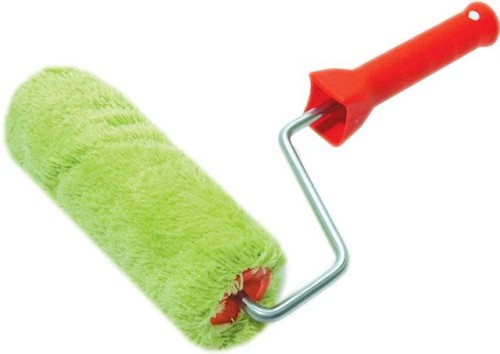
- Fluffy or fur roller is suitable for staining a large area. It is used both for staining ceilings and walls. It is allowed to use this tool to work with oil paint. If you compare it with a foam roller, then the life of the fur coating is greater than that of the foam. Based on this, it can be concluded that the soft roller can cope with staining of walls and ceilings in several rooms. Also, this tool can be used to work with uneven surfaces. If you are gathered to paint the walls, and did not thoroughly prepared the surface (there are differentials and depressions), just a fur roller will allow you to achieve a uniform paint layer.
- Thread rollers are also used widely for finishing. The main advantage of this tool is the possibility of working with many materials (varnishes and paints), as well as ease of care. After working, the tool can easily be cleaned of paint residues. There are also disadvantages, for beginners such a device may seem too difficult, as the paint splashes, staining with the threads.
- Vellar roller coating is an excellent choice for beginners. Such a tool is suitable for working with water-based paint and for staining walls of oil paint. There is one "but", the roller is poorly absorbing the paint, so it will be necessary to dip the tool in the paint tray more often. Experts mainly use velor rollers to perform decorative trim to apply the finishing layer of paint.
We reviewed several common types of rollers. But this is not all, each tool is able to cope with different tasks.
Rollers are designed for:
- implementation of textured work;
- staining of facades;
- combined works.
Consider briefly the appointment of each instrument: so, the roller for facade works is used to apply paint to the outer walls of the building. It is equipped with a special bearing, which lowers the turnover of the tool rotation to prevent the paint splashing.
Valleys for textured work are made from various materials: it can be plastic, metal and silicone. You can meet a combined roller made of several materials. Such a tool is designed to apply patterns and ornaments to the stainable surface.
If you need to quickly repaint the walls in the corridor, a bathroom or a nursery, then a wide tool will be needed for work. The width of the working part of the roller should be at least 250 mm. In order to cope with the painting narrow parts, it is necessary to buy a narrow roller, the width of the tool is 30 mm. Average or intermediate dimensions can be used to work with different surfaces.
Pros and cons of the tool
The main task of the roller is evenly distribute the paint. Therefore it is very important to choose the desired type of tool.
What to pay attention to:
- Material top. It must absorb paint to be able to remove the surplus.
- The material from which the base and the roller handle is manufactured. Practicality and endurance. The tool must be enough to dye one room.
Disadvantages:
- plastic handle will last long;
- the attachment of the rotating drum is not always reliable. You can find rollers with one-sided or double-sided fasteners. The last option is considered to be more reliable and will serve such a tool longer. At one-sided attachment of the drum also has its advantages - this is the ability to quickly replace the "fur coat". A two-way roller cannot be disassembled - it will have to be thrown out;
- rollers are sold with different "fur coats", it can be both natural coating and artificial.
How to choose a tool for staining walls and ceilings
Newbies always have many questions to choose paint, the better to paint: a tassel or roller and how to do it. Let's consider in more detail what roller is better to paint the ceiling? It turns out that any roller will cope with the painting ceiling, everything depends on the quality of paint. But there are also their nuances who also need to consider when choosing a painting tool.
What roller paint the ceiling? For staining the ceiling fit the fur coat from fur or foam rubber. With the help of a foam tool, you can paint any surfaces and even create a relief pattern. Make the surface with bubbles is very simple: apply a layer of paint and ride the roller, bubbles with paint will remain on the wall or ceiling, as they dry up. It turns out an interesting surface.
What roller paint the walls? You can use roller with fur coat or foam. The foam rubber absorbs the paint, which allows you to create a perfectly smooth surface. Paint is easy to squeeze both with fur and foam roller.
By the way, if you want to paint the ceiling or walls of acrylic paint, then you need to buy a roller with a foam nozzle.
What roller can you paint the wallpaper? For painting wallpapers, both foam and fur roller are suitable, as well as a tool with a velor working part. The roller from velor allows you to apply a lonely layer of paint and achieve an ideally smooth surface. If you first gathered to paint the wallpaper, it is best to use a fur roller, since with a velor roller you need, as they say, to get acquainted closer and spoil not one surface before you get to work with this tool. Velor roller is a tool for professionals. In inept hand, it can turn the perfectly smooth surface into a wall with drunks and divorces. So it is better not to risk.
So what roller is better to paint the walls? You can buy a porolon and fur roller. For the masters of their case, the velor roller will fit, as well as a dense. By the way, a filament or dilated surface allows you to quickly paint the large area. Just do it needs carefully, since the tool is quickly spinning and the paint is very sprinkled.
Once again answer the question: what roller is better to paint the wallpaper? You can buy a porolon, fur or long pile. If you want the surface to be rough, then you can choose a roller with a long pile. Just such a tool will help to clean the recesses and dents, as well as removing on the surface. If you want to make a smooth wall, then choose a roller with a very short pile.
Preparation of the surface to staining
How to paint the ceiling with a roller? Before you find out the answer to this question, you must prepare the surface and purchase everything you need.
To work, you will need:
- dye;
- roller;
- extension;
- paint tray;
- several brushes (wide and narrow) for staining of hard-to-reach places;
- workwear, headdress, gloves and glasses.
So, in order to quickly paint the surface, you need to prepare the ceiling and walls in advance - to apply a layer of primer, sharpen irregularities, wait for drying and re-apply a layer of primer mixture. After preliminary preparation of the walls and the ceiling, it's time to start painting.
How to paint the walls with roller
In order not to spoil the floor, it is necessary to be made it with dense polyethylene. Paint should be pouring into a spacious capacity (if you bought it in small banks) and mix well. It is very important to merge several cans of paint in a clean and dry capacity (a new plastic bucket or bowl is suitable). This is necessary in order to exclude the difference in shades. It happens that the paint of one party, and the shade may differ slightly.
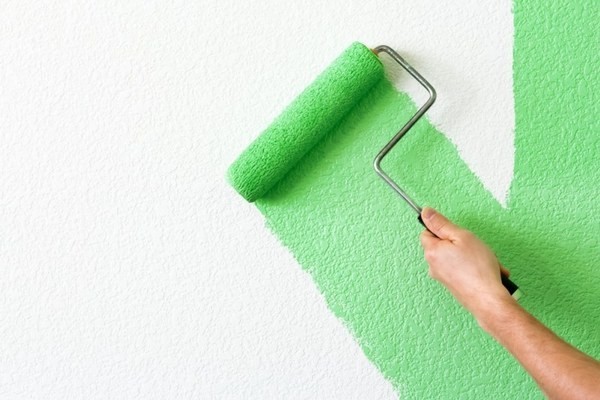
How to paint the walls with roller:
- Mix the paint is preferably using a mixer. To do this, you need to put a shirt-stirrer in a drill and thoroughly mix the paint on small revolutions.
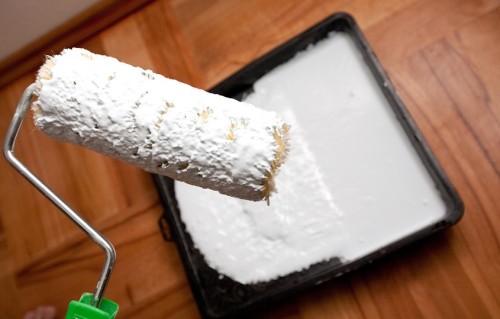
- Now you can fill a little in a special tray and dip the roller in the paint.
- Next, it is necessary to ride several times the roller on the ribbed surface of the tray so that the paint absorbed, and is superfluous in the tray.
- And now is not an easy task: it is necessary to understand which area is enough paint. To do this, you need to paint the wall with a roller, roll the square until the roller is dry. When the paint is over, you will understand the consumption of the material.
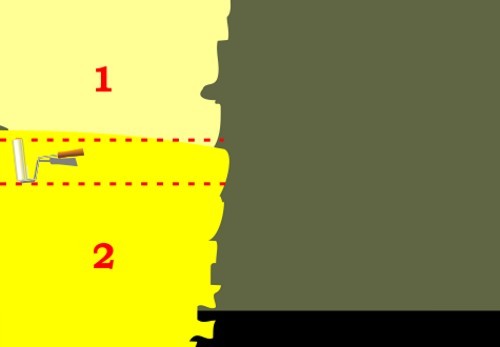
- Now it remains to break the stainable surface on the equal bands (in the width of the roller) and you can proceed to work.
How to paint with roller:
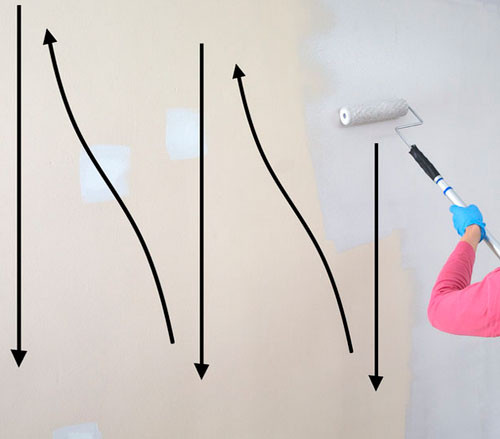
- it is always necessary to start painting the walls from the right or left upper corner. There is no difference in the direction (left-right);
- you divided the wall into several sites, the 1st must be skipped and start painting the wall from the 2nd plot. To do this, we put paint on the wall from below and slowly moving up;
- The 3rd and 4th band must be skipped and paint the 5th strip, and then return to the fourth site and then paint the first.
Why is such confusion necessary? Just such manipulations allow you to apply paint without lumen and strips. Now it will only remain working in a horizontal direction.
Next, we move to the adjacent square, a little exciting area of \u200b\u200bthe first (width of the 1st band). The upper squares are painted, it is necessary to return to the first strip. If you see that the stripes are long and paint dries, then it is better to use the vertical technique of applying paint.
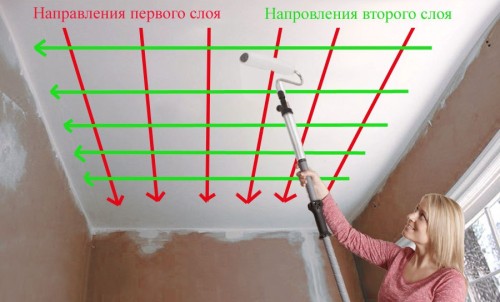
How to paint the ceiling with a roller:
Tool processing
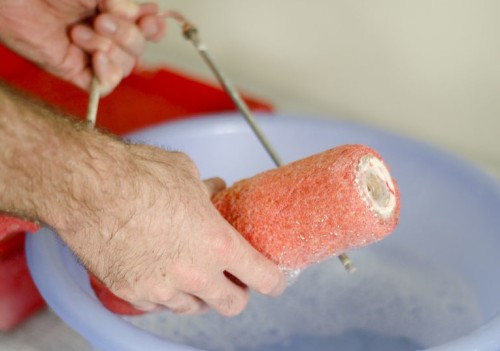
After staining the walls and the ceiling, you need to clean the tool from the paint. If you work with paint on a water basis, then the roller you just need to rinse under the jet of water. You need to wait when water is clean.
If you worked with the paint prepared on the solvent, then you need to prepare such devices:
- solvent;
- rag;
- several tanks;
- scraper;
- foil.
If you are going to continue the work tomorrow or in the near future, you just need to wrap the foil roller to limit air access. For several hours, the paint will not have time to dry. If you need to carefully clean the paint tool, you can use the scraper: remove the remaining paint from the surface, fill the solvent into the container and immerse the roller into it so that it is completely in the liquid. The solvent must be changed until it becomes transparent. Next, it will only stay well to impregnate a pile or pure-rone with a clean soft cloth, and only after that you can rinse the tool under the jet of water. Then you need to squeeze the roller to remove the entire liquid and dry.
How to paint the walls with a roller. Video:

