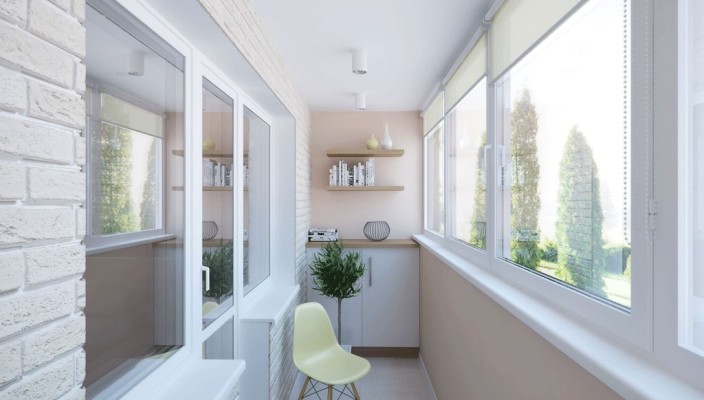
Any household owner with a balcony or loggia is sooner or later thinking about the need for interior decoration. Fortunately, technologies and materials for the implementation of this venture are more than enough. In this article we will tell about the most popular and simple variants of the interior decoration of balconies and loggias, with which even an inexperienced person will cope.
Content
Types of finishing balcony
Glazing and interior decoration of balconies - the occupation is quite troublesome, but not too complicated, as it may seem at first glance. Beautifully sew a balcony with decorative panels or to cover the walls by plaster can any hardworking owner without any construction skills.
But before proceeding with decorative finish, you need to perform a number of preparatory work: insulate and protect the walls from moisture, glazing window openings, insulate the floor. Without these procedures, any finish will last on the walls very long, and it will be impossible to stay on the balcony during the cold season. To deal with this will help you. Warm glazing balcony», « How to insulate a balcony with your own hands?", and " How to independently make glazing a balcony and insulate the loggia».

After all preparatory work, you can think about what finish will be carried out. From the selection of the material will depend on the cost of repair and interior design of the room. We offer to consider the most frequently used materials for the interior of the balcony:
- Plasterboard is one of the easiest and most popular ways to quickly see the balcony. Plasterboard plates give a flat and smooth surface to which the wallpaper can then be labeled, apply plaster or paint. This is completely safe for human health and environmental material. It does not burn and does not support burning, but moisture is afraid, so all the attention should be paid to the waterproofing of the walls and the balcony ceiling (especially if you live on the last floor). The only serious lack of plasterboard walls - they can not hang the shelves (decorative only), which significantly reduces the functionality of the balcony, as the premises where it is possible to remove unnecessary things until time. For trim, use only moisture-resistant types of plasterboard. They cost a little more expensive than ordinary sheets, but will serve much longer. More about this told in the article "Moisture-resistant plasterboard: features and characteristics of the material".
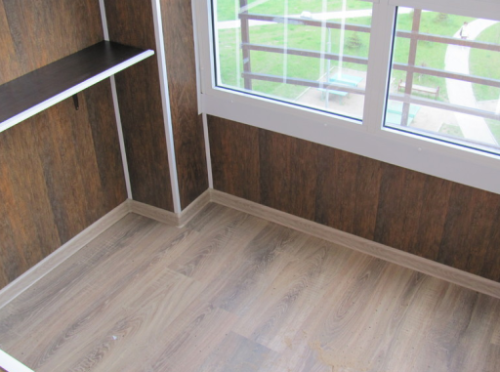
- MDF panels - Material is a mass of wood fibers compressable under high pressure and covered with dense paper with a synthetic finish layer. This layer repels water and prevents minor mechanical surface damage. MDF is good because completely unpretentious in care, imitates natural wood, you can pick up the panel of any coloring and design for small money. However, the environmental friendliness of this material is quite doubtful, it is sensitive to wetting, it is capable of burning and maintaining burning.
- Decorative plaster is one of the simplest and cheapest ways of interior decoration of any premises, including balconies. We will talk about it in more detail a little later, but for now we can only say that with the help of plaster you can get a stylish and original surface, even a beginner can cope with it.
- Block House - finishing material, imitating natural wood: timber or logs. The Block Blocked Blocks have a very neat appearance, it is easy to care for the walls (it is enough to rub a damp cloth). Installation of panels is quite simple, however, to improve performance and extend the service life after installing the wall it is better to cover with a transparent varnish.
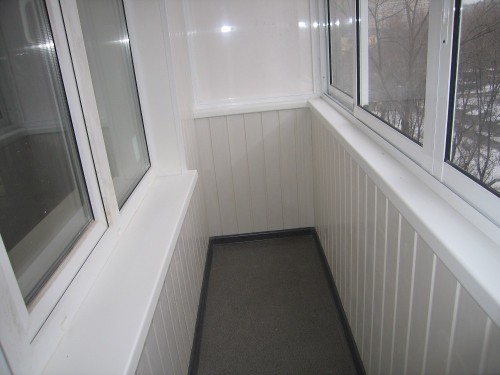
- PVC panels (siding) - the second most popular finishing material for balconies after decorative plaster. The interior decoration of the balcony by siding will not require professional skills and large capital investments. It is easy to care for plastic panels, and a wide variety of colors and textures makes it possible to realize any designer ideas. One of the main advantages of the interior trim of the PVC balcony is that before installing the material there is no need to thoroughly align the walls, as needed, for example, for the same plaster.


Balcony trimming
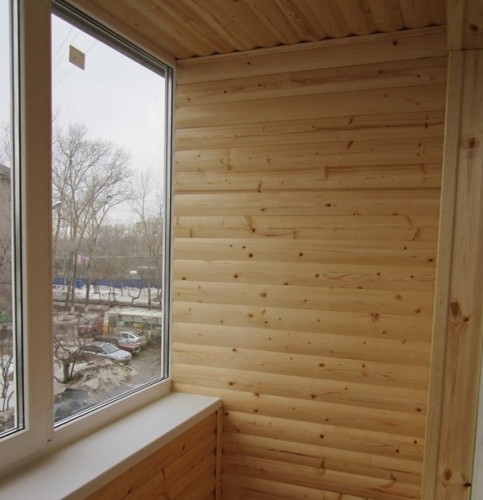
The internal finish of balconies can not be called the most budget way, but despite this, it is one of the most popular. It's all about the simplicity of installation and durability of panels, and no other material will be compared with the operational properties of natural wood.
Choosing clap
For the manufacture of lining, various varieties of wood use, so it is logical to assume that its cost, as well as qualities, will differ. So, the panels can be made of cedar, oak, linden, ash, alder, birch or coniferous rocks (pines, spruce). The best are cedar and oak products, respectively, they are the most expensive. The cheapest is worth the pine lining, but it does not mean at all that its operational qualities on zero - with due isolation of the balcony, such a skin will last for many years. However, this material has one serious disadvantage - the coniferous breed during heating secretes the resin, so you need to exclude direct sunlight on the trimmed walls.

In addition, there is such a thing as a class of lining - roughly speaking, this is an indicator of thoroughness of material processing.

There is a classification of 4 levels:
- Premium class (extra) - the material of the highest quality, completely devoid of bitch or cracks.
- Class A - on one unit of 1.5 m, no more than two bitch may be present.
- Class B - on the material there may be bitch, small cracks and resin notes.
- Class C - technical material with lots of bitch, through openings and various damage. Not intended for any internal work.
For interior trim, you can use class A products or premium. In some cases, you can take the class of class B (try to choose not too knocked products).
Installation of clapboard
When you bought the lining and brought her home, you need to prepare the surface of the walls on the balcony before installation. To do this, clean them from the previous coating: plasterers, wallpapers, paints, etc. In case of detection of cracks first, silent them with a grinder, after which fill in cement-sandy solution or mineral plaster.

How is the internal finishing of the balcony panels:
- Purified walls cover with antiseptic primer deep penetration.
- Form the heat insulating layer. If you use a rolled insulation on a foil basis, the crate must be installed after fixing the heat insulating material to the wall. If you use mineral wool or polystyrene foam plates, first need to mount the crate, and then lay the insulation between its elements. This instruction will describe the second option of action, since it is associated with a large number of nuances than the first. So, use a wooden bar with a square cross section of 40 or 50 mm for construction. You can take a metal profile, but then the work will cost more. If you install the lining horizontally, make a vertical crate, and vice versa.
- Start the installation of the crate with the mounting of the angular racks. Align the vertical bars so that they are located strictly at an angle of 90 ° to the floor and screw them to the walls of anchor bolts.
- Connect the vertical racks with longitudinal bars, placing them in 40-50 cm from each other. Professional masters first fasten the timber at the knee level, then - at the level of the hip and at the level of the shoulder. This allows you to know the places where a person relies most often. Basically, such a Council is relevant for finishing by fragile plastic clap, but it never hurts to reinforce it.
- As you can save the insulation in the cells of the crate, gluing it to the wall with moisture-resistant glue-foam.
- On top of the insulation, attach a vaporizolation membrane. It is best to use a bilateral membrane because it is more effective contributes to the evaporation of excess moisture from under the trim. For fixing, you can use the usual furniture stapler.
- Oddly enough, the most difficult part of the work is behind, but you have not even proceeded to the mounting of the lining. The first panel attach in one of the corners, scoring a nail into the groove or using a special klimmer. If you feed the lining with nails, but you are afraid to randomly damage the panel, first make some non-links to "push" a nail, and then take it completely through the extension in the form of a smaller hammer. In the same way, you can act in the case of clemas.
- Then cut the first panel to the second and repeat the procedure. Lightly tapping it at the end, beat the spike in the groove of the previous panel. Before fixing it with nails, check the position of the construction level.
- Last but you need to install corner lining, platbands and window sills, and then process wooden lining with antiseptic composition and transparent varnish.
Decoration of balcony with decorative plaster
With the help of decorative plaster, any owner will be able to make a stylish interior of a balcony or loggia, and if you know a couple of professional secrets, you can create real designer masterpieces. Plaster In addition to decorative qualities, it can also have other properties: enhance heat insulation, protect against moisture, absorb noise, etc. These parameters depend largely from the composition of plaster.

How to pick up plaster
All operational characteristics of plaster depend on its composition. For the production of solutions, various components of natural and artificial origin are used. For the interior decoration of residential premises, of course, it is best to use a mineral plaster or based on non-toxic water-soluble resins.
Features of various basic components of decorative plasters:
- silicone plasters are best suited for open balconies, as atmospheric influences are perfectly withstanding;
- mineral plaster serve the longest, well protect the room from moisture, withstand mechanical loads;
- lime-based formulations are often used to imitate the texture of natural stone;
- if there are vegetable fibers in plaster, it means it is not afraid of high humidity;
- the most secure environmental terms are acrylic and vinyl plasters.
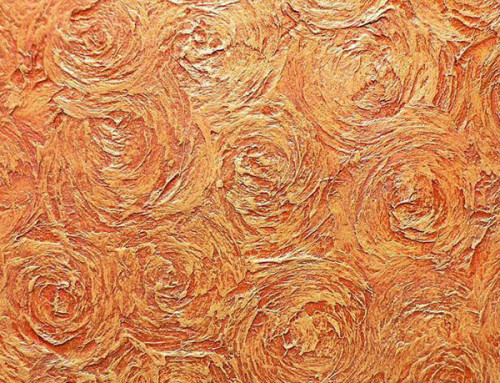
In addition to the base component in decorative plaster there are various fillers. They can be represented by large or finelylaper materials. Large relief is easiest to apply on the wall, as they do not require preliminary preparation of the foundation. But the fine-grained plaster is better to apply on a flat wall to get an expressive effect. The most popular plaster similar plan is a croroede. It imitates the surface of the wood made by the bugs-cores.

Plaster may be textured or simulated. While the first application creates an unusual texture, the second allows you to imitate various materials, for example, artificially together the surface or create the effect of rigine tissue, cracks, snake skin, etc. Thus, the stucco, imitating the soaked fabric, contains a mineralized pigment, which refracts the light and creates an original silk effect.
Special attention deserves plaster with the effect of "soft gold". It contains a granular filler resembling microscopic sponges. Thanks to it, the coating acquires not only valuable decorative properties, but also enhances the heat and sound insulation of the room.

Venetian plaster is considered the most expensive and "noble" species, and for obvious reasons it is better to use it only in well-isolated closed balconies. It creates a plausible imitation of natural minerals, precious stones and even pearls. The coating is applied by several translucent layers, as a result of which the volume and expressiveness is achieved at the expense of various reflective parameters. The only drawback in addition to the high price is exposure to mechanical damage and dampness.
Applying plaster
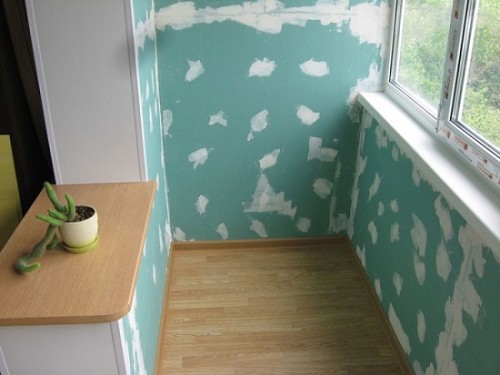
Since the interior finish is mainly used fine-grained plaster, it is necessary to pre-prepare walls. This implies not only the dismantling of the former finish, but also insulation and waterproofing. The optimal option in most cases is the installation of the crate with the insulation and the covering of its plasterboard plates. Plasterboard is an ideal base for any plaster. You may be useful to you " Doomle under the plasterboard do it yourself", and " Sealing seams of plasterboard».

However, the installation of the crate with plasterboard takes a lot of free space, and on the balcony it is always not enough. Therefore, you can use an alternative option - insulate the walls outside and work a little with a concrete base. Aligning it to the perfect state is completely optional, it is enough to remove obvious bumps and smeared the cracks with a mineral putty.
Instructions for applying plaster Very simple:
- Treat concrete or brick walls in deep penetration. It will strengthen the material from the inside and increase the adhesion with the plastering makeup.
- After a complete drying of the primer (it is better to apply it in 2 layers) you can start shuttering walls. If there are any metal elements in the walls, cover them with an anti-corrosion composition or thoroughly insulate. Otherwise, with time, rusty spots may appear in these places.
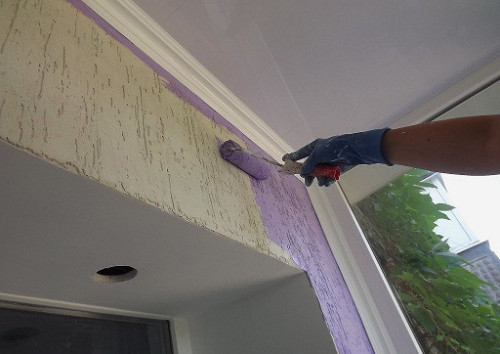
- Mix the plastering in accordance with the instructions on the package. The consistency should remind a thick sour cream. Apply a solution on the wall with a spatula or metal ironing. The layer thickness should not exceed 5 mm.
- If you want to create a nonstandard texture, you can use a roller, brush or sponge. The latter can be made of the original relief, putting a sponge to the mixture applied to the wall, slightly rejusting and turning 180 °.
- In the course of applying plaster, make a dressing of vertical and horizontal smears to increase the strength of the surface. You can experiment with acute, wave-like or round strokes. Apply them carefully, only slightly pressed to the tool with one force to get a uniform pattern.
- Leave the plaster to dry for 2 days, after which we slightly treat the surface with a spatula to remove sharp corners and excess.
- If you have not added a pigment during the mixing of the plastering solution, you can start painting the walls.


In the most recent place, the plastered surface is recommended to graze beeswheat to increase the hydrophobicity and give an additional shine. It will be very easy to care for such a wall - it is only necessary to wipe the soft sponge moistened in warm water.
In the plot below the secrets of the workshop with decorative plaster are told. After watching this video, the interior of the balcony will become even easier.
Interior balcony: photo
Finally, we suggest flying to a small photo formation of examples of the interior decoration of the balconies by plastic panels, plaster, MDF and other materials.


Balcony finish to trust the professionals of his case, friends advised me to firm - https://www.mosremokno.ru/otdelka-balkonov-i-lodzhiy/otdelka-balkonov.. Made quickly and efficiently!