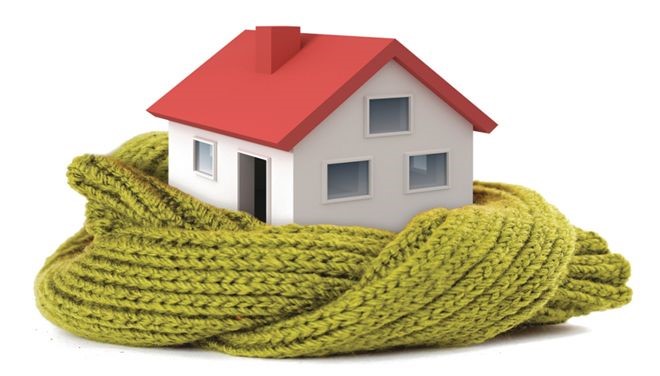
The insulation of the house is not only a way to save funds for the payment of services for energy companies, periodically improving tariffs. So you can achieve comfortable conditions in the premises of the house at any time of the year: in the summer it will not be hot, and in the winter it is cold. Warming gives other advantages if the materials are correctly selected and installed them. This will go further.
Content
Advantages of housing insulation
Measures to warm the house give the following effect:
- saving electrical, thermal energy and gas;
- the creation of comfortable conditions in the premises;
- preventing the freezing of external walls;
- improving noise insulation;
- elimination of conditions for the spread of fungi and mold;
- an increase in the service life of the foundation, base and other supporting structures;
- creation of comfortable conditions in the basement.

The effect of insulation of the walls of the house
Warming options at home
First of all, you need to choose the way and decide how to insulate the facade of the house with your own hands outside. There are the following modern technologies.
- Fastening the slab material with a special glue and plastic dowels of "fungi", followed by applying protective plaster and surface staining.
- The device of a multilayer non-ventilated design is a wall with insulation in the middle, closed on both sides with a dense building material (brick or foam concrete). Polystyx, foam, mineral wool or liquid polystyrene-based insulation is laid between the outer and inner wall.
- Installation of the ventilated facade. The waterproofing film is mounted on top of the wall, then the insulation, vaporizolation and protective design of metal profiles and panels are attached. The task of the panels is to protect the insulation from wind and atmospheric precipitation. For this can be used porcelain stoneware, siding and lining, the fastening of which is carried out on top of the crate of wooden plates.

Installation of polystyrene plates
All options for insulation at home with their own hands have their advantages and disadvantages, but when choosing should be considered:
- availability of the method for self-execution;
- the possibility of performing work at any time of the year;
- cost of materials;
- compliance of the appearance of the warmed wall of the general concept of finishing at home.
Important: Walls at home outside can not be insulated zonal. The insulation must be distributed evenly for all external walls. Otherwise, due to uneven heating and cooling, the building will collapse, mold and fungus will appear.
Tips for choosing a material for insulation at home
Basic materials for insulation of the house do it yourself:
- polyfoam: foamed polymer with a high degree of heat and sound insulation;
- cellulose materials: cardboard and paper impregnated with antiseptic and antipirens (used for insulation of inter-level overlaps);
- mineral and basalt wool: high density materials are used for external insulation;
- extruded polystyrene foam: relative foam material with better characteristics.
The main criterion for selecting the insulation is its characteristics (thermal conductivity, vapor and moisture permeability), on which the thickness should be a layer of material. To calculate, it is also necessary to know the features of the structure: the data is taken into account on the presence of cold bridges near the concrete slabs of overlapping, windows, foundation and roof.

Mounting plates of mineral wool over brick wall
Priority work on housing insulation do it yourself
Before securing insulated material on the wall, you must follow the following.
- The base surface is cleaned of dirt, dust, molding growths and fungi.
- Large irregularities are eliminated: protruding fragments are shy, the depressions are sealed with cement-sandy solution. The surface plane is controlled by a plumbing and level.
- The wall is processed by an antiseptic agent and primer.
IMPORTANT: Fix the insulation to the wall can be started only after its surface is completely dry. It is recommended to use solar weather: the walls will be able to completely dry in three days at a temperature of + 15 ° C and higher.
Mounting Mineral Wool Installation Features for House Wattification
Mounting mineral wool can be divided into several points.
- Installing the crate. Wooden rails treated with antiseptic or metal profiles are used. The lamp should be strictly vertical, the distance between adjacent elements is 550 mm. This is a prerequisite that mineral wool plates can be installed between the Rakes (profiles) of the Mrosport.
- Mineral wool plates are stacked. In order to level the irregularities of the wall, the use of material of different density is allowed. Lone density plates are installed close to the wall, and the plates are denser - the second next.
- The insulation is closed by a vapor insulation film. The bands are mounted on the shoulder, the joints are sampled by scotch.
- Facing mounted, which use siding, decorative panels.
The technology is used including for the insulation of log walls, covering which the woodproof material cannot be avoided in order to avoid damage to wood.

Installation of mineral wool plates
Warming of walls at home by foam
Such technology can be applied only for brick and concrete walls. After preparing the walls, the following works are performed.
- At the bottom of the wall at the level of the metallic base profile is attached. It is designed to protect the insulation from rodents and align the first row of plates from foam.
- With the help of special glue and plastic dowels ("fungi"), foam plates, starting from the first (lower) row, are attached to the wall. For high-quality insulation, it is recommended to use plates with a thickness of at least 10 cm.
- The joints between the plates fill in the mounting foam. Polyurethane foam - "related" foam material, which high-quality seals seams.
- Building angles We protect corners of metal.
- We glue the reinforcing plastic mesh and cover the wall with two layers of plaster, on top of which paint is applied.
Important: Polyfoam can only stick on absolutely dry walls, from which it follows that insulation work is carried out in the warm season with dry weather.

Fastening plate foam plastic dowels with wide hats
Polyfoam can be replaced by plates of extruded polystyrene foam. Considering the smaller thermal conductivity of the material, we use the plates with a thickness of 50 mm.
Required tools and materials on the conduct of insulation work with their own hands:
- kelma Masonic or a perforator with a nozzle-chisel - to remove large protruding irregularities from the wall;
- spatulas are narrow, wide and greasy;
- capacity for kneading glue and putty;
- mixer for kneading solutions;
- level and plumb;
- dowel-nails or dowels like "fungus" (the choice depends on the type of insulation);
- waterproofer;
- vapor insulation film;
- metal profiles and wooden slats;
- self-tapping screw;
- primer;
- antiseptic;
- adhesive for foam;
- putty;
- facade paint;
- malyary roller.
Warming at home from the inside
Before making a decision on insulation from the inside, you should learn all about the disadvantages of this method.
- Reducing the useful area of \u200b\u200bthe room. Taking into account the thickness of the insulation and finishing material, it is possible to lose 1 m² or more. This is especially important for small rooms.
- We have to rearrange the furniture, redo the wiring (rearrange the sockets and switches), restore the interior decoration.
- It is necessary to take measures to protect the heat insulator from condensate.
- As a result of insulation from the inside, the wall will not receive heat from the side of the room, which means the depth of its freezing will increase. The "dew point" (zero temperature line) approaches the inner wall, which means the brick or concrete will be collapsed under the influence of freezing moisture. On the inside, fungus and mold will appear.
How to reduce the negative impact of internal insulation of the house
In order not to be dumbbed and the walls are not collapsed, the following must be taken.
- On top of the insulation, a vapor insulation film of good quality is mounted. Neighboring canvases are jammed, and the joints are sealed with adhesive tape.
- Preference should be made with thermal insulation material with relatively low vapor permeability. It will contribute to the exit of excess moisture out.
- Installation of the insulation is made after the wall processing with an antiseptic agent to an absolutely dry surface.
- Stick the insulation should be as close as possible to the wall, without gaps. The glue is applied to the base with a toothed spatula.
- The thickness of the insulation is chosen taking into account the characteristics of the climate and terrain.
- Excessive moisture from the room is removed using forced ventilation and periodic air ventilation.
- It is necessary to eliminate the "cold bridges": insulate the locations of the joining walls with concrete slabs. Insulation can be closed with decorative material - plastic or plaster, disguise under the column.
Warming options at the inside
The manufacturers of insulation material offer to use the following technologies for internal works.
- Laying mineral wool in the crate, fixed on the wall. Wool varieties should be selected, the characteristics of which are as close as possible to the parameters of foam polystyrene foam. At the same time, it is necessary to use vapor insulation material of the best quality. On top of the insulation fasten plasterboard.
- Installation of foamed or extruded polystyrene foam. This lightweight material that does not create a load on the supporting structures of a building with high thermal insulation characteristics. When it is installed, the vaporizolation membrane can be neglected. It is recommended to use polystyrene plates with stepped edges: they guarantee tightness.
- Spraying on the wall of polyurethane foam. This technology eliminates the use of glue and mechanical fasteners. The advantage of the material is in the ease of applying to the curvilinear surface and in the tightness of the heater of the insulation.

Wall insulation from the inside involves the mandatory installation of vaporizolation
Note: For thermal insulation of the room from the inside, you can use foamed polyethylene, warm plaster and liquid ceramics. These new materials practically do not reduce the useful area.
How to insulate the ceiling in the house
To reduce the loss of heat, it is necessary to solve the problem of insulation of the house comprehensively. The insulation of the ceiling with its own hands can be performed on the side of the top level by analogy with the installation of the insulation on the walls using the wood bars.

Installation of insulation in inter-storey overlap
The technology is used for wooden inter-storey overlaps and provides for the following actions.
- A lags are stacked on top of garbage from garbage - wooden bars with a cross section of 50 × 100 or 50 × 80 mm. The distance between the lags is 0.5-0.6 m. We must be laid down near the walls.
- Between lags, over a vapor barrier film, the insulation falls asleep or stacked. Ceramzite, polystyrene plates, liquid polyurethane foam, foam, mineral wool are used.
- Two layers of waterproofing are stacked.
- The boards with a thickness of 40 mm are styled, on top of which the decorative flooring is mounted.

The insulation of the ceiling from below is performed similarly, but the lags of less thickness are used
Another method of ceiling insulation is used for inter-storey floors from reinforced concrete plates and involves filling the screed over the plates from dense foam or expanded polystyrene foam in compliance with the following rules.
- The insulation is placed on the purified base of the floor. The junctions between the plates are filled with mounting foam.
- Instant beacons are installed.
- A cement-sand tie with a thickness of at least 50 mm is poured. In the middle layer of the screed, a reinforcing mesh from a wire with a thickness of 4-5 mm with a cell is 50 mm.
- The surface is leveled by a finishing tie or self-leveling mixture.
- The decorative flooring is stacked.
Tip: Before laying the insulation, on the base of the floor, foamed polyethylene aluminized coating upwards. Metal will reflect thermal energy inside the room.
Warming roof house
The insulation of the roof with their own hands is mandatory with the arrangement of the residential premises in the attic part of the house. It is important to properly put steam and waterproofing materials. Installation of roofing cake on the following technology.

- Inspect the rafyled: rotten to be replaced or repair. The distance between the rafters should be strictly equal to 600 mm so that the mineral wool slabs are laid between them (their width is 610 mm).
- All wooden parts are processed by an antiseptic agent.
- Installation of the crate, on top of which the layer of waterproofing material is laid. The finish coating is fastened from above.
- Internal work begins with laying plates of mineral wool between rafyles. For high-quality thermal insulation, a layer is 200-250 mm.
- For additional fixation of the slabs, cord or rails are used, which are styled over the rafter.
- The stapler fastens a vapor insulation material.
- Putting with a finishing material - plasterboard, chipboard, USB or clapboard.
It is necessary to mount the materials of the roofing cake in such a way that air ventilation gaps remain between:
- finish roofing and underpants waterproofing;
- mineral wool and hydrobrier plates;
- vapor insulation film and finishing material.
Basic mistakes when insulating at home
- Excess or insufficient layer of insulation.
- Using the fastener of improper quality: the grid is not allowed on dry insulation, it is impossible to use low-quality glue and neglect the use of dowels.
- Warving walls, ceiling and roofing, you should not forget about the basement.
- The slab insulating material must be laid with a smooth layer of the same thickness and density.
- It is impossible to neglect the preparation of the base surface.

The consequences of the use of poor-quality glue when sticking the reinforcing grid
At the end of the article on how the insulation of the house is carried out with their own hands - video with a specialist comments.


