
Ceramic tile - ancient facing material. Despite this, he did not lose his popularity to today.
Content
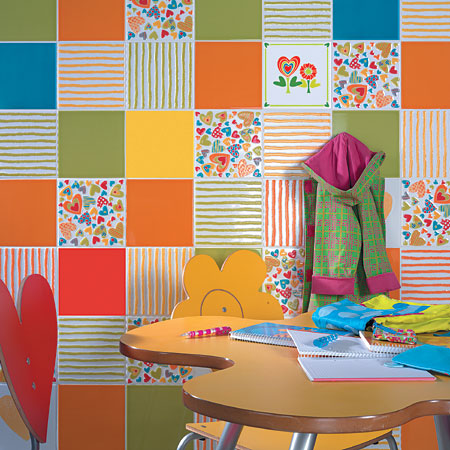
Where do ceramic tiles use?

Almost no interior design is without this material. Most often it is used for the design of the bathroom, pool, kitchen. Thanks to the improvement of manufacturing technologies, the possibilities of its application have significantly expanded. Therefore, it is relevant to the arrangement of any type of room, with the help of a properly selected tile, inside, outside, as well as the design of the design of the Green Zone. 
What does the life of the lined surface tile depends?
In addition to the quality of the tile itself affects the duration of operation and the quality of the adhesive solution. For example, the glue mask for ceramic tiles, as well as products of many other manufacturers, information about which you will find below has proven yourself. 
How to choose glue?

When buying, consider the set of criteria corresponding to the parameters of your room. Pay attention to the following conditions set out below to make the right solution for the question "What glue to glue ceramic tiles":
- Types of adhesive composition and principle of use
- Speed \u200b\u200band Professional Mounting
- Tile size
- Mounting conditions and subsequent operation
- Type of surface.

Type of surface
Basically, manufacturers on packaging indicate the parameters of permissible use. 
Note the following parameters:
- Material to which Mounting: Plasterboard, Brick, Glass, Concrete, Tree, etc.
- Surface quality: sliding or availability of irregularities. Choose a special composition for the maximum smooth surfaces, such as glass, in the first case or with the ability to adjust the thickness of the layer in the second.
- Location: Vertical, horizontal. For inclined surfaces there are solutions that exclude slipping.


Tile size
This criterion is of great importance, since when choosing an inappropriate composition, it is possible to destroy the entire lined surface due to unreliable clutch. 
Marking on a pack:
- For tiles of small sizes, usual (20x20 cm, 20x30 cm)
- For mosaic (has white color to ensure maximum accuracy of the appearance of the work performed)
- For powerful tiles, porcelain stoneware, stone.


Speed \u200b\u200band Professional Mounting
This criterion is closely related to the composition of the components. 
Pay attention to:
- The possibility of applying without professional skills (usually determined by the complexity of the preparation of glue and applications)
- Working hours of glue (the period in which laying is needed)
- Tile position adjustment time (time after mounting tiles on the surface).
Mounting conditions and subsequent operation

Defining criteria:
- Humidity (when placing pools, shower rooms, bathrooms)
- Heat resistance (when facing fireplaces, stoves)
- Resistance to temperature drops (when finishing the outer surfaces, the arrangement of warm floors).


Types of solutions
Dry mixtures on cement-based

Traditional glue for laying ceramic products. Before use is bred by water in accordance with the instructions.
Advantages:
- Naturalness of components (cement, sand)
- Affordable price
- High degree of fixation
- Ability to use in all conditions (high humidity and mechanical load, outdoor cladding)
- The ability to purchase the required amount of the mixture due to the various form of packing (2-25 kg).
Important! The drying rate of this glue is quite high, so the correct organization of actions is required, with desirable skills of working with material and selection Tools.
Dry mixtures on a cement basis with plasticizers and other additives

The essence of the solution is the same as the above described, but, thanks to special additives, the drying time is significantly increased, which allows you not to hurry with stacking. To the merits, we will take the possibility of mounting with this solution tile of any size.
Important! Pay attention to this type of glue if operating conditions are assumed with regular harmful effects on the surface or installation process will occur in adverse climatic conditions.
Single-component water-dispersion glue

An excellent option for non-professional installation without any skills. The profitability of such a decision:
- Maximum accurate work
- Long term of frozen
- Simplicity of application
- Uniform of the applied layer
- The impossibility of disrupting the formulation (on sale it is present in the form of a finished solution).
Important! Consider, given the preference to the water-dispersion composition, that the price of glue for ceramic tiles is already finished at times exceeds the cost of dry cement-based mixtures.
Among the disadvantages, we highlight the limitation of the application - mostly simple internal finishing works.
A two-component solution based on polyurethane or epoxy resins

Features of their application - self-mixing of components before starting work.
The profitability of use:
- High clutch strength
- The ability to regulate the speed of frost
- Savings due to the use and in the form of adhesive mortar, and as a cloud.
Important! Among the disadvantages, we note the abundance of chemical impurities in the composition.
Popular brands

The current building materials market provides a very wide range of not only species categories, but also manufacturers. It is very easy to confuse in this variety. Therefore, pay attention to the brands of glue for ceramic tiles, which make it possible to make sure that products are allowed:
- Ceresit.
- Knauf.
- Kilto.
- Unis
- Litokol
- Marshall
- Bergauf.
- Vetonit.
- Volma
- Stovetonit
- Fastener
Important! Choose the best glue for ceramic tiles yourself, based on the above recommendations.
How is the facing?

The entire finish process consists of the following steps:
- Preparing tools.
- Preparation of the surface.
- Installation tile.
- Shave processing and surface polishing.
How to calculate glue consumption for ceramic tiles?

Perform counting the right amount of glue is simple enough:
- Calculate the area of \u200b\u200bthe estimated cladding.
- The average solution consumption is 1m2 at a layer of 1 mm - 1.3-1.4 kg.
- Multiply the value of the area, the thickness of the alleged layer and the amount of flow to 1m2 (the maximum allowable layer of glue is usually 5 mm).
Important! Also consider the quality of the prepared surface, that is, a possible additional consumption of the mixture for alignment.
Preparatory work

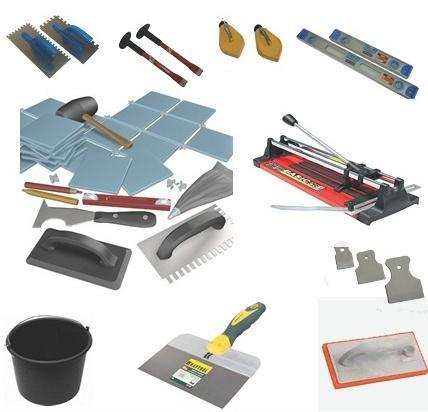
Tool preparation
To fulfill all the works, prepare in advance tools and materials, focusing on the following list:
- Level
- Kiyanka rubber
- Hammer
- Drill or perforator with a special nozzle
- Primer
- Putty
- Rubber or silicone spatula
- Toothed spatula
- Glass cutter, stovetur, hacksaw with a diamond string or any other tool for cutting tiles
- Seam sealant (better silicone)
- Glue for tile
- Shutdown of seams
- Ruler
- Wooden or metal rails
- Nails
- Paint ribbon.
- Crossings for seams
- Capacity for the preparation of solutions
- Selected tiled material
Important! When calculating the number of tiles, add to the resulting number of 10% - standard overrun due to marriage or battle during transportation and cutting.

Preparation of the surface
The main requirements for the surface of the planned laying are strength and evenness. Below are the recommendations for the preparation of the foundation. 
Follow these steps:
- Remove all the remains of the previous facing material.
- Cold walls for emptiness.
- Slip all irregularities on the walls.
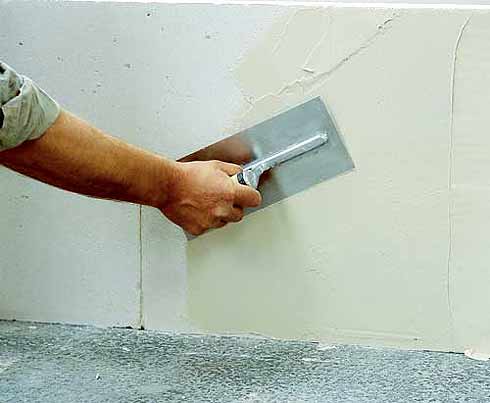
- Sproute for a reliable clutch of material with a vertical surface.

- With the deviations of the flooring of the floor, make a cement screed using, for example, a self-leveling mixture "Ceresit".

- Wait for complete drying.


Marking area of \u200b\u200bwall
- Make the number of rows by vertical, based on the size of the selected material.
Important! Consider only the number of fitted full tiles, taking into account the seams (the amount of seams between the tiles corresponds to the selected cross).

- Apply markup on the wall.

- The lower (first) series, regardless of the size (full tile or part of it), temporarily remains empty.
- Secure the prepared rails at the beginning of the second row.
- Make the markup horizontally, given the parameters of the tile, the size and location of the alleged seams.
Important! Standard seam size - 2.5-3 mm, but may vary by personal preferences.


Placement of the floor surface

- Determine the center of the room (middle of the length and width of the room).
- Make marking on 4 equal squares.
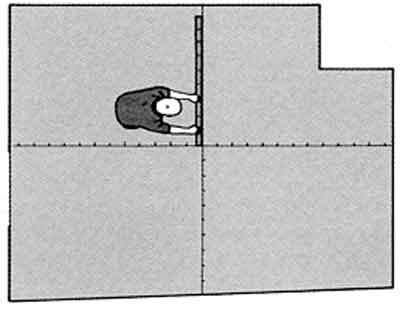
- In each square, make the markup of the drawing, starting from the center of the room.
Important! Such an approach allows you to accurately make a cladding with the correct location of the cropped items along the edges.

How to glue ceramic tiles?
Sequencing:
- Spread on the floor pre-1-2m2 selected pattern. It is especially important to do this if the material fragments have a different shade or drawing.

Important! This action will allow us to perform the final adjustment so that the lined surface looks in accordance with the idea.
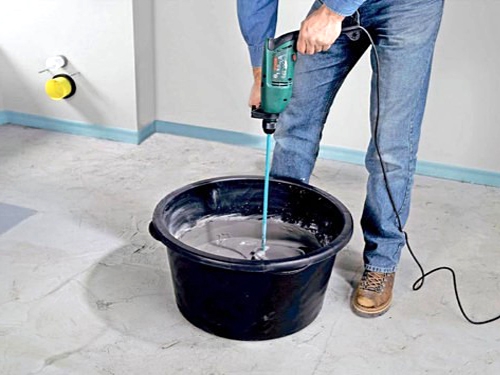
- Prepare the adhesive solution.
Important! Clearly follow the rules of instructions regarding the proportions and time of mixing.
- Apply the glue to the surface of the wall, floor, or apply directly to the tile if you allow the use of the selected composition.

Important! The area of \u200b\u200ba single application of the solution to the facing surface is slightly larger than the size of the tile or not more than 1M2 with sufficient drying time.

- Stay from the center when installing floor tiles, and from any angle or center when designing walls.
- Apply the tile, slightly pressing into the mixture.

Important! Do not press much to eliminate the leakage of the entire glue from the finishing material.
- Place the crosses for the seams.

- Sharpen your own hands the ceramic tile of the first row of the wall (above the rail) or square on the floor.

- Check the level of surface level.

- Spend individual elements of rubber Cyans when detecting deviations.
- Mock all subsequent rows, regularly checking the quality of the surface smoothness by the level.

- Clean the seams from glue excess.
- Wait for drying (standard period - 24 hours, accurate information Review in the glue manufacturer instructions).
- Remove the rails and crossbars from the seams.
- Make a cutting material in accordance with the parameters of the lower row of the wall or formed by the edges of the voids on the floor.
- Install the remaining elements in accordance with the rules of technology.
- Wait for complete drying.
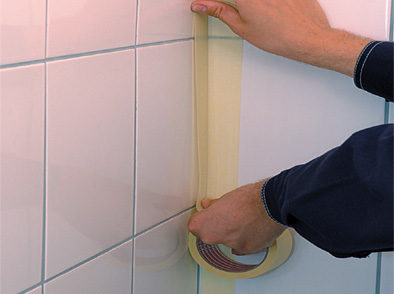
- Start a painting tape on the seams to avoid the solution to the surface of the tile.
- Prepare rapid solution, seams for seams or used glue.
Important! For decoration of premises with an increased moisture degree, use sealant or glue, and not grout.
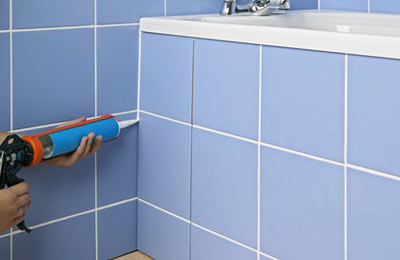
- Fill all seams with the selected composition.

- Look out 15-20 minutes of drying.
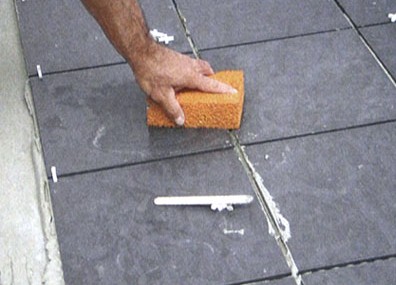
- Clean the surface with a rubber or silicone spatula.
- Remove the surplus with a wet sponge.
- Remove the painting tape.

- After drying, polish the surface and apply a protective solution for tiles.


Video
Browse the video "How to glue ceramic tiles" to the floor to more clearly imagine the work process.
Vitely familiarize with the technology of wall-mounted and floor tiles at the same time will help the next video instruction.
Conclusion
After you studied all the materials and were convinced that in the process of independent cladding with ceramic tiles there are no special difficulties, proceed to performing work. Remember that creating an attractive surface will be obtained only if the recipe for the preparation of solutions required for work, and the clear consequence of the processes is observed.


