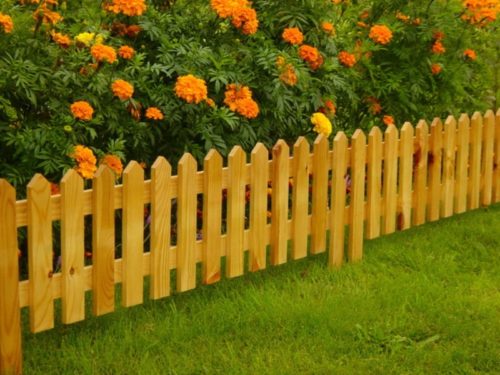
If there is a barisade on the territory of your country house or cottage, you will need a small fence for it. With this task, the fence made from the stakenik will be perfectly cope. In addition, he will perfectly fit into the overall landscape of the local area, and protects your vegetation from damage to pets. Since there is nothing difficult in installing a stakenice, we suggest to do everything with your own hands. You will get excellent experience, besides you can save. In this article we will try to consider all the features of the stakenik, as well as one of the options for its installation.
Content
Characteristics of the palanitor
Before starting the installation of the fence for the parisader, you need to choose the view of the stakenik, from which it will be collected. The most popular material is considered to be wood. After all, fences from a wooden stakeholder were raised a long time ago, and only recently began to use more modern materials. Anyway, we will have to consider every kind of stakenik individually to determine the appropriate option.

Options for a palanisader
I would like to immediately say that the modern construction market of construction and finishing materials is sisite by the varieties of the stakenice. Multiple fences are manufactured using modern materials, which can be combined. However, we would like to highlight the three main material from which the palanisader is manufactured.
Consider each of them individually:
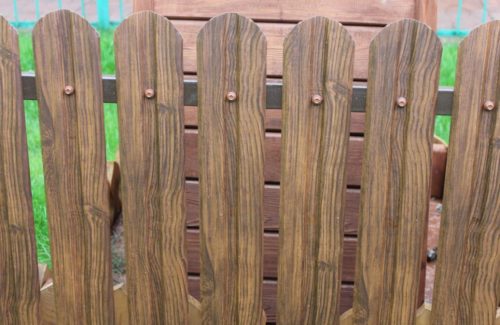
- Wood. This is the most popular type of material because it has several advantages. Natural wood is environmentally friendly, it also looks natural. In addition, you can decorate Staketin any threads to your taste. The tree is easy to process and paint, and thanks to the uncomplicated method of installation - to build a fence independently will not be difficult. But it also has a disadvantage - under the influence of weather and temperature changes, wood will quickly deteriorate, rotates and burns out, besides can easily flare. But this problem is solved, it is enough to treat the fence with special antiseptics and protective means. Such events will significantly increase the service life of the fence.
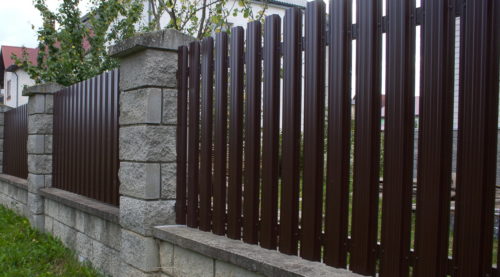
- Metal. More reliable and durable material. Please note that the metal fence is more often used to fencing the perimeter of the area of \u200b\u200bthe house, and only occasionally - for the arrangement of the palisaders and gardens. Metal stakenik has several advantages, such as: long service life, relatively low cost and strength. Designs made of metal are also used in decorative purposes - to give originality the landscape of the local area. In addition, such a stakenik with proper processing will be able to simultane more than a dozen years, and will ensure proper protection against the penetration of ill-wishers.
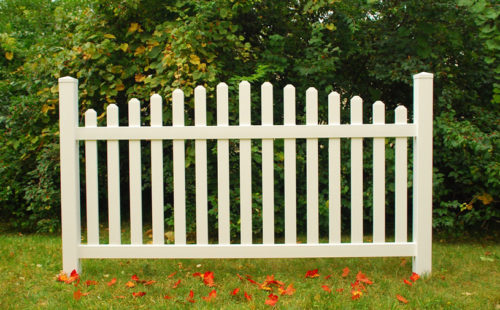
- Plastic. A stakenik made on the basis of this material appeared relatively recently. Thanks to the use of special additives in the production, the fence does not fade and does not spoil a very long time. He will fit perfectly as for the fence of flower beds and for the whole house. Plastic stakenik is often produced in the form of sectional parts that are mounted by the designer. The main drawback is the high cost of fence. But it is compensated by excellent performance, as well as the long service life of the plastic.


The selection of the stakeholder for the bar is entirely depends on your preferences and fantasies. Also note that the wooden fence will be the cheapest option that you can easily collect yourself. In addition, why spend a lot of stakeholder, which will only fen your plants. To improve the territory around the house, you can choose a more reliable and expensive option - plastic or metal.
Advantages of a paneltnik for a parisade
If you ever seen a wooden fence or a fence, made using carved elements, then, most likely, it was manually executed. In very old buildings, the stakenik was preserved pretty good, because before the dense tree breeds were more accessible. Although the stakenik and serves as a fence from domestic animals, still its main task is zoning. Thus, you can separate any plot near the house without worrying that someone accidentally crosses your plants.

The main advantages of the stakeholders for the palication include:
- a wide variety of materials, of which the stakenik is made, allows you to choose an individual version for yourself, which will like even the most demanding owner;
- you can modify any store option yourself, it is enough to have a little imagination;
- stakenik can be replicated several times in any color you like. Thus, your fence will always look fresh and in a new way;
- excellent combination with the surrounding design;
- reliability of the design (with proper installation and care, the fence will serve for a long time);
- easy to install the fence from the stakenik allows you to spend all work yourself.
To choose for yourself a stake, decide on the tasks that it will perform. If you want a reliable and durable version that will not require too frequent care, we advise you to take plastic stakenik. No worse than the quality will also be metallic, however it will require additional processing. The characteristic of the tree of wood will allow it for the most part for fencing and zoning.
How to build a fence from a wooden stake in your own hands. Stages of the construction of a wooden stakeholder fence
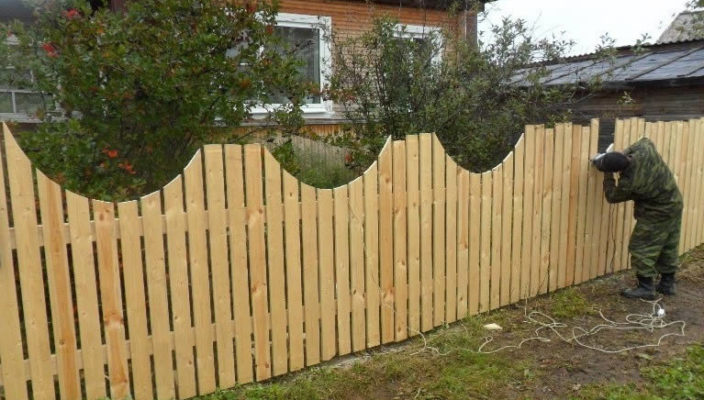
If you want to protect the dresser or a small flower on your own, while spending the minimum of money, it is better to make a fence from a wooden stakenik. This option of fence will last long enough, the main thing is to care for it. Further in the article we will analyze all the main stages of the installation and assembly of the fence from the wooden stakenik.
Wooden Stakenice Mounting Materials and Tools
Starting installation work, it is better to immediately arma everything necessary so that in the future it does not waste the time in search of the missing tool or material. We also advise all the calculations in advance, and take everything with a reserve.

For high-quality installation of the fence, we will need the next set:
- perforator, screwdriver, electrolybiz, mixer, welding machine, Bulgarian;
- vest, shovels, hammer, screwdriver, nail, pliers, scrap;
- roulette, level, caprochy thread, plumb;
- metal primer, paint, metal brush, roller, brush, bath, bath;
- self-tapping screws, nails, bolts, nuts, screws;
- impregnation for wood (fire-bioprotection, antiseptic);
- reference pillars (made of metal pipe or thick timber);
- transverse strips;
- sand, cement, crushed stone, plasticizer;
- rubber boots, special equipment, safety glasses, gloves.
With the help of such a simple dial you can spend high-quality installation of a wooden fence. As you will work with cutting material, we advise you to immediately purchase protective clothing.
Installation of support pillars of fence
We want to immediately warn that before starting the installation of the fence, it is necessary to process all the wood with a special impregnation. To protect the metal, use primer or rust protection.

Works at this stage suggest the following actions:
- Follow the future fence. To mark the location of the corner pillars, take the wedges, then pull the capron thread between them.
- The thread will set the plane necessary to install the remaining support pillars. The locations of their location are also noted by spicy, or marked on Earth.
- As a support, you can use both a wooden bar 100x100 mm and a metallic professional 50x50 mm. Selection of supports are made on the basis of the alleged load. For fences, more than 1.5 m height we advise you to choose a metal support, for the other cases it will be suitable for the wooden version.
- We proceed to the ruin of the pits under the support. Armed with scrap or perforator with a special nozzle, deepen into the soil by 0.8 m.
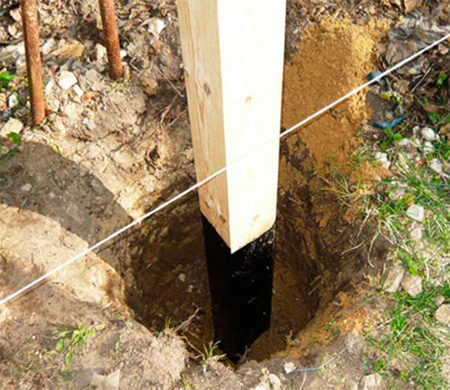
- To install the support vertically, use a plumb and level. So that the pillar does not fall during the fill with the solution, lock it from several sides by the backups.
- At the bottom, we put the pillow from the crushed stone, and we are tightly tamped. The thickness of the layer of 10-15 cm will be enough.
- We mix the solution from sand, cement and rubble. With each knee, add plasticizer to solution. It will give a mixture with great elasticity, while protecting the concrete from cracks.
- While the solution did not cover, make sure that the supports are exhibited correctly. If necessary, correct them. They must be located along the thread so that the angle of one face of the support corresponded to the rest.

There are several options for mounting support pillars for fencing. You can set the support in the usual pillow, from rubble and sand, after which the tamper is. There is also an installation option for special metal anchors. The easiest and reliable will be the solution of the solution. It is very important that all pillars are exhibited by level, then the fence will serve longer, and will not fall.
Montage run
End (or stated) must be installed in order to subsequently mounted stakes. They are conventional wooden planks with a thickness of at least 30 mm and a width of at least 70 mm. Although for small designs that will not carry heavy loads, you can choose a smaller option.

To install correctly live, use the following recommendations:
- it is best to mount out so that the bottom plank was parallel to the top;
- to dock stabbing, holes are cut in the same altitude. After that, the hole is inserted into the hole on half the thickness of the support;
- they are fixed to the supporting racks on brass self-tapping screws or nails;
- the ends of all wooden elements (stakenice, supports, running) is better to rinse. Thus, the moisture will not be held for a long time on a wooden surface, and will prolong the service life of the fence.
At this stage, it is important to correctly set down to keep tracks to securely fix the support poles with each other. Always use the bubble level to observe the plane and parallelism of the planks.
Fixation Staketin
Staketins are the same wooden boards. Most often, the width of Staketina is equal to the width of stations to which it will be attached. Of course, there are other options in which all stakes have different lengths and sizes. But it is more like design solutions or improvisation.

To correctly consolidate Staketins to End, use the following tips:
- make a blank in advance on which staketins will be cut off. For example, for placing stakes with a width of 100 mm, make a 50 mm wide template. Thus, applying a template, you will not have to constantly measure the distance to the next Staketina. It is enough to correct the first staketin correctly, then the rest of the process will pass quickly and easily;
- each staketin needs to be recorded to the stray of the screw (2 per hour);
- the length of the nail to connect the wooden elements should be less than 5 mm. The nail should not go from the back side of the board. If a piece of metal will look out, then with time the rust will appear in this place, and wood will begin to deteriorate;
- when working with self-drawers, first drill holes in the wood, and then sprinkle the holes under the head. Thus, when screwing off a self-pressing board does not burst;
- if the nail still peeps out of the board, it is better to cut it with a grinder, then handle paint.

If you want a fence for your fabric to look original, then use the stakenik of different lengths, for example, from smaller to more. So you have a wave effect.
Installation of gate
This element of the fence is installed at will. If the fence is a small height, then it can be done solid. The main thing is that the gate is at least 100 mm from the surface of the Earth. To enter the average person, it is enough to assemble a width of 0.7-1 m wide and a height of at least 1 m. First create a frame of wickets of two transverse slats and two stakes. Then the diagonal is fixed, thereby reliably fixing the framework. Next, the missing odds are mounted, after which the gate is placed on the support pillar.

As you can see, collect and install a fence from a wooden stakenant simple enough, it is only important to observe several rules, then the result will not make you wait. Separate attention to the processing of wood, and do not forget to periodically update the paint. We hope our advice helped you deal with the recruitment of the paralisian with a fence from the stakenik.


