The gate is called single doors in the fence, which protects the territory of the site. It can be located in the gate. Today, the wickets are fulfilled by not only fences, but also are a decorative element adorning the site. They are made of forging, professional flooring, metal parts and wood. In most cases, the doors are made from the material as the fence. And the size and shape of structures can be the most diverse and depend on the preferences of the owner. Consider the order of structures and installation of wickets from the tree in more detail.
Content
Types of materials
For the manufacture of wickets, lumber are used made of coniferous and hardwood. The most common types of wood belonging to the first category are spruce and pine. They acquired their popularity due to the affordable cost and ease of processing.
The cedar wood has good performance, but it is quite expensive material, therefore it is used infrequently. The coniferous rocks include larch, which is also high-quality raw materials.
The most suitable option among hardwood can be called oak. Thanks to solid wood, it is capable of listening throughout enough long time. In addition, the material is well prepared. You can also use a yavor, ash, chestnut or alder. These types of wood have not been widespread, but are quite suitable wicket material.
Glued bar is suitable for the construction of such a design. But the beech should not be applied, as it is subject to crack formation and will not last long. Lumber can be purchased at a finished form or make themselves with the help of hacksaws and an electric bissing.

Wood wicket options
There are several varieties of wicket designs. They are divided into:
- wood-metal;
- wickets that do not have a row;
- constructions with a troop;
- deaf;
- grid.
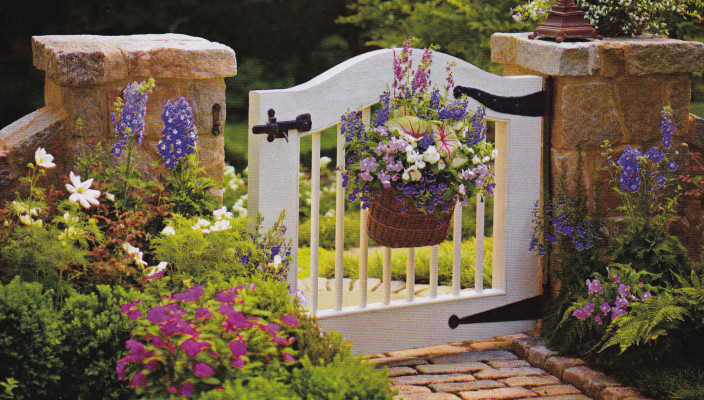
Watch from wood. Photo:


Varieties of column
Pillars are divided into species depending on the material based on which they are made. Distinguish such types of structures:
- Brick supports should be installed on a sufficient depth of at least 50 cm. Their size is 35x35 cm.
- Pillars made of concrete are made with reinforcement and without it. They can attach wooden bars with leaks and loops.
- Wooden supports are performed from solid wood - larch, chestnut or oak.
- For the production of metal columns, pipes with a cross section of 10x10 cm in the form of a rectangle, a circle or square are used in the form of a rectangle. They are covered with plastic or processed by bitumen.

Rama connection methods
The connection is carried out by two methods:
- using metal toothed plates;
- docking in spike.
The last option is used more often. To implement this method, glue uses, thanks to which the fastener is solid. The size of the groove and spike should be calculated in such a way that the spikes be placed in the cavity of the groove with difficulty. PVA can be used as an adhesive composition.
Screws are used for fixation. The corners of the wiring frame must be 90 °. To make sure this needs to be measured by diagonals. If they are identical to each other, it means that the angles correspond to the necessary requirement.
Before making a waters of wood, you need to decide on the design parameters. The maximum width can be 80-120 cm, height - 2 m. Do not go beyond these norms. In the reverse case, the door will be too cumbersome, which will cause difficulties when opening it. And the loops as a result of the exposure of greater weight will be regularly session.

How to make a watery of wood with your own hands
First you need to choose the drawing of the desired design, which will approach the general facade of the building and the fence. It can be found in Internet resources.
Materials and tools required for the manufacture of water wickets:
- 2 pine boards cross section 50x150 and 2 m long;
- 10 larch boards with a cross section 20x140, 2 m long;
- fittings - latch, wooden handle, metal plates in the amount of 6 pieces, loops, 4 brass plates, corner;
- manual or electric drill;
- chisel;
- hammer;
- electrolzik (it can be replaced with hacksaw);
- plane;
- screwdriver or screwdriver;
- buckets, shovel;
- scrap;
- brush;
- rope;
- level;
- self-tapping screw;
- milling machine.
Further actions are made in this order:
- Supports are installed. To do this, it is necessary to prepare a pits, the depth of which depends on the level of primerization of the soil in the winter period. This information can be obtained in the Architectural Design Bureau.
- The depth of the pit must be at least 0.5 m. And it is better that it reaches 70 cm. For convenience, the pit should dig a square form 50x50 cm. Then it is recommended to deepen with a bera.
- Pillars in the base area are treated with bitumen mastic. Then put them in the prepared pits and poured with cement-sand or concrete composition. It should be remembered that supports that were not installed on the necessary depth, after one year will begin to stagger.
- Then the sidewalls are made of pine boards on which the design will be attached.
- Initially, with the help of the level, their vertical is checked.
- Next, they are fixed on the supports by means of screws.
- At the next stage, frame is made. The larch boards are pre-coated with coloring composition. After that, the frame is recruited. It is fixed in the area of \u200b\u200bthe corners with the help of brass planks that are attached to the self-tapping screw.
- To give the design the necessary rigidity to it, gear metal plates are installed. These items need to drown a little in the wood.
- Then the burst loops are installed on the support frame. If the design is placed in the opening, you can proceed to the manufacture of a pier, which is fixed on the base.
- The finished frame is mounted on the loop, after which the shearing boards are installed on it. For fixing each of them, 2 self-pressing are used. At the corners of the board are sealed using 3 fasteners.
- Now you can install a handle and a valve. On this gate from the tree with their own hands is ready.

Final processing
In order to extend the period of operation of the manufactured design, it must be coated with an antiseptic, soil composition, as well as paint or varnish. The choice of data from today is quite extensive. Forms are suitable for priming, which are designed to process wooden and metal parts. It is divided into several types. There are pentafthal, glyphthale primer and a mixture for working with opaque coatings.
The next step after processing the primer is painting:
- 2-3 layers of painting composition are applied to the gate.
- Then grinding.
- The processing of the lacquer design is made in another sequence. The surface of the wicket is first grinding, then moisturized with a small amount of water to rose a pile and dried.
- Next re-grinding. After this procedure, the design is covered with a special composition, filling pores.
- Then the surface is thinned for the third time, eliminating all defects thus, which allows you to get beautiful wickets of wood.
Experts recommend using for processing yacht varnish. Its cost cannot be called low, but this composition meets all quality requirements. A table of compatibility table of paints and varnishes will help freely navigate in primers, paints, varnishes and solvents.

Wicket under old tree
Lovers of the direction "Retro" can stylize the door under the old days. It is manufactured by the same principle as the usual design, however, has some features:
- For operation, curly boards are used. 15 cm wide. They are nailed first, then conventional edged parts are used, which should evenly overlap on the elements below.
- On the outer surface of the usual and curly boards in the longitudinal direction, the grooves are performed with a depth of 5 mm. The presence of the presence of atmospheric moisture from the roofs.
- Such grooves can be made using circular saws.
- On curly detail running one groove, and the usual - two.
- To emphasize the vintage style you can pick up a big castle. The carved wicket from the tree in modern times looks quite original.
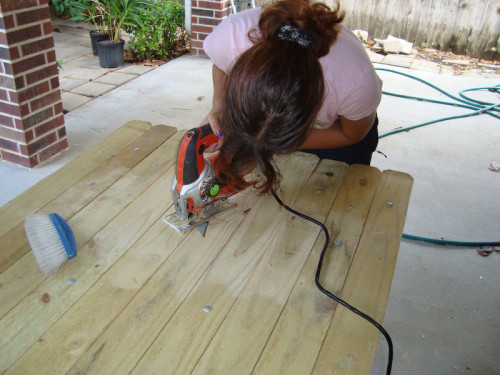
Retro effect will help the surface treatment of the wicket surface by the film by the film. But this procedure is suitable only for certain tree breeds. This method can be used if the design is made of larch, oak, ash or pine. The essence of the brush is to process a wooden surface with a rigid metal brush. As a result of these manipulations, the soft layer of wood is removed, only a solid part remains. After processing the brush, the surface becomes embossed. Similar changes with wood occur in the process of natural aging.
Next, the base is covered with varnish. At this stage you can stay. But there is another procedure that makes the effect more pronounced. To do this, the design is applied a storm or paint it into various shades. Pores are treated with a darker than the bulk of wood. To simplify the task, you can paint the design into a dark color and immediately after that remove the upper layer of the coloring composition with the help of a vet. From above, such wood is covered with varnish.

Conclusion
Many owners of private sites are interested in how to make a wicket in a fence from a tree. From the above information, it can be understood that this work is scheduled for everyone. To get a qualitative result, you need to adhere to the sequence of work and do not forget about the completion processing of the finished design. The wicket made in accordance with all the requirements will last for several decades.
Ideas for performing wickets from wood:


