Many materials exceeding its aesthetic qualities, and modern technologies allow you to significantly increase its service life. That is why designers attract the features of the fence under the tree. From the professional flooring with their own hands the fence is easier to build, but his attractiveness leaves much to be desired. The one who attracts the idea to establish an original fence near the country house will be useful to familiarize themselves with the information set out in the article.
Content
What good is a wooden fence
Advantages and features of a wooden fence:
- The cost of materials necessary for the construction of a wooden fence is several times less than you have to spend on a fencing of stone or brick.
- Speed \u200b\u200band simplicity of installation: For the fence from wood, there is no need for the fill of the foundation, which significantly reduces the construction time. Wooden fence from different trees breeds can be built using simple tools without special training.
- Aesthetic attractiveness: Wood perfectly combines with any materials, fits into the landscape around a country cottage.
- Environmental safety: does not generate harmful substances, does not cause allergic reactions.
- Wide design potential: the properties of wood allow you to implement original design ideas.
The disadvantage of wooden fences is their relatively short service life, but if the technology of material processing and construction is observed, such a fence will last long years.
Wood fence options
For the device of wooden fences, boards (edged and non-edging) can be used, bars of various sections, rods and branches, as well as logs, rails and more. Such a variety of material allows you to create fences of various designs.
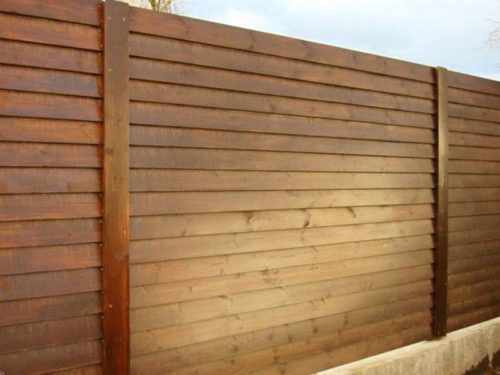
- "Lestenka": such a fence implies the horizontal location of the boards in sections. They can be fastened. As a result, the boards are attached at an angle, due to which the original fence is created, and the rain water flows, without lingering.
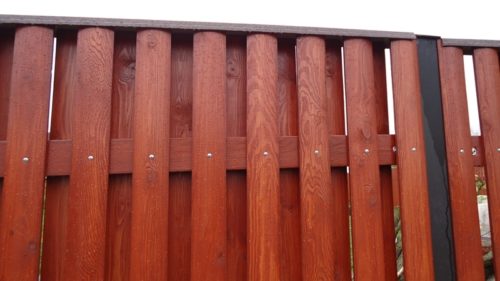
- Chess: Fencing Boards are located vertically in two rows, alternating in a checker order. It is characterized by the presence of lumen, but at the same time the fence is visually visible. Light passes through the slots only under an acute angle.
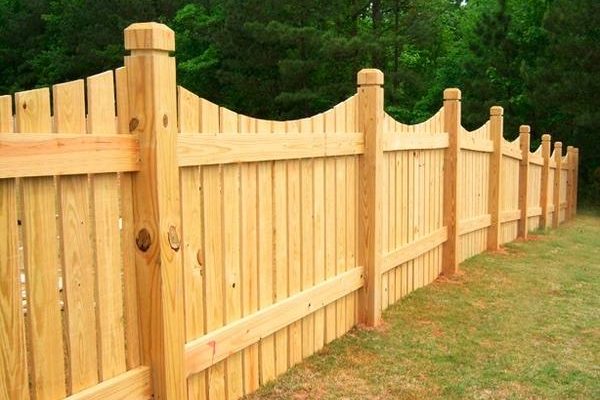
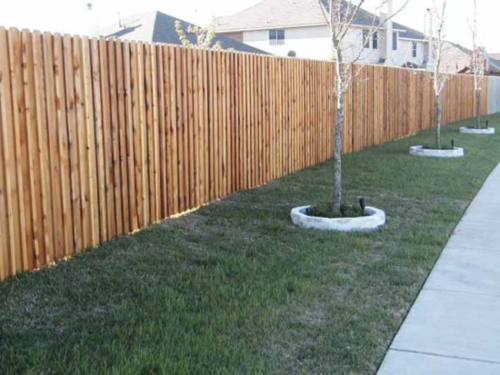
- "Stakenat": the most common and simple type of fence, built of two horizontal guides and vertical boards. The fence of the stake with your own hands can be made original, issuing the top of the boards in the form of a complex figure.
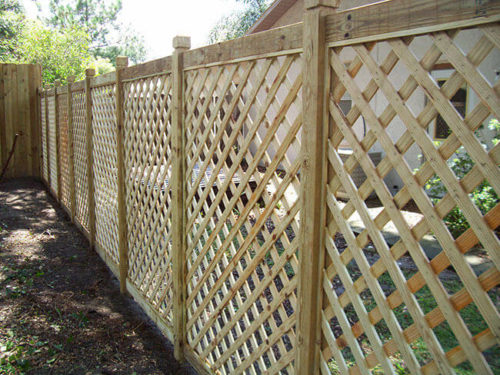
- "Lattice": a fence in the form of frames, in which the intersecting strips are concluded, located at an angle relative to the horizontal. Can be used for decorating.
- "Braided": vertical boards intertwined with horizontal or arranged at an angle. A special case is a weave of branches. The hedge usually serves for decorative design of the boundaries of the site.
Tip: Wooden fence elements can be combined with natural stone, brick and metal. The listed materials are used to build the base and partitions. Only sections are mounted from wood.
Installation of a wooden fence: basic rules
The technology of installing a wooden fence with their own hands implies the following events at the preparatory stage.
- Manufacturing and processing of columns by an antiseptic agent. The underground part of the columns is burned to the state of charred or impregnate the heated bitumen mass.
- At the boards used for the construction of the stakenice, laying up the vertices of the pre-harvested pattern.
- Plane guides (stated).
All details of the fence must be sharp. This facilitates the color of the color, makes it more efficient and reduces paint consumption and antiseptic agents.
You must have at your disposal tools and equipment for installing a wooden fence with your own hands:
- earth diameter of 250-300 mm - with its help drill holes for pillars;
- hammer;
- electrolake;
- painting brush;
- screwdriver;
- electrolovik;
- tamble.
The sequence of work and recommendations for installing a fence from the tree are reduced to the following. Consider the installation of the stakeholder.
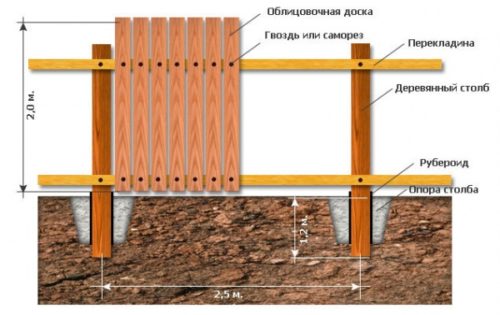
- Manufacture and antiseptic column processing. To do this, use bars with a cross section of 100 × 100 mm and more or logs with a similar cross section area.
- After charging, the underground parts of the poles are treated with a hot water and wrapped with several layers of a bituminous runner.
- After removing the turf, the earth drill drill the holes at the corners on the border of the site. With the help of a cord stretched between them, the line is planned, along which on equal distances from each other (maximum 3 m) drill the remaining wells. The depth of the wells should be at least 1 m.
- At the bottom of the wells, a sandy befelling with a thickness of about 10 cm is arranged. 2-3 layers of rubberoid are stacked over the sand.
- In the wells insert the prepared posts and fix them with the help of reverse swelling: sand or soil in small portions fall asleep in the wells around the pillar and trambet. In this case, using a level or plumb to control its vertical position.
- Using to control the level, mount horizontal blind (bearing bars). To do this, use the bars with a cross section of 50 × 80 mm or round rings. In the event that the length of the bars exceeds the distance between the columns, the splicing of the carrier elements is allowed. At the same time, it is impossible to merge the upper and lower run in one span. It is important to sharpen the upper part of the run well: it will contribute to the better gathering of water and snow from their surface. The splicing is carried out in dragged or by the "swallow tail". Fasten to leaving with wooden wedges, nails or self-pressing, pre-tripled holes for them. At the point of attachment to the post they make a shallow dress - about 1.5 cm.
- Pubinate the crate for which the 1.1-1.9 m long boards are used. They must be sputted on both sides. Initially, two planks are stuck on one side of the perimeter (at the corners), drive cloves in their vertices and stretch the cord. On the cord exhibit the rest of the shells of the crate. The distances between adjacent boards are kept by a pattern of a certain width. A solid wooden fence with your own hands is mounted without a template: the boards are embarked in the jack. Between the land and the lower edge of the boards, it is necessary to leave a gap - at least 10 cm.
Tip: In order for the boards to hold better on the outdoors, not completely robbed nails should be bent, after which they drive them into the wood, beating along the fibers.
Not yet fixed boards, blind and pillars need to be treated with an antiseptic, since after installation some areas will be hidden.
After the installation is completed, the fence must be covered with the wood with the wood and paint for outdoor work. The number of layers of paint is at least two. You can use paint of different colors: this method of decorating will make a variety in the countryside landscape. You can cover the paint only dry wood.
Wood pillars can be replaced by steel pipes that need to be treated with anti-corrosion means, and the lower (underground) part is covered with bitumen mastic.
About how the wooden tree fence is mounted with their own hands: video, visually demonstrating the work of the specialist.
How to build a braided wooden fence
For decorative design of a section of a country house or cottage successfully use wicker fences. Such fences support the folk style of the landscape and the main structure.
The following types of braided fences are distinguished:
- Up to 1 m high with horizontally spaced rods. Such fences are installed along the perimeter of the flower, along the gardens paths.
- Up to 1.5 m high: Used to zoning the territory, for example, to separate the garden from the decorative lawn in the recreation area.
- Up to 2 m high: can be used for the device of protective fence of the entire territory. Bars can be located and vertically, and horizontally.
For weaving, the hedge uses the rods of the Yves vine or hazel. The material is impregnated with an antiseptic immersion method into a solution or spraying.
For installation, you will need the following:
- wooden stakes in length in excess of 1 m height of future fence;
- vine branches;
- heavy hammer;
- garden knife;
- wire.
When the branches are harvested, preference is preferred. They should be dried after autumn collection and tied with beams. Before starting weaving, the rods are immersed in hot water.
After the preparatory stage, the following is performed:
- On the perimeter, the fencing is riveted with a trench and fall asleep by the bottom of the sand layer. It will contribute to the removal of rainwater.
- Thick vertical stakes are driven into the ground to a depth of at least halfter, the trench falls asleep. The distance between adjacent stakes is about 0.5 m.
- Weaving from the vine are made from below, rich stakes. The vertices of the fence temporarily fasten the rail, which is dismantled after the end of the installation. The ends of the branches must remain with the fence that is not viewed. The joints are distributed evenly along the entire length of the fence.
- For the strength, the ends of the branches are wired.
Using the recommendations set forth in the article, you can independently install a wooden fence on the country site.



The tree is of course an eco-friendly material, but modern and much looks in my opinion a fence from a professional flooring with pillars, lined with brick from the company Country buzz http: //xn--80ahqp0afz7a3a.xn--p1ai/inzhenernye-sistemy-ograzhdeniya/ustanovka-zaborov/ They ourselves ordered them and satisfied, how we all quickly and on time did.