Creating a multi-level ceiling is a stylish way of finishing the surface. Thanks to this technology, a visual increase in the ceiling and dividing space on the zone will occur. On how to make a multi-level ceiling, and it will be discussed in our article.
Content
Varieties of designs
In addition to modifying room space, a multi-level ceiling is designed for:
- hide the irregularities and other surface defects;
- internal styling of engineering communications (pipes, electrical wiring, elements of the ventilation system);
- improve lighting by mounting lamps in different planes.
There are such main types of multi-level ceilings:
- simple;
- sophisticated.
Simple designs may include both one and several levels. Create a single-level plasterboard ceiling is the least complex technology:
- a frame of galvanized profiles is made;
- the frame is trimmed with plasterboard with simultaneous fastening of lighting devices;
- the finish finish of the surface is carried out.

Through the creation of one level, the surface is aligned. This will serve as a magnificent basis for creating the following levels. The second and third levels are created similarly to the frame structure.
Simple multi-level plasterboard ceilings are:
- Framework. On the perimeter of the ceiling, a box is constructed, which has an irregular shape and 1-2 steps. Its thickness does not exceed 0.5 m. Inside the box, fastening of embedded luminaires occurs.
- Diagonal. The conditional division of the second and third levels (from opposite angles), each of which is characterized by a wavy or curly configuration. Level area may vary.
- Zonal. When the device of the second and third level, a specific room zone is selected. Moreover, one of the levels takes the maximum area.
The design of multi-level ceilings of a complex shape involves the presence of drawings, patterns and other solutions. Common structures include:
- curly ceilings;
- "Steaming" designs;
- patterned ceilings;
- ceiling abstractions.

Curly ceilings involve a specific figure (circle, square, flower, stars), which is usually located in the central part. To create a figure applies the second and third level (or one of them).
The visual effect of the savings creates ceilings that have a specific system for fastening drywall to the concrete surface.
The patterned ceiling is a design consisting of an identical fine pattern. And such a drawing is done over the entire surface.
Ceiling abstractions can acquire any forms. In most cases, this type of complex multi-level ceiling is an irregular spiral that is additionally highlighted. In various parts of the ceiling, various figures can be created.
Preparatory stage
For high-quality work, it is necessary to preliminarily draw up a detailed scheme of the construction of a multi-level ceiling. This can be done both on paper and using a special computer program.
The scheme indicates:
- form and ceiling area (in full size);
- the location of profiles and suspensions;
- place of laying of communication elements (electrical wiring, lighting, ventilation, pipes).
The scheme is transferred to the surface. For this, you can use the floor, since it and the ceiling have similar dimensions. This method will help to avoid errors when creating a ceiling structure. A laser level is used to carry out the marking work (with lines markup) and the folding cord (for applying lines curves).

When the surface markup should take into account that:
- the guide profiles are located at 10-15 cm from the lower point (if communication is paved, then this distance increases on their dimensions);
- bearing profiles are located at a distance of 35-40 cm from each other;
- the suspensions are attached with increments of 55-60 cm.
Creating a multi-level ceiling of plasterboard
Installation of a multi-level ceiling suggests:
- the first-level framework device;
- fastening of plasterboard sheets;
- creating a frame of the following levels;
- the cover of its plasterboard;
- sleeping surface.
Carcass device
This process provides for the implementation of the following actions:
- fastening the guide profiles to the base of plastic dowels;
- installation of suspensions;
- inserting supporting profiles in the guide structures;
- screwing by self-reserving profiles for suspensions;
- installation of profile jumpers;
- fastening "crabs" in the field of crossing profiles.
The manufacture of the second-level framework is performed almost similar:
- markers are made on the walls;
- guide and carrier profiles are attached;
- mounted suspensions and "crabs".
Among the nuances of the work should be noted the following:
- the screw in the second row of the guide profiles to the carrier along the walls is made through drywall;
- when creating curves, profiles are cut and bended (and first the carrier profile is inserted into the suspension, and then in the guide profile);
- to lay wiring to highlight the second level, the corrugated pipe is pulled.

Installation of plasterboard
The casing of a multi-level frame is made so that no coincidence of the seams of adjacent levels of gypsum can occur. The extreme part of the sheets must go to the profiles. To fix the sheets to the frame structure, screws are applied.
When working with finishing materials, the following should be provided:
- it is necessary to carry out entire sheets in the maximum;
- immediately make holes for lamps and chandeliers;
- to facilitate the subsequent process of shtlocking joints from the extreme part of the drywall, a chamfer is removed (40-45º).
Cutting the finishing material on the workpiece or drilling in it holes is carried out using a knife:
- the tool marks the place of the cut;
- a knife is carried out an incision along the entire length of the sheet;
- on one side of the plasterboard, a light and sharp movement of hand is done;
- the sheet must burst through the cut line;
- to complete the procedure, you must once again spend the knife along the section line.
After reliable fixation of plasterboard sheets, joints are closed:
- the reinforcing Sherryanka grid is stacked;
- spacure is applied on top of it;
- finish putty covers the entire ceiling;
- after drying, the putty surface is grained by the abrasive grid;
- decorative coating occurs.
Features of the installation of the stretch ceiling
Multi-level stretch ceilings are characterized by greater attractiveness. Such structures may acquire a variety of shades and texture (matte or glossy).

Before carrying out installation work:
- spend all communication lines;
- remove all furniture from the room;
- to take care that there are no drafts in the room.
To attach a multi-level stretch ceiling, it is better to use profiles made of plastic. This material better takes the necessary form when creating smooth and wave bends.
It is the correct installation of plastic profiles that is the most complex process when the tension ceiling device, which should most closely fit to the surface. This depends on the operational period and the aesthetic properties of the structure.
After the framework of the frame:
- unpackled stretch ceiling;
- with the help of clips, which are located in the corners, is attached to the surface;
- the stretch ceiling is heated by a gas gun, resulting in tensioning and final fixation on the baguette;
- installation of the edge ribbon.
Quite often, when creating a multi-level stretch ceiling, plasterboard is used. Such a combination involves a second-level device from plasterboard. After that, the surface is subjected to shtlock, priming and painting. Only upon completion of all these actions, the tension ceiling is installed.
Lighting nuances
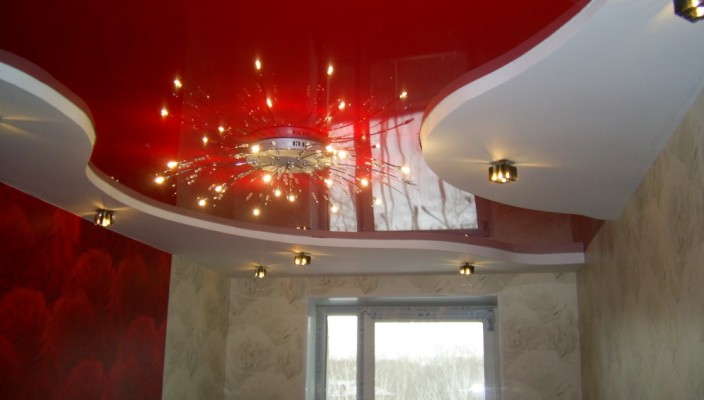
An important role in creating a cozy atmosphere in the room plays high-quality lighting of a multi-level ceiling. Installation of lamps is carried out at various levels and in niches. Lighting elements can be both point and in the form of chandeliers and ceiling.

As a result of the original dispersion, crossing and reflection of light, the ceiling becomes alive. The design design of the room is achieved by switching the lamps.
Nowadays, there are many lamps for a multi-level ceiling device with illumination:
- Neon. Different with different colors. Luminaires are located both in the ceiling and in the niches of the wall.
- LED. Characterized by a magnificent decorative effect, low energy consumption and lack of heating elements. A multi-colored LED tape is particularly popular, which is ideal for a multi-level plasterboard ceiling.
- Fiber optic. Used in the device landscape from stars and other stylish compositions. But they are not suitable for the arrangement of rooms that have a small height. Yes, and the cost of such lighting devices is quite high.
- Halogen. The best solution for the stretch ceiling. Create an original visual effect.
As for the number of lighting elements, in which case the size of the room should be processed. You can use a chandelier with several bright lamps. It will save from laying new wiring. But in a small room, the chandelier will make it even smaller.
Dot lamps include more versatile and practical products. With their help, the rays of light create uniform and full-fledged lighting in rooms with any ceilings, highlighting specific items in the interior.
The technology of creating modern illumination in a multi-level ceiling provides:
- stroke of the walls;
- laying a new electrical cable;
- shtlogani
- replacement switches;
- fastening the controller and power supply for lamps.
When installing the ceiling chandelier additionally creates a mortgage design, which consists of metal profiles.
Video about creating multi-level ceilings:


