The modern world of building materials allows us to do not just change the color of the ceiling in the process of repair, but also to radically transform its design, design. In addition, such decisions bring a lot of advantages, not to mention a unique interior that will benefit from your housing from hundreds of typical projects. At the same time, if you are a creative person, then fantasy will not limit you with standard dogmas, but on the contrary, it will allow creating a variety of ceiling sizes and multi-level configurations.
Content
Types and design of hinged ceilings
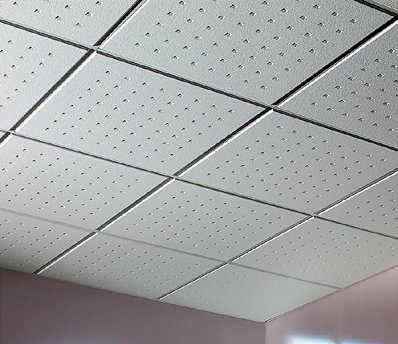
The ceilings are mounted in the room - efficient and the most rapid solution to the problems of various irregularities, as well as the functionality and attractive view of the room. Thanks to unsurpassed characteristics, they are able to close electrical wiring, air conditioning system, ventilation box and a variety of engineering communications.
Advantages:
- practicality;
- reliability;
- suitable for any type of room;
- attractive appearance, a wide range of colors;
- creating a unique style;
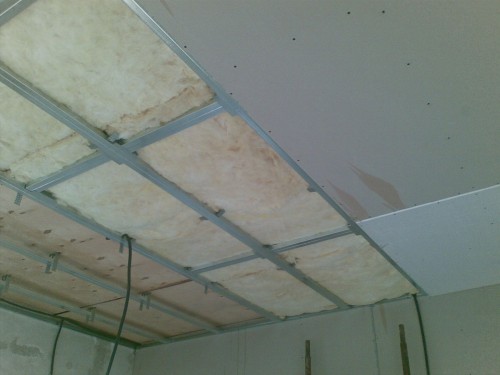
- if desired, the sound insulation material can be paved;
- easy to install;
- they are easy to care for them.
Today there are 2 types of mounted ceilings:
1. Suspended.
Installation of such ceilings takes quite a bit of time. At the same time, stretch are manufactured individually under the order and are established by specialists. The initial building material for them is the PVC film, tensioning on the frame, which is fixed on the ceiling and walls.
Another type of stretch ceilings is a fabric seamless ceiling. It can be purchased in a roll, it does not require preheating in contrast to the previous one.
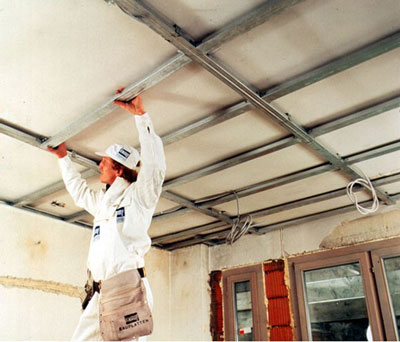
The main element of the suspended ceilings are plasterboard sheets that are attached to the frame consisting of longitudinal and transverse profiles.
More detailed classification divides mounted ceilings depending on:
1. From the design:
- modular (mounted ceiling of plastic panels, rush ceilings, etc.);
- solid (drywall ceilings).
2. A type of building materials used for modules:
- reinforced gypsum fiber;
- mineral fiber;
- plastic;
- plasterboard;
- mirror, glass;
- veneered panels;
- metal, etc.
3. Depending on the functional load:
- acoustic;
- impact-resistant;
- fireproof;
- moisture resistant.
Thus, installing the hinged ceiling follows, focusing on its purpose, type and material. For example, the cam ceiling is mounted on the suspension, followed by fixing to the carrier tires, and the drywall - on a pre-prepared frame.
As for suspended ceilings created from plastic panels, they have excellent soundproofing, moisture-resistant and strong enough, while they can be installed on previously untreated surfaces. Such a ceiling does not require special care, it is easy to launder with water or any detergent. The panels are securely connected with each other thanks to the presence of grooves. In the process of work, the first panel is attached to a border groove, which is pre-fixed to the ceiling and wall. All subsequent elements are inserted into the grooves of the previous one.
Features of using mounted ceilings
Ceiling mounted can be used in the room, the kitchen and other rooms, but the installation of such products in the bathroom requires compliance with certain rules, because its surface is in contact with moist air and water.
Before you begin installing the false ceiling in the bathroom, you need to make sure of its moisture resistance, and all other characteristics - sound, light reflection, fire resistance and environmental friendliness - are common.
The bathroom is perfectly suitable for the tile, iron and duralanes, as well as those manufactured from hydrostroy drywall. It is recommended to give preference to perforated type so that it is not so noisy and stuffy.
How to make a mounted ceiling
Recommendations:
- it is impractical to establish this type of ceilings in the rooms, the height of which is less than 2.5 m;
- installation should be started after the completion of all finishing works;
- the horizontal frame of the frame is determined by the level and adjusts the suspension length;
- bring out the laying of sound and thermal insulation materials only after 2-3 days and exclusively after the control check of the ceiling horizontal;
- the panel of the suspended ceiling must be mounted from the center of the room;
- between the ceiling and walls it is recommended to leave small gaps.
Installation of mounted ceilings from plasterboard
Progress:
- We plan the initial profile fixation line using a level. At the same time, it should be 10-20 cm below the main ceiling, because subsequently there will be communications and sound insulation.
- Then, on the perimeter of the room we produce fastening of guides, focusing on the markup. To do this, we use a dowel-nail, which are located 40-60 cm from each other.
- We make marking under the main carriers guides by conducting parallel lines every 1.25-1.27 m.
- Next, set the suspensions on the lines with a 40 cm gap.
- Make fixation of guide profiles with self-draws in the starting frame and suspension.
- Now prepare the longitudinal profiles by cutting them from the guides, on the segments of the desired length.
- Insert the longitudinal profile between the guides with a gap of 50 cm and secure them with crabs. To strengthen the design, it is recommended to fix with a suspension of the middle of each longitudinal profile.
- Now you can start mounting drywall. Place sheets are needed in a checker manner across longitudinal and along carrier profiles.
- The first sheet is installed in the wall using self-samples, which are screwed in every 20 cm.
- The next sheet must be placed on the first longitudinal profile. The gap between sheets should be 1-2 cm.
- The distance between the wall and the first longitudinal profile is closed with a half sheet of plasterboard.
- All subsequent sheets are mounted by analogy.
- Upon completion of work, the joints are close to a special composition, which is superimposed by the reinforcing grid.
- After the mixture is dry, process the seams in shallow sandpaper and suck the ceiling.
- Implement finish.
Hinged ceilings do it yourself video:


