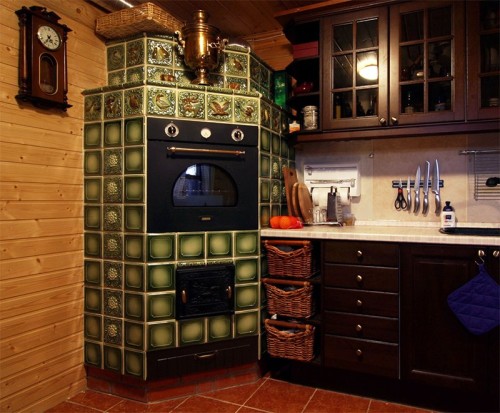
In a private house, the oven or fireplace most often served as the central part of the interior, because they not only warm the owners in the cold winter days, but also attract attention. In this article we will talk about the materials and methods of facing the furnace with their own hands.
Content
Simple types of furnace finish
Pokes and painting
Simple, fast and cheap furnace furniture, the furnace is its painting or whitewash. Before branched the oven, it is necessary to abandon the coarse sandpaper or a piece of brick. Then the plastered surface should be mixed, but it is best to cover the furnace with a primer. For the blinks of the furnace, a hawed lime is used, which add a little blue. Sometimes for the same purpose there is a lime milk mixed with a cook salt.
For dyeing the furnace, the paint on the adhesive basis is suitable, and metal elements, for example, cast iron doors, can be opened with silicone paint, which has an increased heat resistance.
These methods are suitable for oven finishing somewhere in the country, as a result of construction work done is not very decorative.
stove plastering
Simple way to finish the furnace is considered to be plastered. The composition for such a cladding can be made with your own hands, and you can buy ready. For those who want to save, we offer some simple recipes for the preparation of a plaster mix:
- Mix 2 parts of river sand, 1 part of clay and 1/10 part of asbestos.
- Connect sand, clay and lime in proportions 2: 1: 1, add 1/10 of the asbestos.
- Prepare a plaster solution of 1 piece of clay, 2 parts of river sand, 1/10 of the asbestos and 1 part of the cement.
- Make plaster on a plaster basis, mixing sand, clay, gypsum and lime in proportions 1: 1: 1: 2, as well as adding asbestos 2/10 components.
When finishing the stove with plaster, it is desirable to adhere to some rules:
- All dry components that are part of the plaster mix should be suitable through a sieve.
- At first, you need to mix dry components, and then add them to an aqueous solution of lime or clay.
- If there is a plaster in the plaster mixture, it is necessary to separate it separately in water, and then add to the lime solution. Note that the gypsum quickly freezes, so you should not prepare a large amount of mixture at a time.
- If the stove has been collected recently, it is necessary to wait for a complete drying of the cement mortar before it is plastered. You also need to wait for a while until the masonry is shrink.
- Before plastering, the stove should be cleaned with a metal brush to remove with it in the influx and dirt, and then you need to slightly clear the seams.
- The application of the plaster mortar is made on top of a metal mesh, which is fixed on steel wire laid during the masonry furnace.
- Before starting work, the furnace should be melt. The plaster is applied to a hot surface, pre-moistened with water.
- Watching is produced in 2 layers, the thickness of each of them is 4-6 mm. The second layer should be a bit thick of the previous one.
- In the fresh form, the plaster should be swallowed. After its drying, the surface is finally grinding, and then it is broken or painted.
Furnace finish with tile materials
Types of cladding for decorative furnace design
If you want to make the stove not just a functional design, but also a decorative element of interior design, instead of simple plastering and painting, give preference to slaughter materials. Fortunately, on the modern construction market you can find a lot of different materials for facing furnaces. We will understand more in their views:
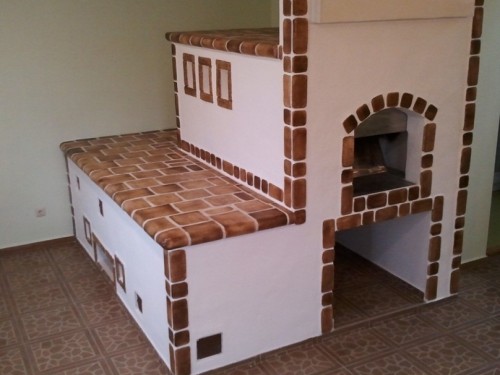
- Terracotta chamotte tile, as well as chamotte brick for facing the furnace belong to environmentally friendly finishes - this makes it possible to apply them in residential premises. In addition to furnaces, such materials are suitable for facing fireplaces and even house walls. The color range of terracotta tiles is not too diverse and ranges from bright beige shades to saturated brown colors. However, this assortment is enough to decorate the interior rich in natural shades. Such facing refers to heat-resistant materials and is well withstanding heating to high temperatures. In this work, it is relatively simple, in connection with which the laying of such a tile does not represent any particular difficulties. Among other things, the terracotta tile has an acceptable cost.
- Another popular material for facing the furnace is clinker tiles. Like the previous type of facing, the clinker tile is well withstanding the heat, and besides, it is not afraid of direct contact with fire. The advantage of such a finish is the simplicity of care, since in the case of contamination, the surface of the stove can easily be laundered with water without using detergents or rigid brushes. Clinker tile pushes well not only dirt, but also moisture, but a rich selection of shades allows you to give the stove an interesting original look.
- For the facing of the furnace, a ceramic tile is used, but, unfortunately, not all. Among the types of ceramic tiles can be found both heat-resistant materials and those that do not tolerate heavy heating. Therefore, before buying such a tile, it should be studied as much as possible to study all aspects of the choice, consult with knowledgeable people, and also carefully read the instructions for the product.
- Maitolika is a decorative tile, which, according to its properties and manufacturing technology, is closest to the terracotta variant. The difference lies in the fact that a colored glaze is applied to the surface of the MAIOLIKA, which gives the material decorative properties. Maitolika looks very original and gives the furnace an unusual stylish design.
- Porcelain stoneware is an artificial stone for facing the furnace, which in its properties is similar to clinker tiles. The difference is in the monolithic structure. Porcelain stoneware is universal in the sense that in its appearance is well combined with almost any interior.
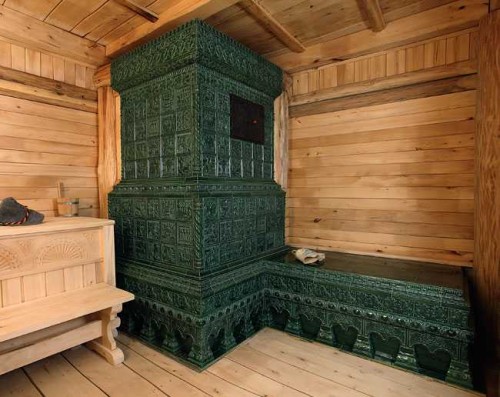
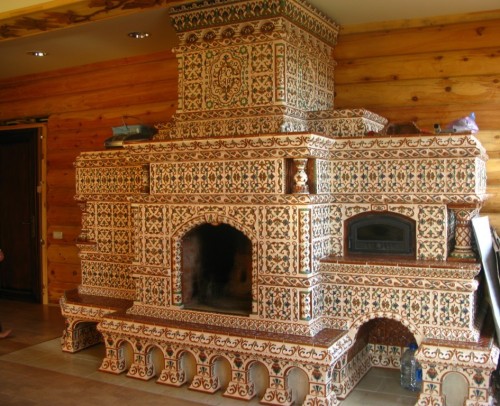
- Tiles are an expensive type of decorative lining created by hand from ceramics. The stove, decorated with tiles, looks stylish and expensive, especially good such design looks in retro style premises. The positive qualities of the facing include ease of care, since such a surface is enough to clean with just a damp cloth. Tiles do not accumulate dust, possess good heat transfer and do not give smoke gases to penetrate the room. The material from which a similar tile is made is well accumulated warm and slowly gives it to the surrounding air. Since the tiles are made manually, they may have a different form, and the wealth of drawings allows you to create the most unusual designs.
Facing Tile Requirements
Choosing a tile as a stove facing material, it is important to pay attention to its characteristics and properties. Requirements that are presented to such material, consider in more detail:
- Heat resistance is the first and, perhaps, the most basic requirement for tile. Since the surface of the furnace in the operating mode is strongly split, the facing material must withstand a high temperature.
- An important indicator of the quality of the finishing is its heat transfer. The tile will be considered good if it will warm evenly and slowly give heat into the surrounding space. The thermal conductivity and ability to evenly heat up largely depend on the thickness of the facing tiles.
- If the tile is covered with icing, then its glossy surface should also easily transfer strong heating. If the glaze will be poorly, during the operation of the stove, it will simply crack and will lose a decorative look.
- It is believed that for finishing the furnace the optimal size of the tile is the indicator 12x12 cm.
- When buying a tile, pay attention to the absorption coefficient of moisture. The optimal is the coefficient equal to 3%.
Facing the furnace with their own hands
Below we will look at the process of finishing the stove in stages, as an example, take clinker tiles, the thickness of which is 1 cm. Step-by-step furnace looks like this:
- If the stove does not have a plaster layer, it is necessary to twist it before decorative trim. The main purpose of this procedure is the leveling of the working surface, as well as an increase in the heat transfer of the stove.
- To reduce the risk of tile damage as a result of its frequent heating and cooling, on top of the stove, it is desirable to build a frame from metal corners. These corners are installed on the sides of the design, subsequently the metal mesh is attached to them. It is screwed to the corners of washers and screws. When mounting the grid in certain places you will have to drill holes and install special dowels in them.
- The next stage of the furnace finish is its re-shocking. The second layer of plastering makeup is applied over the grid. In the event that the stove is used in the bath and will often be subjected to intense heating and cooled, it is advisable to do this procedure twice. That is, on top of the second plaster layer you need to install another layer of the mesh, and then finally attach it to the third time.
- As soon as the plaster mix is \u200b\u200bdry, it will need to be slightly polluting, to get rid of unnecessary protrusions, after which you can start laying tiles. Take into account that the ordinary tile glue for such a job is not suitable, as the tile capeses after the first few stoves. To separate the stove with a tile, you will have to use heat-resistant adhesive compositions, fortunately, you can find many different options on sale.
- If you plan to create any pattern on the stove, it is desirable first to decompose the tile on the floor in the desired order. So as not to confuse the elements in the process of laying, the tile can be labeled.
- The glue composition is prepared in accordance with the instruction that was attached to it. It is possible to mix glue and manually, but if you use a building mixer or drill with a special nozzle, the result will be better. So that all components react together, after cooking glue should stand 15 minutes.
- It is desirable to start work. The glue is applied to the working surface with a toothed spatula, then the tile is applied to the glue, they turn it slightly in different directions, and then fixed in the desired position. The construction level immediately check the result of the work.
- Each subsequent tile is placed in the same way, and there are special plastic crosses between individual details, to make the seams smooth.
- The glue to the surface is approximately applied to the surface so that it is enough for laying 4-5 tiles. The surface can be aligned for 15 minutes. If the errors were discovered later, the tile should be dismantled, the old glue is considered, and then carry out the procedure again.
- After laying 3 rows you need to take a break for several hours. Then you can start laying the following 3 rows.
- When the glue dries, the crossings from the seams are removed, and the seams themselves are cleaned with glue residues.
- To give the surface of the decorative species, ready-made dried seams need to be lured with a solution, according to the color suitable to the tile.
- To extend the life of the facing material, the finished surface after drying should be washed and impregnated with a special heat-resistant composition.
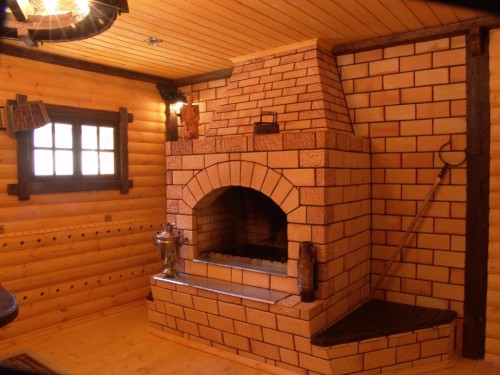
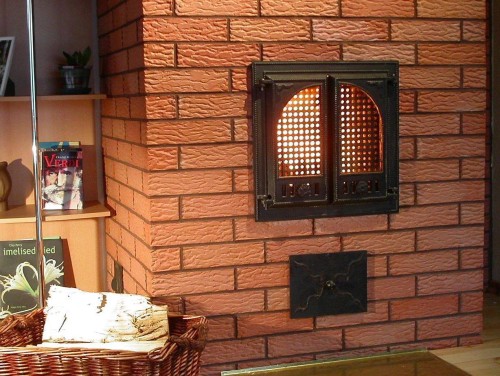
Facing stoves, photo:

